
This Baby Penguin pattern happened by accident. I was actually trying to make a little puppy but somewhere in the process, I decided that the puppy looks more like a penguin. I am loving this little guy! He is super cute and very, very quick to make. There is almost no sewing which to me is always a plus!
This is a free version of the pattern. If you would like a downloadable or printable version of this pattern, an inexpensive PDF file could be downloaded from my Etsy or Ravelry shops. The premium version also includes more step by step pictures as well as a pattern for a tiny Santa hat to go with your little Baby Penguin.
MATERIALS:
- Thread:
- DMC Baroque size 10, white – body
- Aunt Lydia’s size 10, color of your choice – coat and flippers
- Aunt Lydia’s size 10, yellow – beak
- Aunt Lydia’s size 10, light pink – cheeks
- Hook: 1.5 mm (Clover Amour)
- Plastic eyes, 2 mm (or use black thread to sew the eyes)
- Stuffing
- Sewing needle and scissors
- Tacky glue
ABBREVIATIONS:
MR – magic ring Trbl – treble crochet
Ch – chain Inc – increase
St(es) – stitch(es) Dec – decrease
Sl st – slip stitch
Sc – single crochet
Hdc – half double crochet
NOTES:
- Crochet in continuous rounds unless otherwise specified.
- This doll is crocheted with the RS (right side).
- When decreasing (sc2tog), use the invisible decrease technique.
PATTERN
BODY
Round 1: with white 6 sc in mr – 6 sts
Round 2: 6 inc – 12 sts
Round 3: (sc, inc) x 6 – 18 sts
Round 4: (2 sc, inc) x 6 – 24 sts
Rounds 5 – 6: sc around – 24 sts
Round 7: (3 sc, inc) x 6 – 30 sts
Round 8: (4 sc, inc) x 6 – 36 sts
Rounds 9 – 11: sc around – 36 sts
Round 12: (4 sc, dec) x 6 – 30 sts
Round 13: (3 sc, dec) x 6 – 24 sts
NOTE: Stuff the body well. You may need to stuff more before finishing the last round.
Round 14: (2 sc, dec) x 6 – 18 sts
Round 15: (sc, dec) x 6 – 12 sts
Round 16: 6 dec – 6 sts
Fasten off. Finish off and secure stitches. Set aside.
COAT
Do not cut the tail from the magic ring. We will need it later.
Round 1: with pink 6 sc in mr – 6 sts
Round 2: 6 inc – 12 sts
Round 3: (sc, inc) x 6 – 18 sts
Round 4: (2 sc, inc) x 6 – 24 sts
Round 5: sc around – 24 sts
NOTE: We will start crocheting in rows, but the count will continue from where we stopped with the rounds.
Row 6: 1 sc in 16 sts; ch 1 and turn – 16 sts
Row 7: (3 sc, inc) x 4; ch 1 and turn – 20 sts
Row 8: (4 sc, inc) x 4; ch 1 and turn – 24 sts
Rows 9 – 11: sc in each st; ch 1 and turn – 24 sts
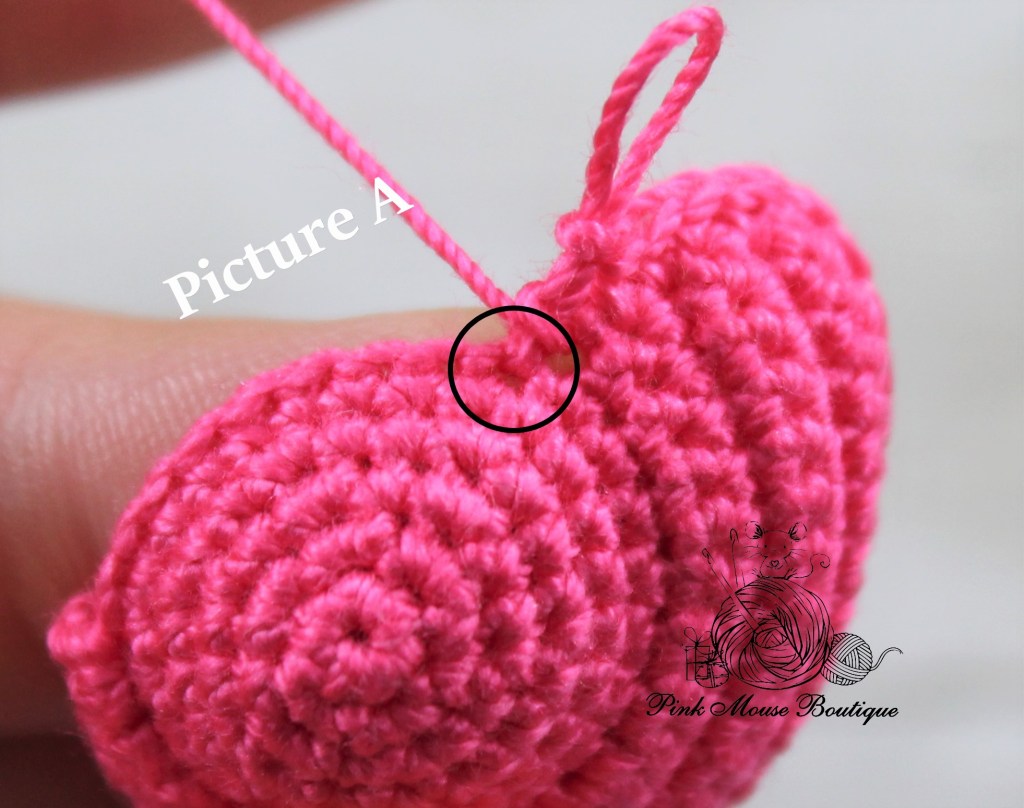
Row 12: sc in each st do not turn but continue up the side
Sc 5 sts evenly spaced
1 sc in last worked st of Round 5. See Picture A.
1 sc in next 2 sts, 1 hdc in next, 1 trbl in next, 1 hdc in next, 1 sc in next 3 sts. You should have 9 sts across the top.
Continue down the side. Sc 5 sts evenly spaced. See Picture B
NOTE: We will go back to rounds. The count continues from where we stopped with the rows.
Insert the beginning tail of the coat through the magic ring of the body and out through another stitch.
Then place the coat on the body and continue with the next round.
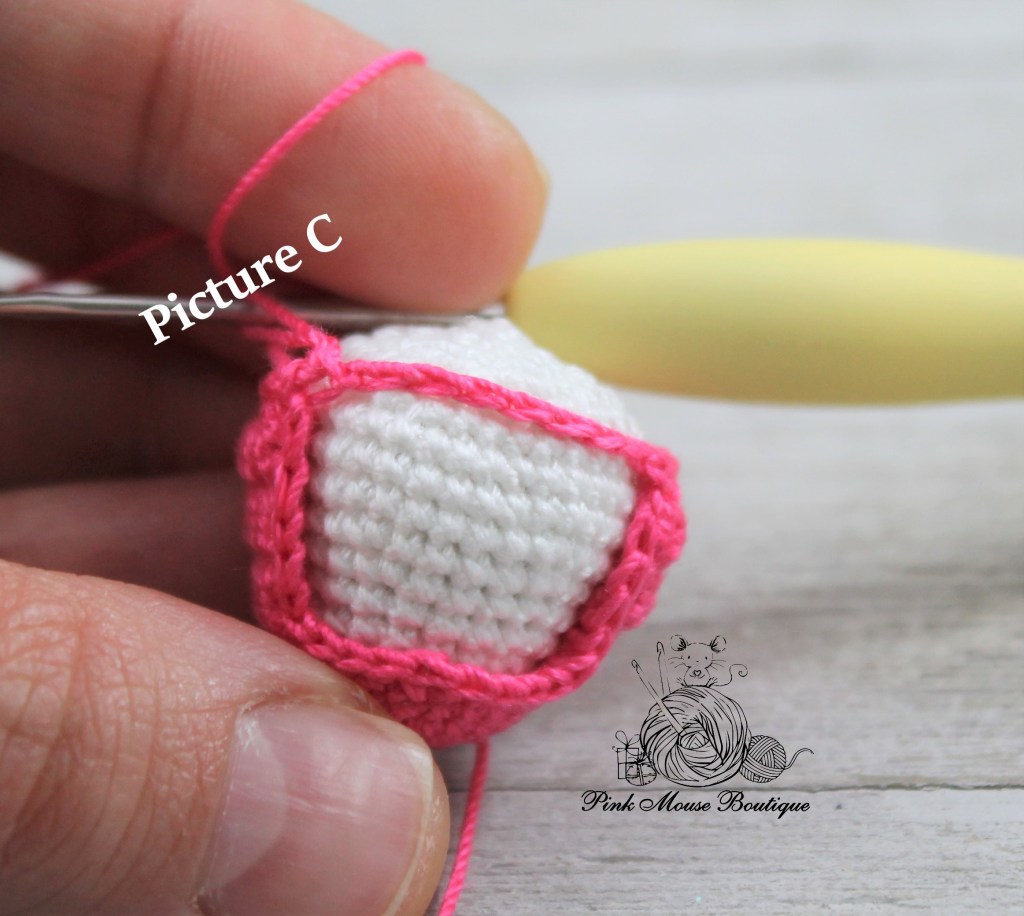
Round 13: 1 sc in next 24 sts, ch 8 and 1 sc in 1st st of Round 13 (that counts as the 1st st of Round 14) – 32 sts See Picture C
Round 14: (2 sc, dec) x 8 – 24 sts
Round 15: (sc, dec) x 8 – 16 sts
Round 16: 8 dec – 8 sts
Fasten off and finish off.
Secure the stitches by inserting the beginning and ending tails through the same stitch, tying a knot, and stuffing it inside the body.
FLIPPERS (x 2)
With pink, 8 hdc in mr
Do not join to other side. Leave a tail for sewing. Fasten off and set aside.

ASSEMBLY:
- Using the yellow thread, sew the beak starting with the treble stitch from the coat and going one round down on the body. I sewed a few times.
- Glue the plastic eyes with tacky glue a round below the coat and 2 sts away from the beak.
- With pink thread, sew twice directly under each eye to create the cheeks.
- Sew the flippers 2 sts from the edge of the coat, about a round under the round where you glued the eyes. The flippers are sewn with the wrong side facing out. Picture D shows the left flipper. When you finish sewing, insert both ends through the same stitch of the coat, tie a knot, hide the excess thread inside the coat.
NOTE: For the right flipper, weave the ending tail through a few loops to get to the other end of flipper. That way you can sew it to the penguin with the wrong side facing out. See Picture E


OPTIONAL: Make it an ornament by inserting a thin ribbon through the top of the penguin.
FINISHED MEASUREMENTS:
If you have used the materials suggested, your baby penguin should be about 1 inch (about 2.5 cm) tall.

Thank you for visiting my blog! I hope you enjoyed this pattern.
Let me know in the comments section below. I would love to hear from you!
HAPPY CROCHETING!

tHaNK yOu!
LikeLike