Pocket Valentines – Part 7 (Crochet Pattern)

Another Pocket Valentine that was not planned. But this little axolotl would not leave me alone until I made it. πŸ™‚ I hope you like this new addition to the Pocket Valentines series. Don’t forget to let me know in the comments below.

Part 1: Envelope, Speech Bubble, and Heart

Part 2: Bear

Part 3: Narwhal

Part 4: Frog, Bunny, and Pig

Part 5: Bee (coming soon)

Part 6: Fox

Part 7: Axolotl

Materials

  1. Drops Muskat Worsted Weight: Peach, Dark Pink, Black
  2. Crochet Hook, 3.25 mm
  3. Stuffing
  4. Others: sewing needle, scissors

Abbreviations

ch – chain

st – stitch

sl st – slip stitch

sc – single crochet

hdc – half double crochet

trbl – treble

inc – increase

dec – decrease

Helpful Tutorials

Back Bump of Chain

Notes:Β 

  1. Make sure to read through the whole pattern and look at all the step-by-step pictures before crocheting the axolotl.
  2. You will notice that the pattern for the body and arms is the same as the other critters.

Arms (x 2)

Suggested color – Peach

Ch 4

Row 1: in back bump of ch only sc in 2nd ch from hook, sc in next, hdc in last ch – 3 sts

Fasten off leaving a tail for sewing.

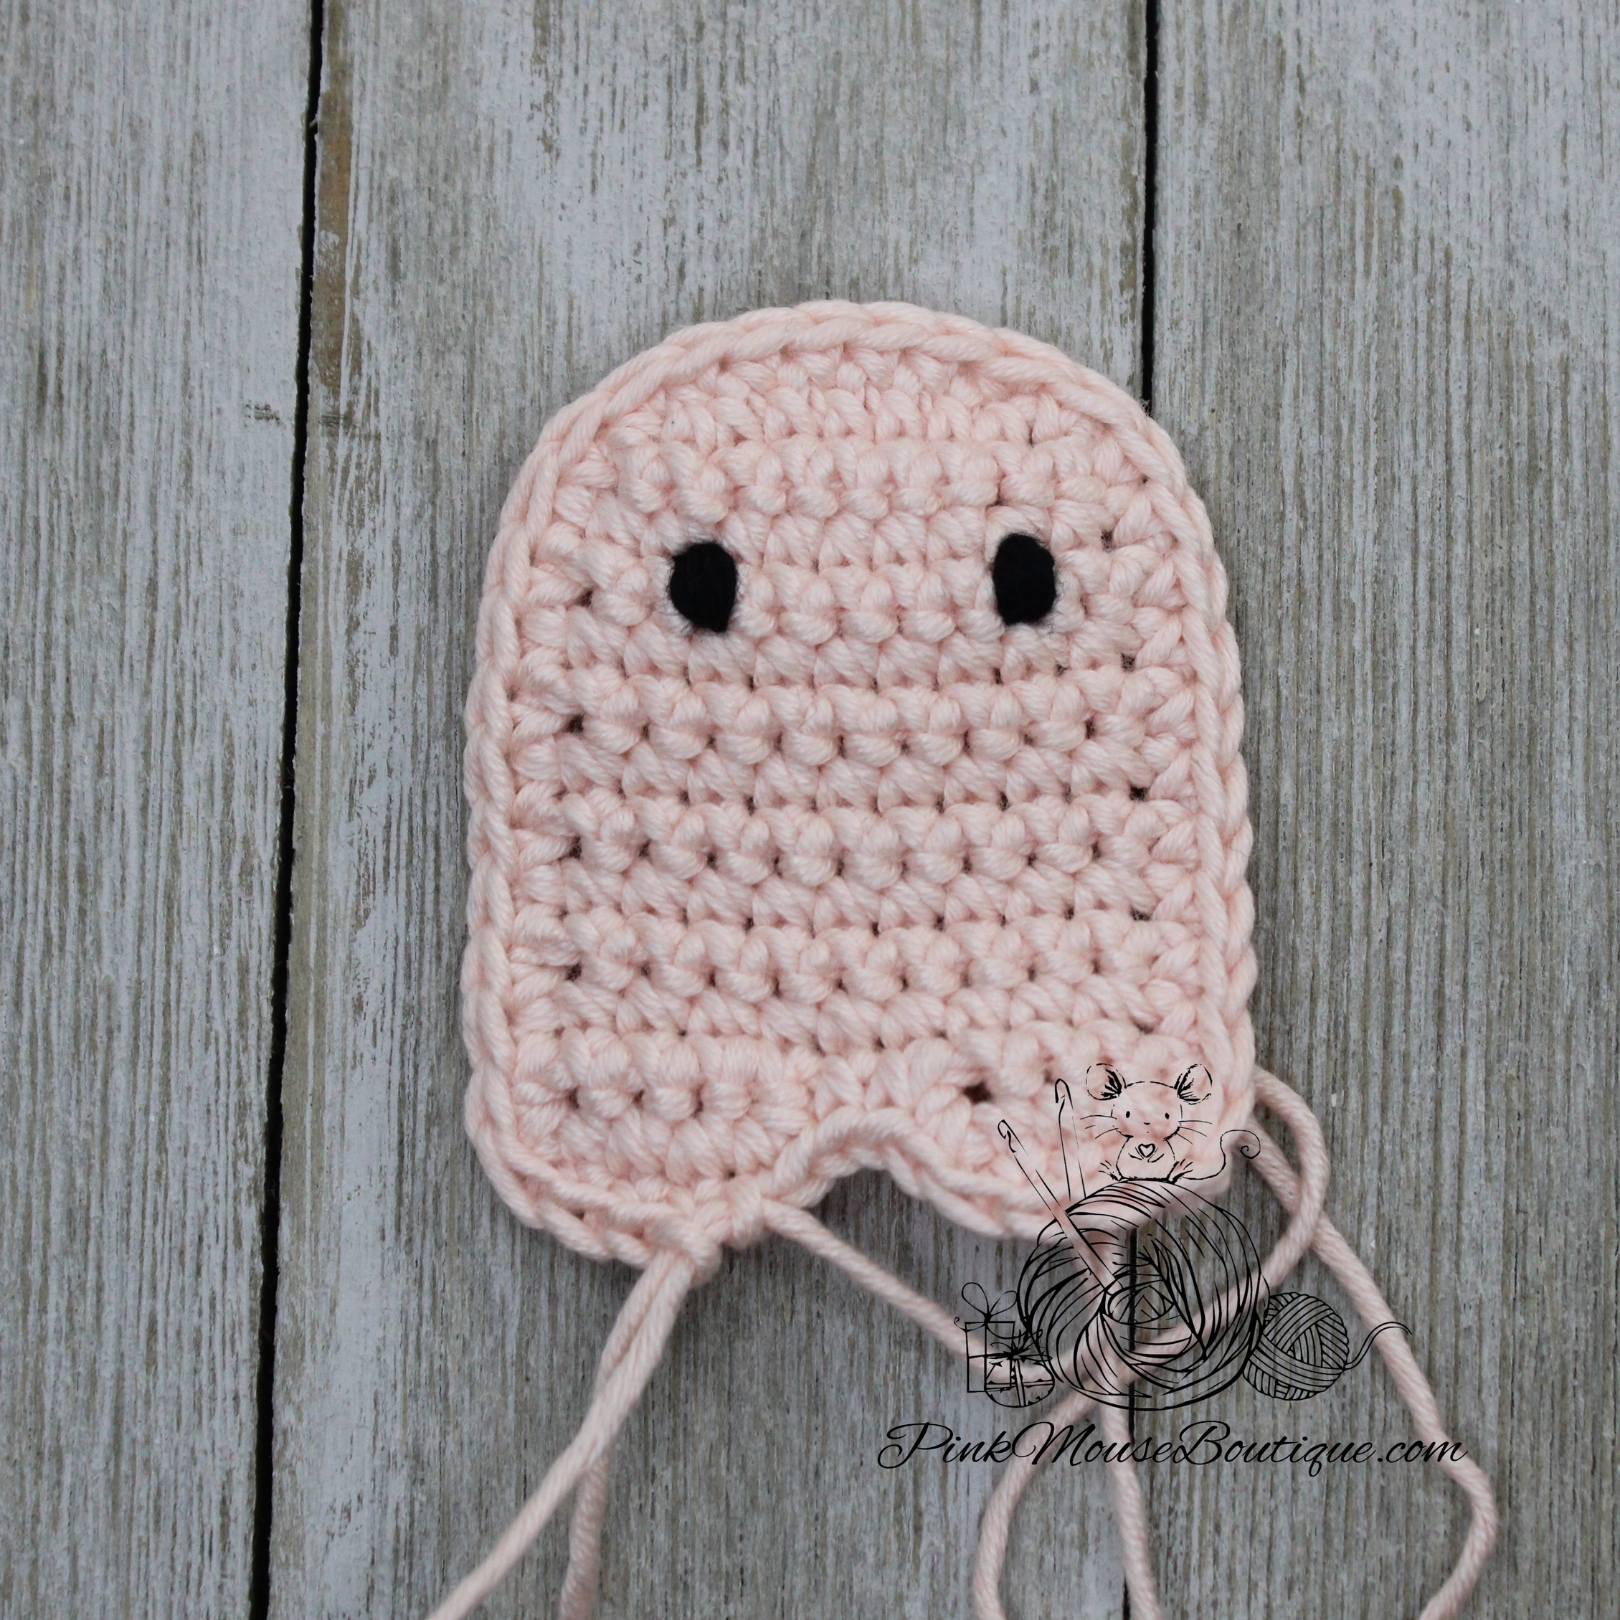
External Gills (x 6)

Suggested Color – Dark Pink

Ch 3

Round 1: 1 sc in 2nd ch from hook, 4 sc in last ch; going around the other side of the ch 1 sc – 6 sts

Fasten off leaving a tail for sewing.

Tail

Suggested Colors – Peach and Dark Pink

With Peach, ch 8

Row 1: 1 sc in 2nd ch from hook, sc in 5 chains; 1 sc, 1 hdc, 1 sc in last ch; going around the other side of the ch 1 sc in 6 chains; ch 1 and turn – 15 sts

Change Color – Dark Pink

Row 2: sc in 6 sts; (sc and hdc) in next st, (hdc, trbl, hdc) in next st, (hdc, sc) in next; sc in last 6 sts – 19 sts

Fasten off both Peach and Dark Pink leaving a long Peach tail for sewing.

BODY (x 2)

Suggested Color – Pink

Ch 7

Row 1: in back bump of ch only 2 sc in 2nd ch from hook, 4 sc, 2 sc in last ch; ch 1 and turn – 8 sts

Row 2: inc, 6 sc, inc; ch 1 and turn – 10 sts

Rows 3 – 11: sc in each st; ch 1 and turn – 10 sts (9 rows)

LEG 1

Row 12: sc in 4 sts; ch 1 and turn – 4 sts

Row 13: sc in each st – 4 sts

Fasten off.

LEG 2

Join thread to 7th st of Row 11.

Row 1: sc in 4 sts; ch 1 and turn – 4 sts

Row 2: sc in each st – 4 sts

Sc in each st and row all around the body.

Fasten off the 1stΒ piece. Do not break the thread from the 2ndΒ piece.

Assembly

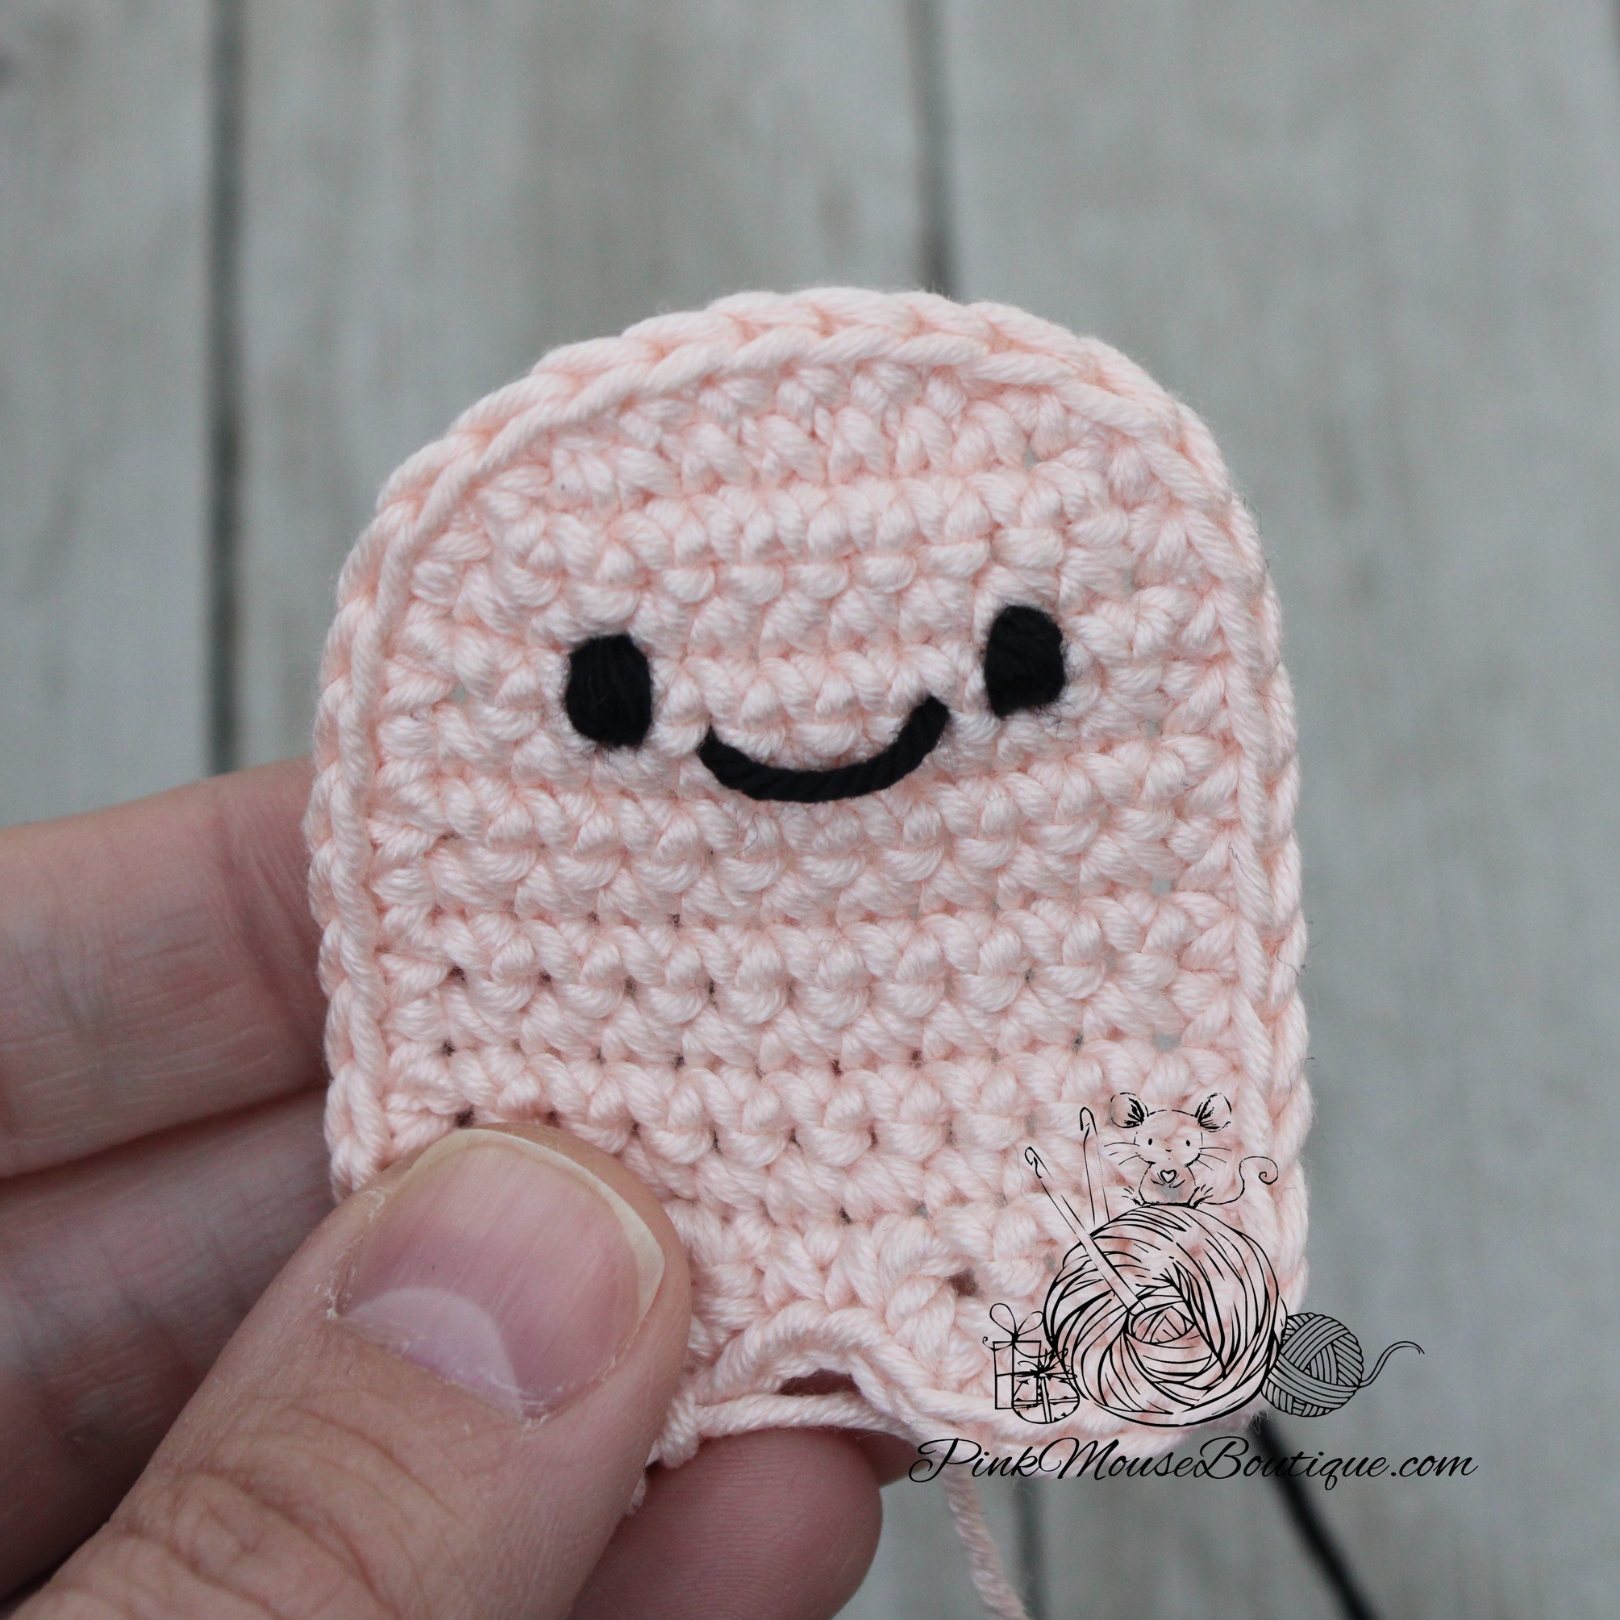
  1. The facial features will be sewn to the piece that has not been fasten off.
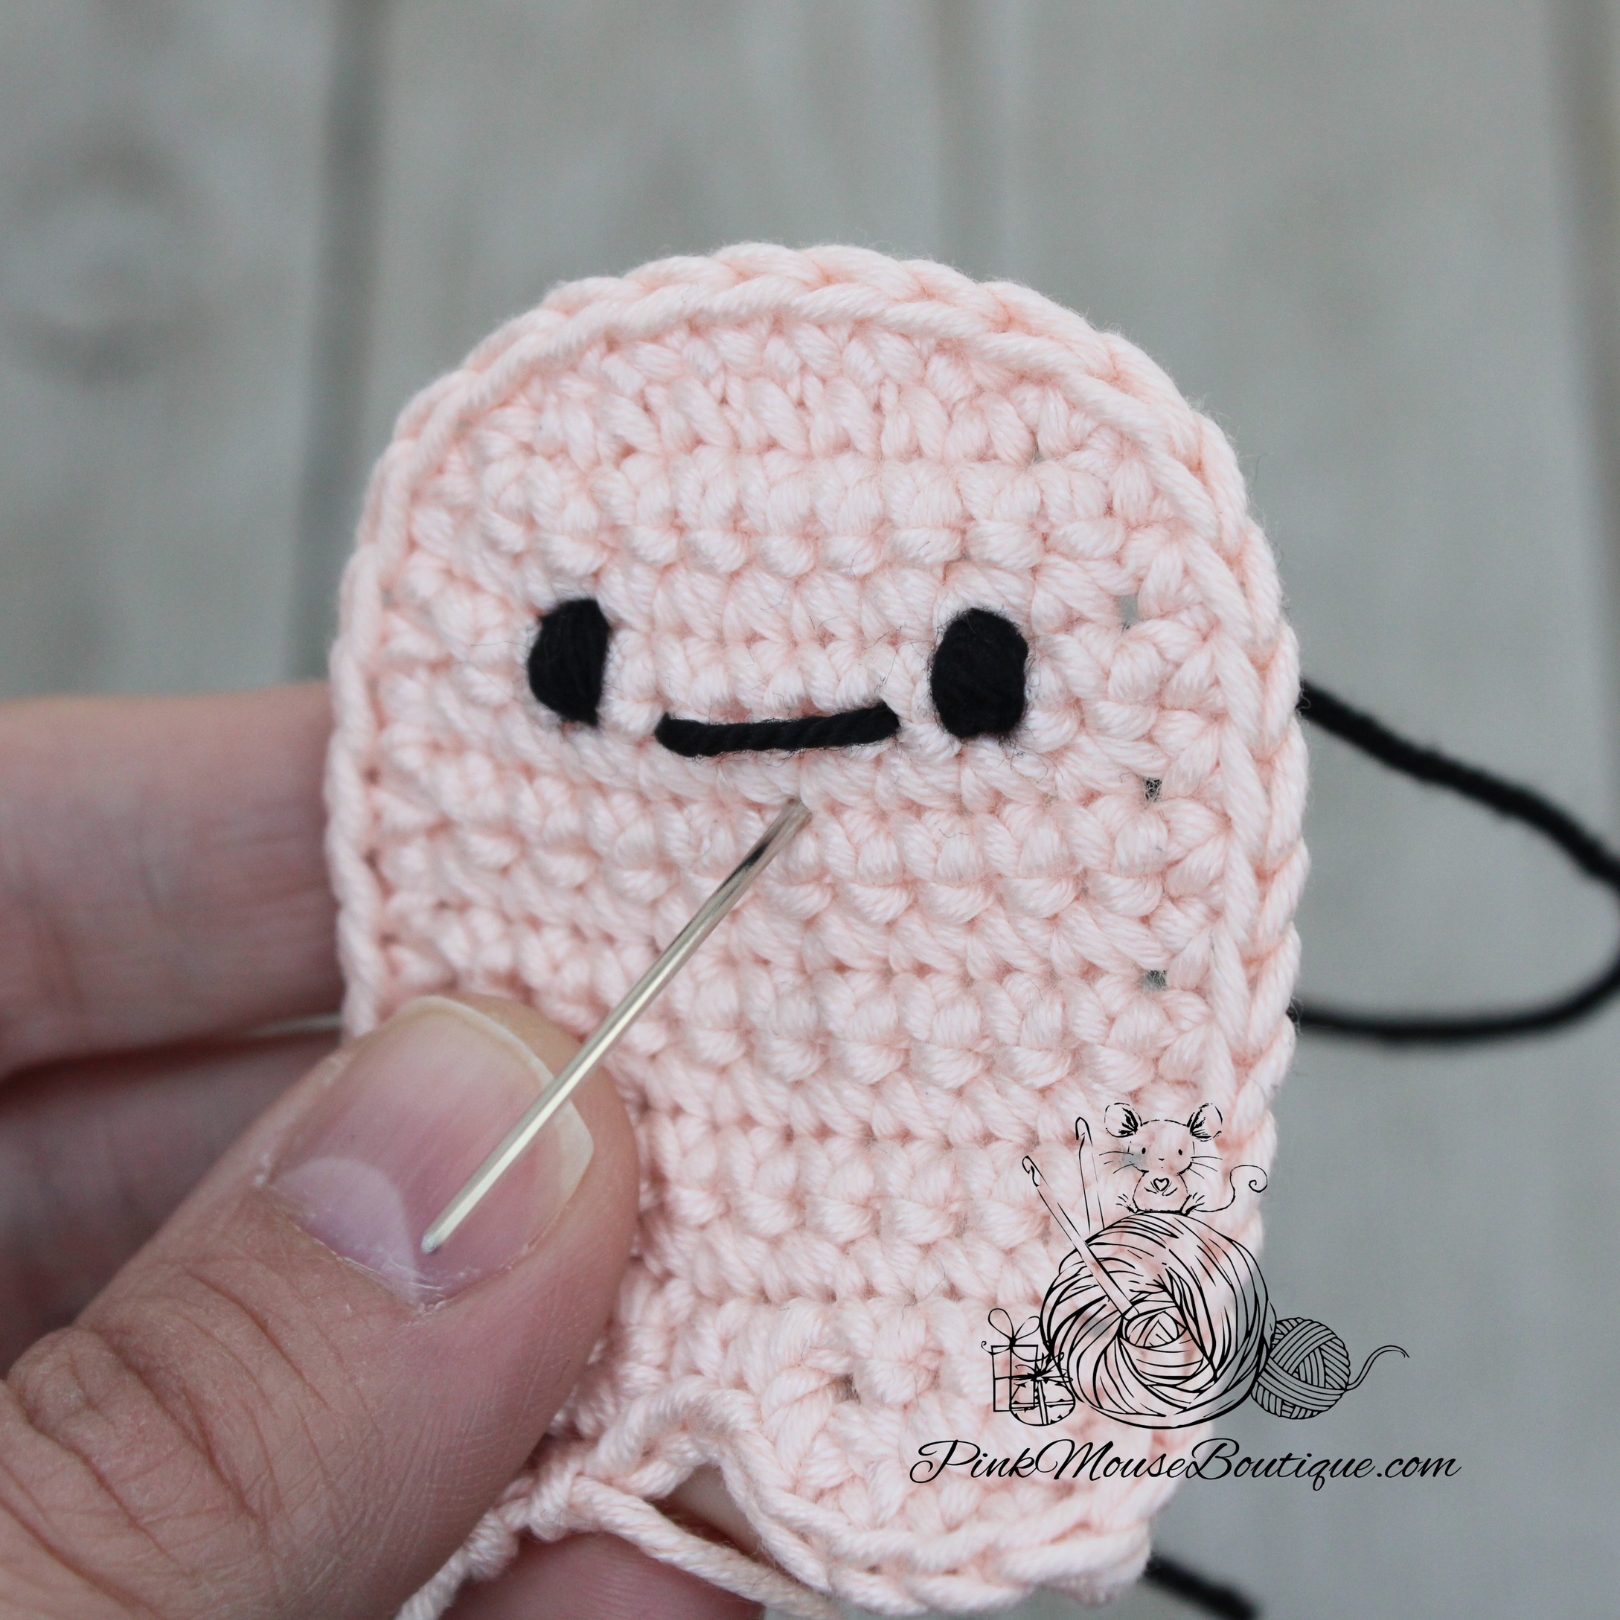
  2. With Black yarn, sew the eyes on Row 4 or 5, 5 stitches apart.
  3. With Black yarn, sew a line between the eyes. The line should be 3 stitches long.
  4. Insert the needle a row below the mouth and in the middle. Pull and go around the mouth to form a curve. Insert the needle again through the same stitch and pull. Tie a knot to secure the ends.
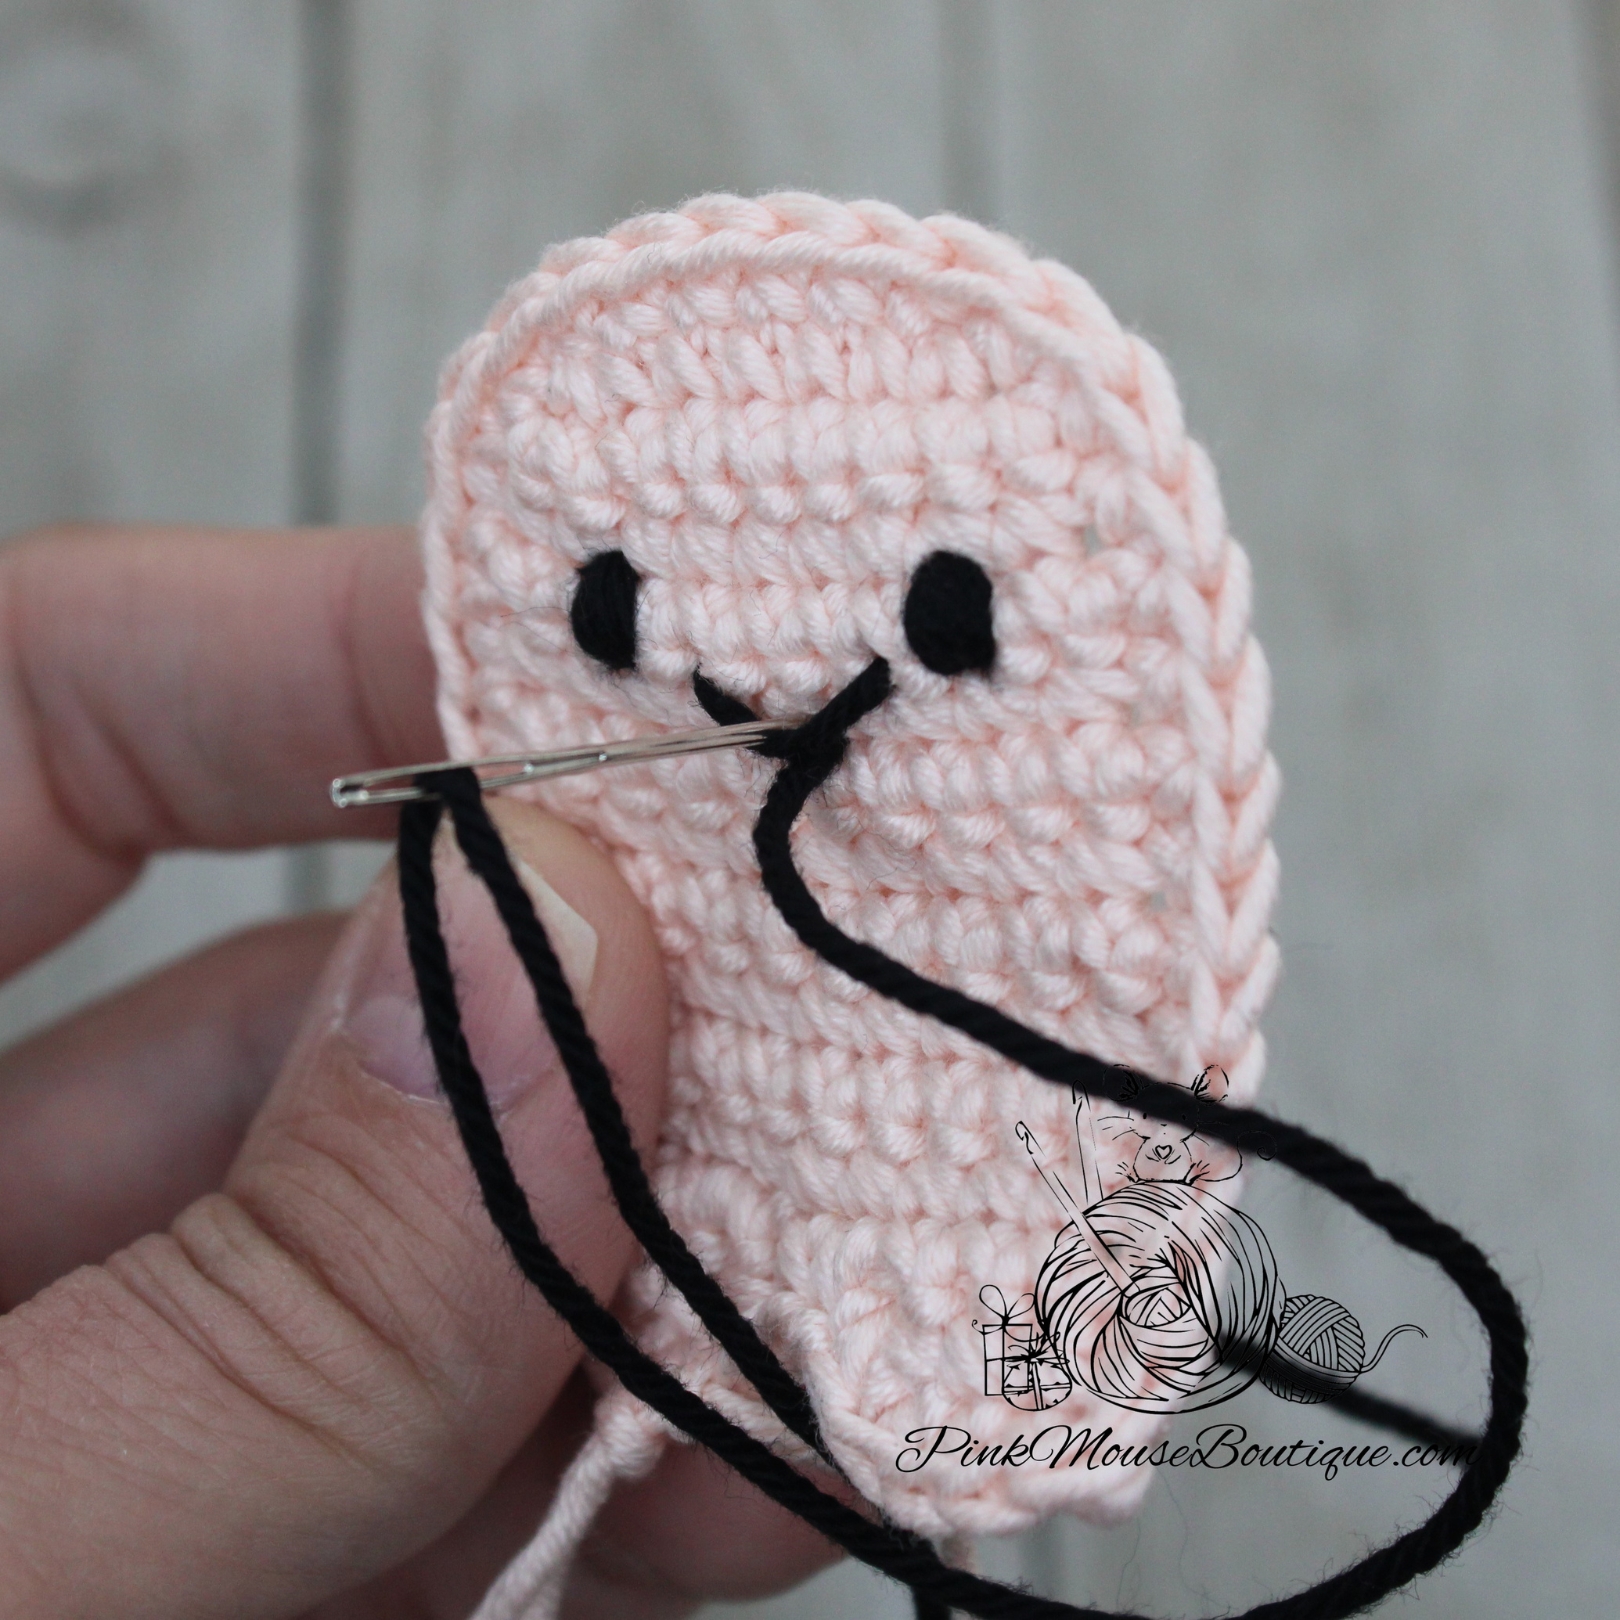
  5. With Dark Pink, sew a couple of times a row below the eyes to make the cheeks.
  6. Sew the arms a row below the cheeks.

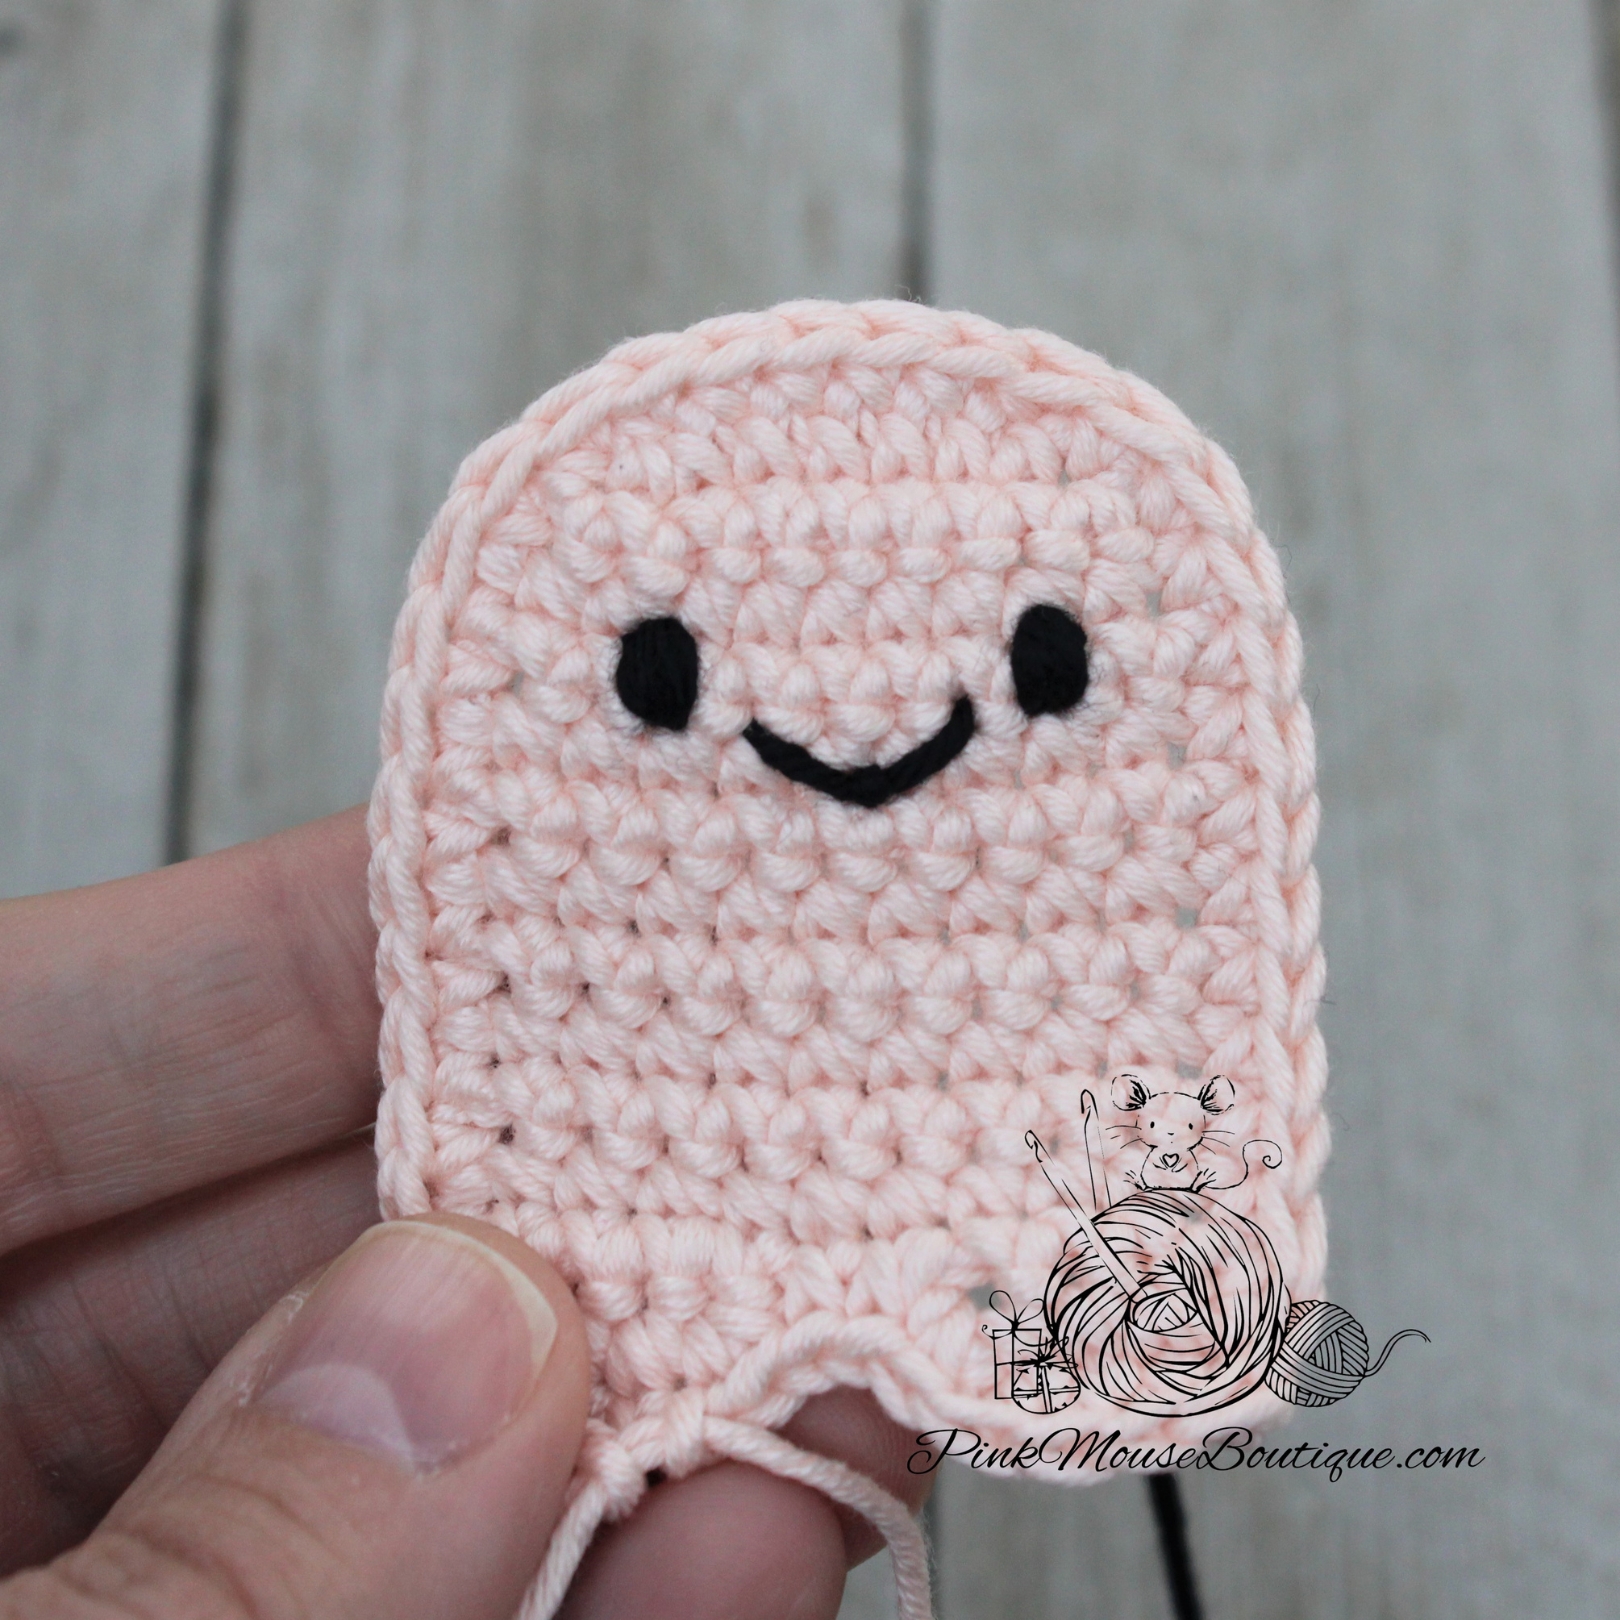
7. Place the two pieces of the body together with the right side facing out. Slip stitch all around going through both pieces. Stuff lightly before you finish closing the body. Finish closing the body, fasten off, and secure the stitches (I tie knots and stuff inside the body).

8. Use pins to position the External Gills in place – 3 on each side of the head. Then sew in place using the BLO of the front piece and the FLO of the back piece.

9. Sew the tail on Row 10, at the back middle of the body.

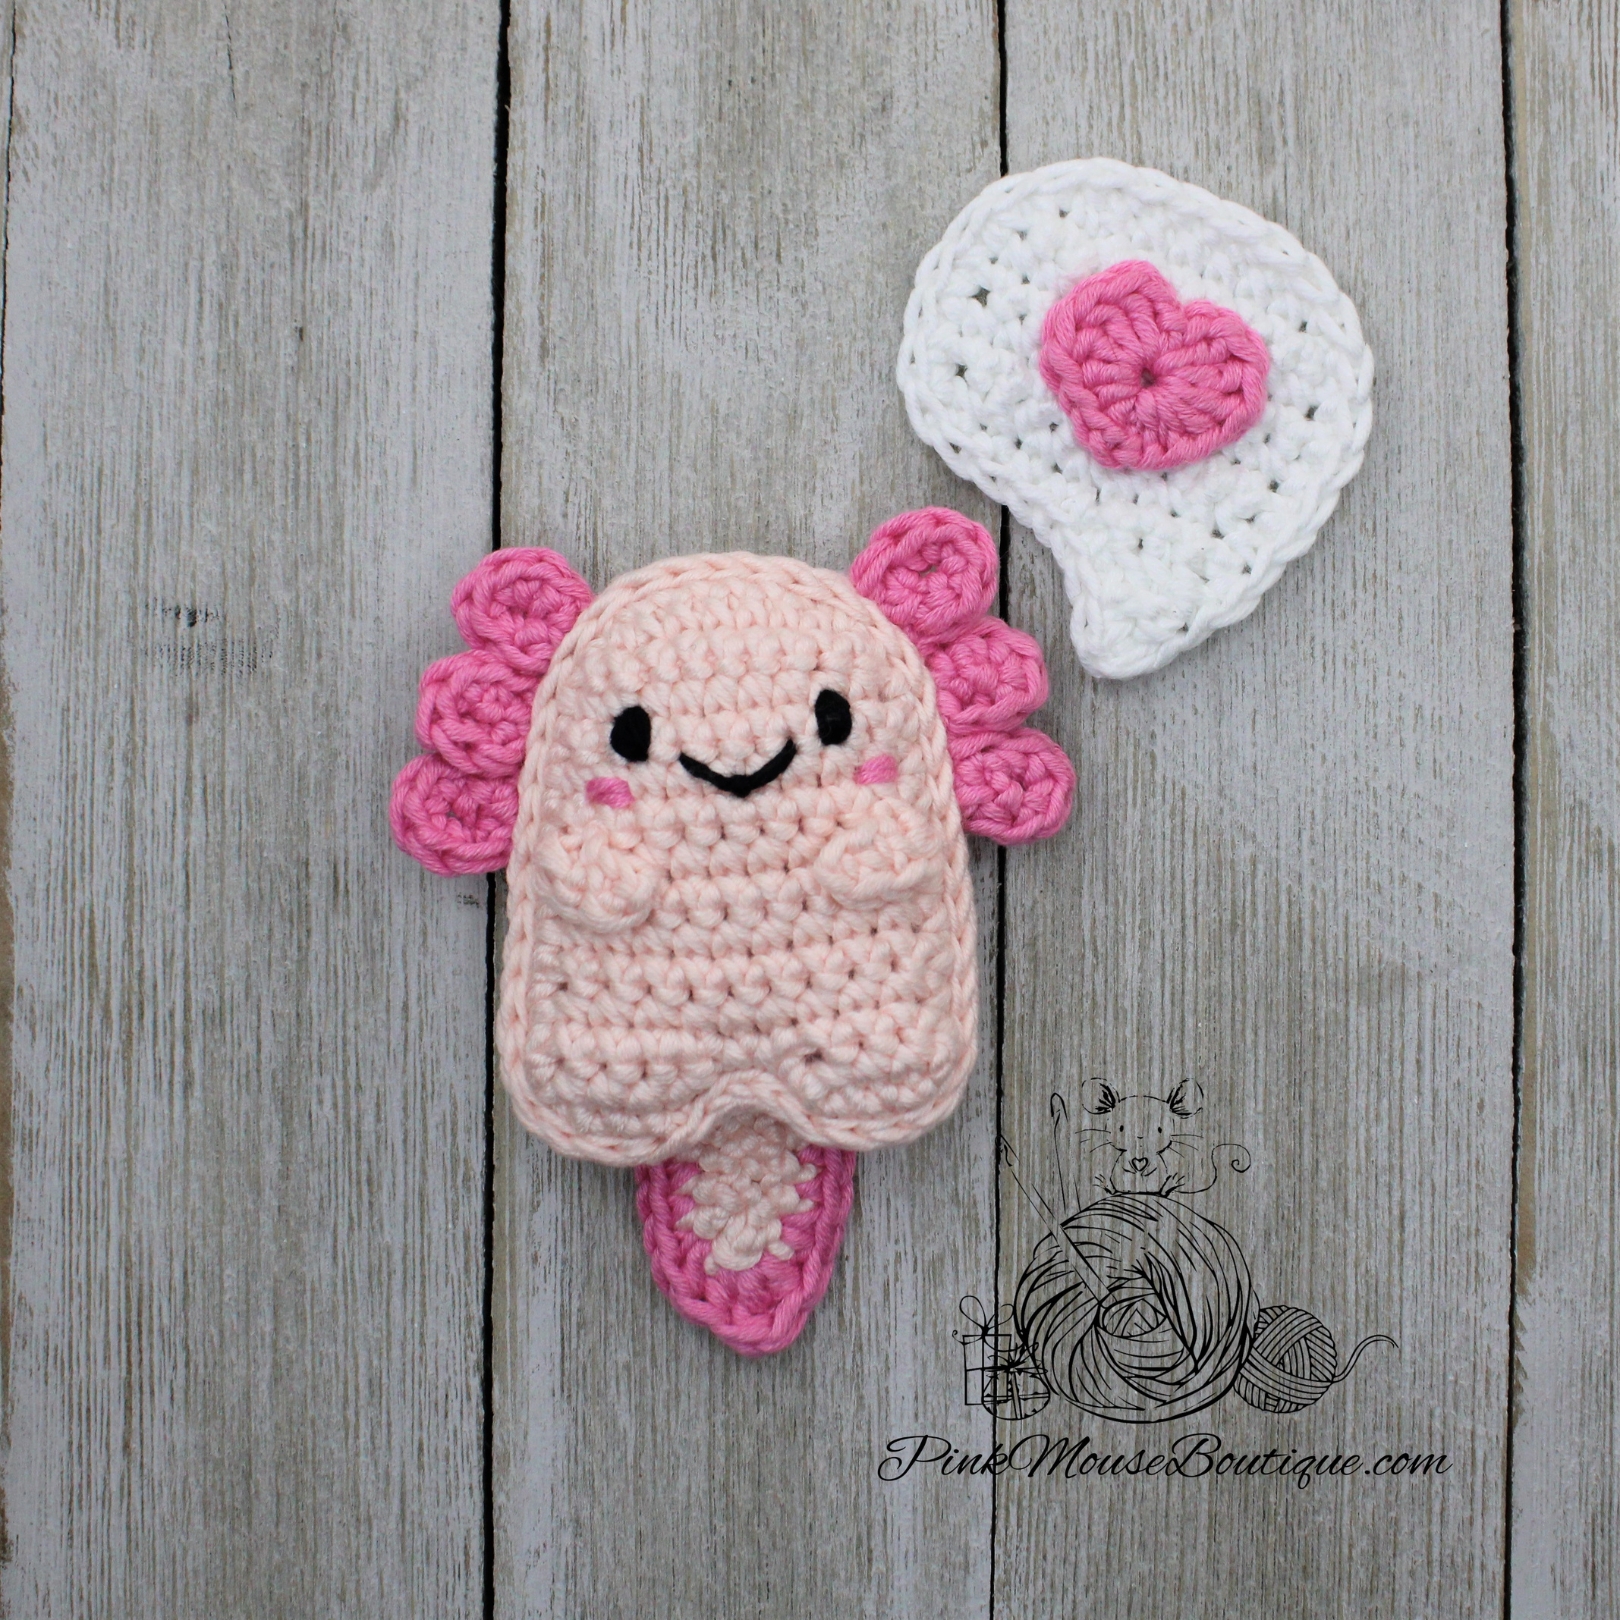
I hope you enjoyed making this little cutie.

Happy Crochet!

Baby Animals (Crochet Pattern)

Baby Panda and Baby Bear were a special request from my daughter.

Because they are only 1.5 inches tall (in sitting position), they fit perfectly in her dollhouse and she loves playing with them over and over and over.

The pattern is a quick and easy one to make. I used Copper for Baby Bear and White and Black for Baby Panda, but Curio has so many beautiful colors that you can make a whole collection of colorful baby bears. If you sew the eyes with Curio Black thread instead of using plastic eyes, these bears made in all of Curio colors can be used to teach little ones colors and counting and sorting and make math more fun!

You can download the PDF file here for free: BABY ANIMALS

MATERIALS:

  1. Thread – Curio size 10 (various colors)
    1. Natural – face and hands
    1. Copper – bear costume
    1. Black and White – panda costume
    1. Pistachio/Tea Rose – binky
  2. Plastic eyes – 2 mm
  3. Hook: Clover Amour, 1.50 mm
  4. Stuffing
  5. Tacky glue
  6. Cotton swab and blush

ABBREVIATIONS:

MR – magic ring                                                  Inc – increase

Ch – chain                                                             Dec – decrease

St(es) – stitch(es)                                                  Sc – single crochet

Sl st – slip stitch                                                   Hdc – half double crochet

HEAD

Join rounds with a slip st and chain 1.

Round 1: with ecru 6 sc in a mr – 6 sts

Round 2: 6 inc – 12 sts

Round 3: (sc, inc) x 6 – 18 sts

Round 4: (2 sc, inc) x 6 – 24 sts

Rounds 5 – 10: sc around – 24 sts (6 rounds)

Round 11: (2 sc, dec) x 6 – 18 sts

Round 12: (sc, dec) x 6 – 12 sts

Stuff the head.

Round 13: 6 dec – 6 sts

BODY

Change color depending on animal costume. Continue crocheting in spiral.

If you are making a baby panda, use black thread for Rounds 14 – 17. Then change color to white to finish the body.

Rounds 14: 6 inc – 12 sts

Round 15: (2 sc, inc) x 4 – 16 sts

Rounds 16 – 17: sc around – 16 sts (2 rounds)

Round 18: (3 sc, inc) x 4 – 20 sts

Round 19: (4 sc, inc) x 4 – 24 sts

Rounds 20 – 23: sc around – 24 sts (4 rounds)

Round 24: (2 sc, dec) x 6 – 18 sts

Round 25: (sc, dec) x 6 – 12 sts

Stuff the body.

Round 26: 6 dec – 6 sts

Fasten off and secure the stitches. Set aside.

ARMS (x 2):

Round 1: with ecru 5 sc in a mr – 5 sts

Round 2: (inc, sc) x 2, inc in last st – 8 sts

Round 3: sc around – 8 sts

Change color depending on animal costume.

Round 4: (2 sc, dec) x 2 – 6 sts

Rounds 5 – 9: sc around

Leave a tail for sewing and fasten off.

LEGS (x 2):

Use the color for animal costume.

Round 1: (2 sc, 3 hdc, 2 sc) in a mr – 7 sts

Round 2: sc inc in 2 sts, hdc inc in 3 sts, sc inc in 2 sts – 14 sts

Rounds 3 – 5: 14 sts (3 rounds)

Round 6: 1 sc in 3 sts, 4 sc dec, 1 sc in 3 sts – 10 sts

Stuff the foot.

Round 7: 1 sc in 3 sts, 2 sc dec, 1 sc in 3 sts – 8 sts

Rounds 8 – 10: sc around – 8 sts (3 rounds)

Stuff the leg lightly.

Round 11: 4 dec – 4 sts

Leave a tail for sewing and fasten off.

EARS (x 2):

Use the color for animal costume.

Round 1: 6 sc in a mr – 6 sts

Round 2: 6 inc – 12 sts

Rounds 3 – 5: sc around – 12 sts (3 rounds)

Round 6: sl st around – 12 sts

Leave a tail for sewing and fasten off.

TAIL:

Use the color for animal costume.

Round 1: 6 sc in a mr – 6 sts

Round 2: 6 inc – 12 sts

Rounds 3 – 4: sc around – 12 sts (2 rounds)

Round 5: 1 sl st in next 2 sts

Leave a tail for sewing and fasten off.

HAT:

With animal color

Round 1: 6 sc in a mr – 6 sts

Round 2: 6 inc – 12 sts

Round 3: (sc, inc) x 6 – 18 sts

Round 4: (2 sc, inc) x 6 – 24 sts

Round 5: (3 sc, inc) x 6 – 30 sts

Rounds 6 – 10: sc around – 30 sts (5 rounds)

Round 11: 1 sl st in next 2 sts

BINKY:

Leave a long tail before you begin.

Round 1: with pistachio 8 sc in a mr

Sl st to join and fasten off.

ASSEMBLY:

Glue the eyes between Rounds 8 and 9, about 5 stitches apart.

Use the eyes as a guide when sewing the legs and arms.

The legs are sewn between Rounds 22 and 23. Turn the doll to one side. The very back of the leg should be about 6 stitches away from the eye (the foot would be closer to the animal’s tummy that way). Sew several times and in several places so the leg is securely attached to the body. Then repeat with the other leg.

Sew the arms on Rounds 15 and 16. Turn the body to one side (just like we did with the legs). The back end of the arm should be about 4 stitches away from the eye. I sewed the back of the arms to the body and then I sewed the β€œhands” to the belly, so they stay snugged.

Position the hat so it’s about 4 rounds above the eyes and sew it to the head.

Using the whip stitch, sew the ears on Rounds 2 through 5 of the hat. Once you finish, wet the ears and press the middle with the back of a metal hook. This will give the ears a nice shape.

Sew the tail at the back of the bear, between the legs. Before finishing, insert a little stuffing.

Before attaching the binky to the face, insert the mr tail through the mr.

Insert the needle through a front loop on any stitch on the right side of the piece. Refer to the picture on the right.

Before pulling the needle all the way through the stitch, wrap the thread around it 10 times. Carefully pull the needle through the thread and the stitch. Then insert the needle back through the mr and pull.

Attach the binky to the face, a round below the eyes. I used tacky glue in addition to sewing it to the face.

Use a cotton swab and blush to add a little pink to the cheeks.

HAPPY CROCHETING!!!