


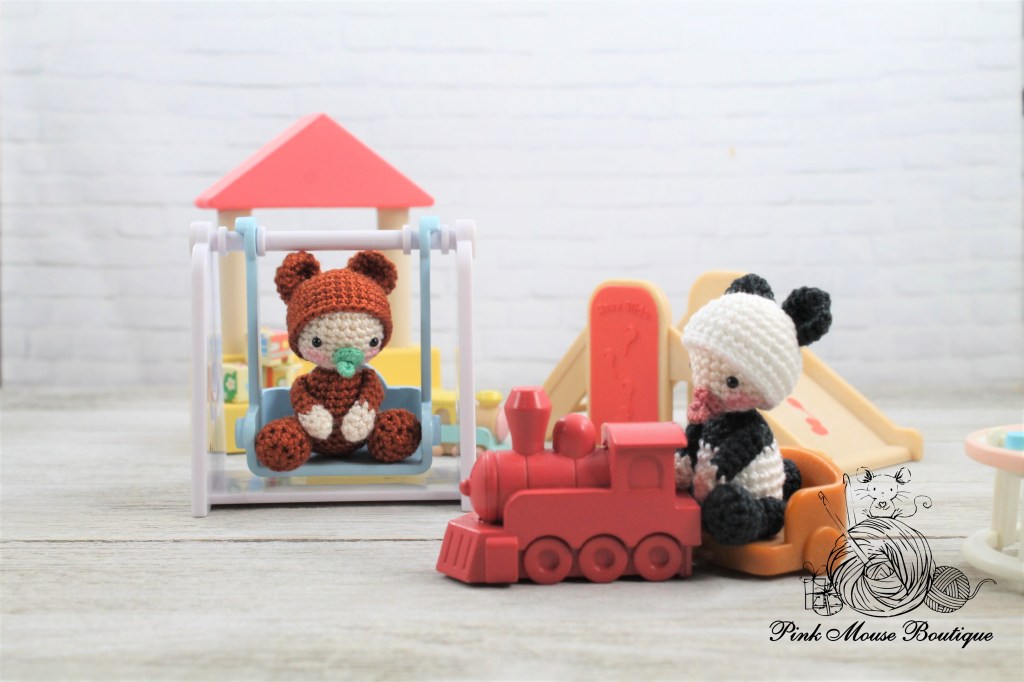
Baby Panda and Baby Bear were a special request from my daughter.
Because they are only 1.5 inches tall (in sitting position), they fit perfectly in her dollhouse and she loves playing with them over and over and over.
The pattern is a quick and easy one to make. I used Copper for Baby Bear and White and Black for Baby Panda, but Curio has so many beautiful colors that you can make a whole collection of colorful baby bears. If you sew the eyes with Curio Black thread instead of using plastic eyes, these bears made in all of Curio colors can be used to teach little ones colors and counting and sorting and make math more fun!
You can download the PDF file here for free: BABY ANIMALS
MATERIALS:
- Thread – Curio size 10 (various colors)
- Natural – face and hands
- Copper – bear costume
- Black and White – panda costume
- Pistachio/Tea Rose – binky
- Plastic eyes – 2 mm
- Hook: Clover Amour, 1.50 mm
- Stuffing
- Tacky glue
- Cotton swab and blush
ABBREVIATIONS:
MR – magic ring Inc – increase
Ch – chain Dec – decrease
St(es) – stitch(es) Sc – single crochet
Sl st – slip stitch Hdc – half double crochet
HEAD
Join rounds with a slip st and chain 1.
Round 1: with ecru 6 sc in a mr – 6 sts
Round 2: 6 inc – 12 sts
Round 3: (sc, inc) x 6 – 18 sts
Round 4: (2 sc, inc) x 6 – 24 sts
Rounds 5 – 10: sc around – 24 sts (6 rounds)
Round 11: (2 sc, dec) x 6 – 18 sts
Round 12: (sc, dec) x 6 – 12 sts
Stuff the head.
Round 13: 6 dec – 6 sts
BODY
Change color depending on animal costume. Continue crocheting in spiral.
If you are making a baby panda, use black thread for Rounds 14 – 17. Then change color to white to finish the body.
Rounds 14: 6 inc – 12 sts
Round 15: (2 sc, inc) x 4 – 16 sts
Rounds 16 – 17: sc around – 16 sts (2 rounds)
Round 18: (3 sc, inc) x 4 – 20 sts
Round 19: (4 sc, inc) x 4 – 24 sts
Rounds 20 – 23: sc around – 24 sts (4 rounds)
Round 24: (2 sc, dec) x 6 – 18 sts
Round 25: (sc, dec) x 6 – 12 sts
Stuff the body.
Round 26: 6 dec – 6 sts
Fasten off and secure the stitches. Set aside.
ARMS (x 2):
Round 1: with ecru 5 sc in a mr – 5 sts
Round 2: (inc, sc) x 2, inc in last st – 8 sts
Round 3: sc around – 8 sts
Change color depending on animal costume.
Round 4: (2 sc, dec) x 2 – 6 sts
Rounds 5 – 9: sc around
Leave a tail for sewing and fasten off.
LEGS (x 2):
Use the color for animal costume.
Round 1: (2 sc, 3 hdc, 2 sc) in a mr – 7 sts
Round 2: sc inc in 2 sts, hdc inc in 3 sts, sc inc in 2 sts – 14 sts
Rounds 3 – 5: 14 sts (3 rounds)
Round 6: 1 sc in 3 sts, 4 sc dec, 1 sc in 3 sts – 10 sts
Stuff the foot.
Round 7: 1 sc in 3 sts, 2 sc dec, 1 sc in 3 sts – 8 sts
Rounds 8 – 10: sc around – 8 sts (3 rounds)
Stuff the leg lightly.
Round 11: 4 dec – 4 sts
Leave a tail for sewing and fasten off.
EARS (x 2):
Use the color for animal costume.
Round 1: 6 sc in a mr – 6 sts
Round 2: 6 inc – 12 sts
Rounds 3 – 5: sc around – 12 sts (3 rounds)
Round 6: sl st around – 12 sts
Leave a tail for sewing and fasten off.
TAIL:
Use the color for animal costume.
Round 1: 6 sc in a mr – 6 sts
Round 2: 6 inc – 12 sts
Rounds 3 – 4: sc around – 12 sts (2 rounds)
Round 5: 1 sl st in next 2 sts
Leave a tail for sewing and fasten off.
HAT:
With animal color
Round 1: 6 sc in a mr – 6 sts
Round 2: 6 inc – 12 sts
Round 3: (sc, inc) x 6 – 18 sts
Round 4: (2 sc, inc) x 6 – 24 sts
Round 5: (3 sc, inc) x 6 – 30 sts
Rounds 6 – 10: sc around – 30 sts (5 rounds)
Round 11: 1 sl st in next 2 sts
BINKY:
Leave a long tail before you begin.
Round 1: with pistachio 8 sc in a mr
Sl st to join and fasten off.
ASSEMBLY:
Glue the eyes between Rounds 8 and 9, about 5 stitches apart.
Use the eyes as a guide when sewing the legs and arms.
The legs are sewn between Rounds 22 and 23. Turn the doll to one side. The very back of the leg should be about 6 stitches away from the eye (the foot would be closer to the animal’s tummy that way). Sew several times and in several places so the leg is securely attached to the body. Then repeat with the other leg.
Sew the arms on Rounds 15 and 16. Turn the body to one side (just like we did with the legs). The back end of the arm should be about 4 stitches away from the eye. I sewed the back of the arms to the body and then I sewed the “hands” to the belly, so they stay snugged.
Position the hat so it’s about 4 rounds above the eyes and sew it to the head.
Using the whip stitch, sew the ears on Rounds 2 through 5 of the hat. Once you finish, wet the ears and press the middle with the back of a metal hook. This will give the ears a nice shape.
Sew the tail at the back of the bear, between the legs. Before finishing, insert a little stuffing.


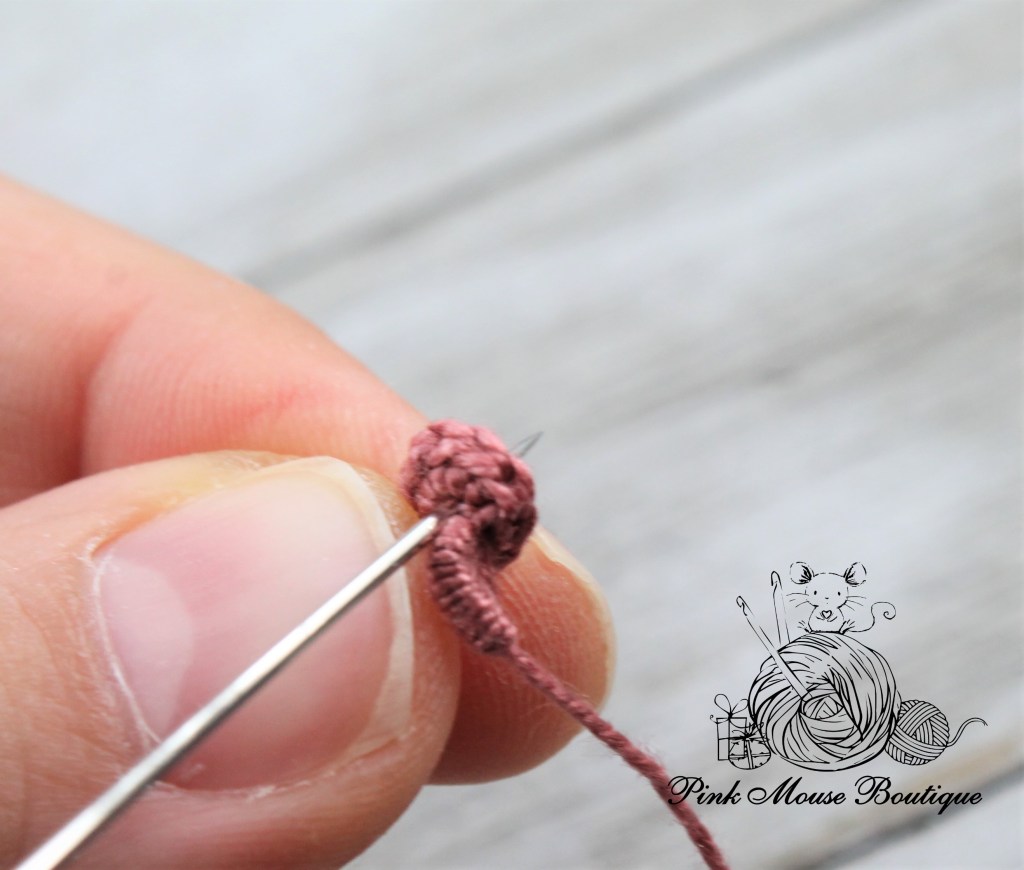

Before attaching the binky to the face, insert the mr tail through the mr.
Insert the needle through a front loop on any stitch on the right side of the piece. Refer to the picture on the right.
Before pulling the needle all the way through the stitch, wrap the thread around it 10 times. Carefully pull the needle through the thread and the stitch. Then insert the needle back through the mr and pull.
Attach the binky to the face, a round below the eyes. I used tacky glue in addition to sewing it to the face.
Use a cotton swab and blush to add a little pink to the cheeks.

HAPPY CROCHETING!!!
