


This year for Valentine’s Day, I wanted to create a design that is adorable, but also easy and quick to make; something that even a beginner can crochet without frustration; something that can be made last minute. My first idea was to put a tiny bear in an envelope. But once I made that, the idea of the speech bubble with the little heart came to me. Then while my testers were testing the pattern, I crocheted several other little animals using the pattern for the bear. And now, we have a pattern with several parts. Best of all, you have choices of what animal to make depending on who you are making this Valentine for.
And because the pattern is growing and because I wanted to make it easy to follow, I decided to split it in small parts.
Please note that the instructions for all Pocket Valentines will be available on my blog free of charge. If you’d like the PDF version which includes all patterns in a convenient downloadable document, you can visit my shops below.
Or click on the links below to access the free version for each little critter.
Part 1: Envelope, Speech Bubble, and Heart
There may be more critters in the future, but today we will begin by making Part 1.
MATERIALS
- Drops Muskat, Cotton Yarn Worsted
- Light grey: envelope
- Red: seams
- White: stamp
- Crochet hook – Clover Amour, 3.25 mm
- Sewing needle and scissors
Abbreviations
mr – magic ring
ch – chain
st – stitch
sl st – slip stitch
sc – single crochet
hdc – half double crochet
dc – double crochet
BLO – back loop only
FLO – front loop only
inc – increase
dec – decrease
Helpful Tutorials
Front Loop Only and Back Loop Only
Note: You will notice that when I decrease in the pattern, I either crochet in the BLO or the FLO. I do that because it makes the decrease neater, or invisible. You can do a normal decrease and insert the hook in both loops when decreasing if that is what you prefer.
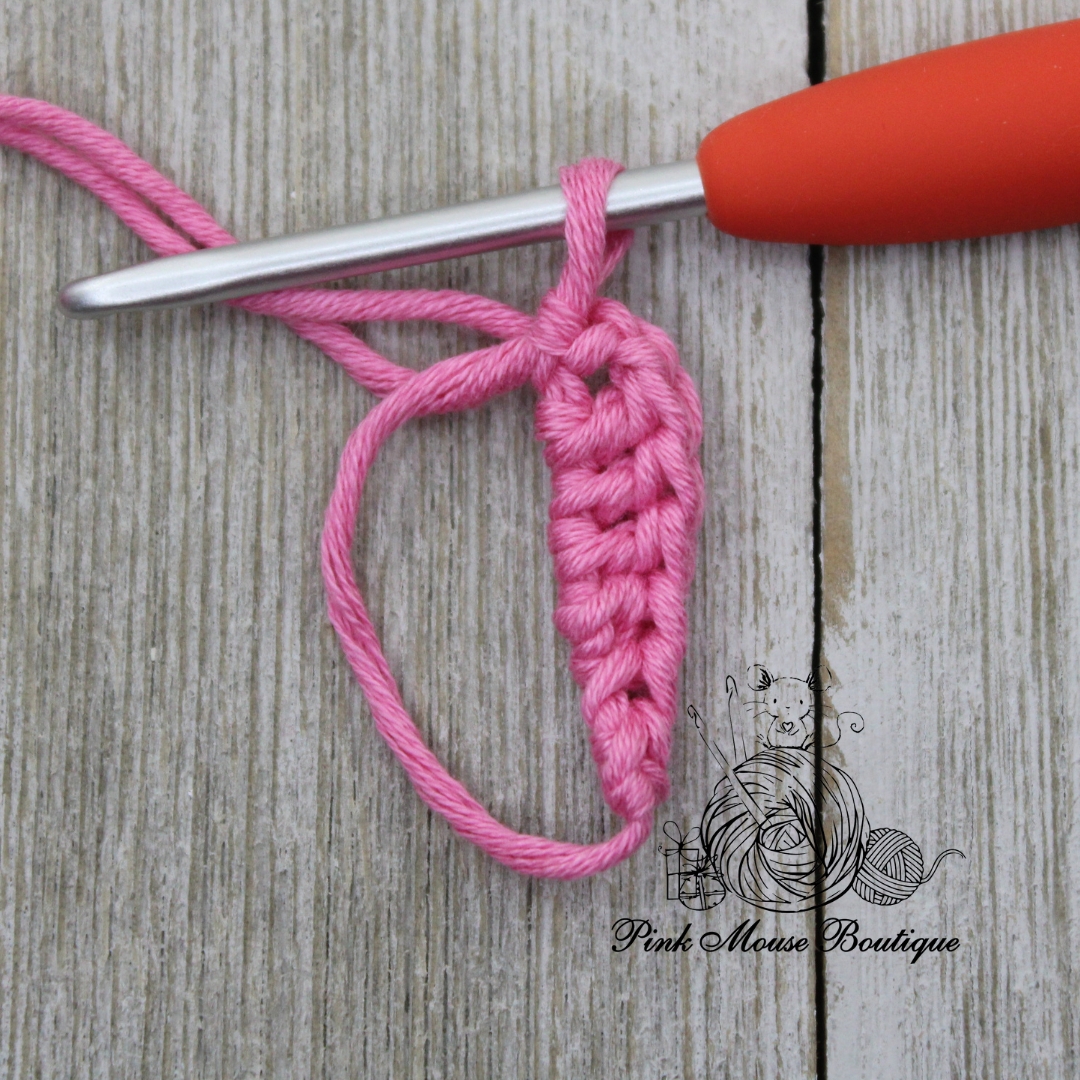
SPEECH BUBBLE PATTERN
Suggested color – White
Ch 7
Row 1: in back bump of ch only 2 sc in 2nd ch from hook, 1 sc in 4 chains, 2 sc in last ch; ch 1 and turn – 8 sts
Row 2: inc, 1 sc in 6 sts, inc; ch 1 and turn – 10 sts
Rows 3 – 6: sc in each st; ch 1 and turn – 10 sts (4 rows)
Row 7: sc, in FLO dec, 1 sc in 4 sts, in FLO dec, sc; ch 1 and turn – 8 sts
Row 8: 1 sc in 4 sts; ch 1 and turn – 4 sts
Row 9: in FLO 2 dec; ch 1 and turn – 2 sts
Row 10: in BLO dec; ch 1 and turn – 1 st
Row 11: 1 sc
Sc all around the speech bubble, in every st and row. Slip stitch to join to the st of Row 11. You should have 31 sts.
Fasten off and weave in the ends.


HEART PATTERN
Suggested color – Dark Pink
Round 1: in a mr 2 sc, hdc, 3 dc, ch 2 and sl st, ch 2 and 3 dc, hdc, 2 sc; sl st to join – 13 sts
Fasten off. Pull beginning tail to close the ring.
I used a hot glue gun to attach the heart to the speech bubble.
Set it aside and let’s continue with the Stamp and Envelope.

STAMP
Suggested Color – White
Ch 8
Row 1: in back bump of ch, 1 sc in 2nd ch from hook, 1 sc in every ch; ch 1 and turn – 7 sts
Rows 2 – 7: sc in each st; ch 1 and turn – 7 sts (6 rows)
Row 8: sc in each st – 7 sts
Fasten off leaving a tail for sewing.
STRAP
Suggested Color – Light Grey
Leaving a long beginning tail 23 fsc. Fasten off leaving a tail for sewing. Set aside.
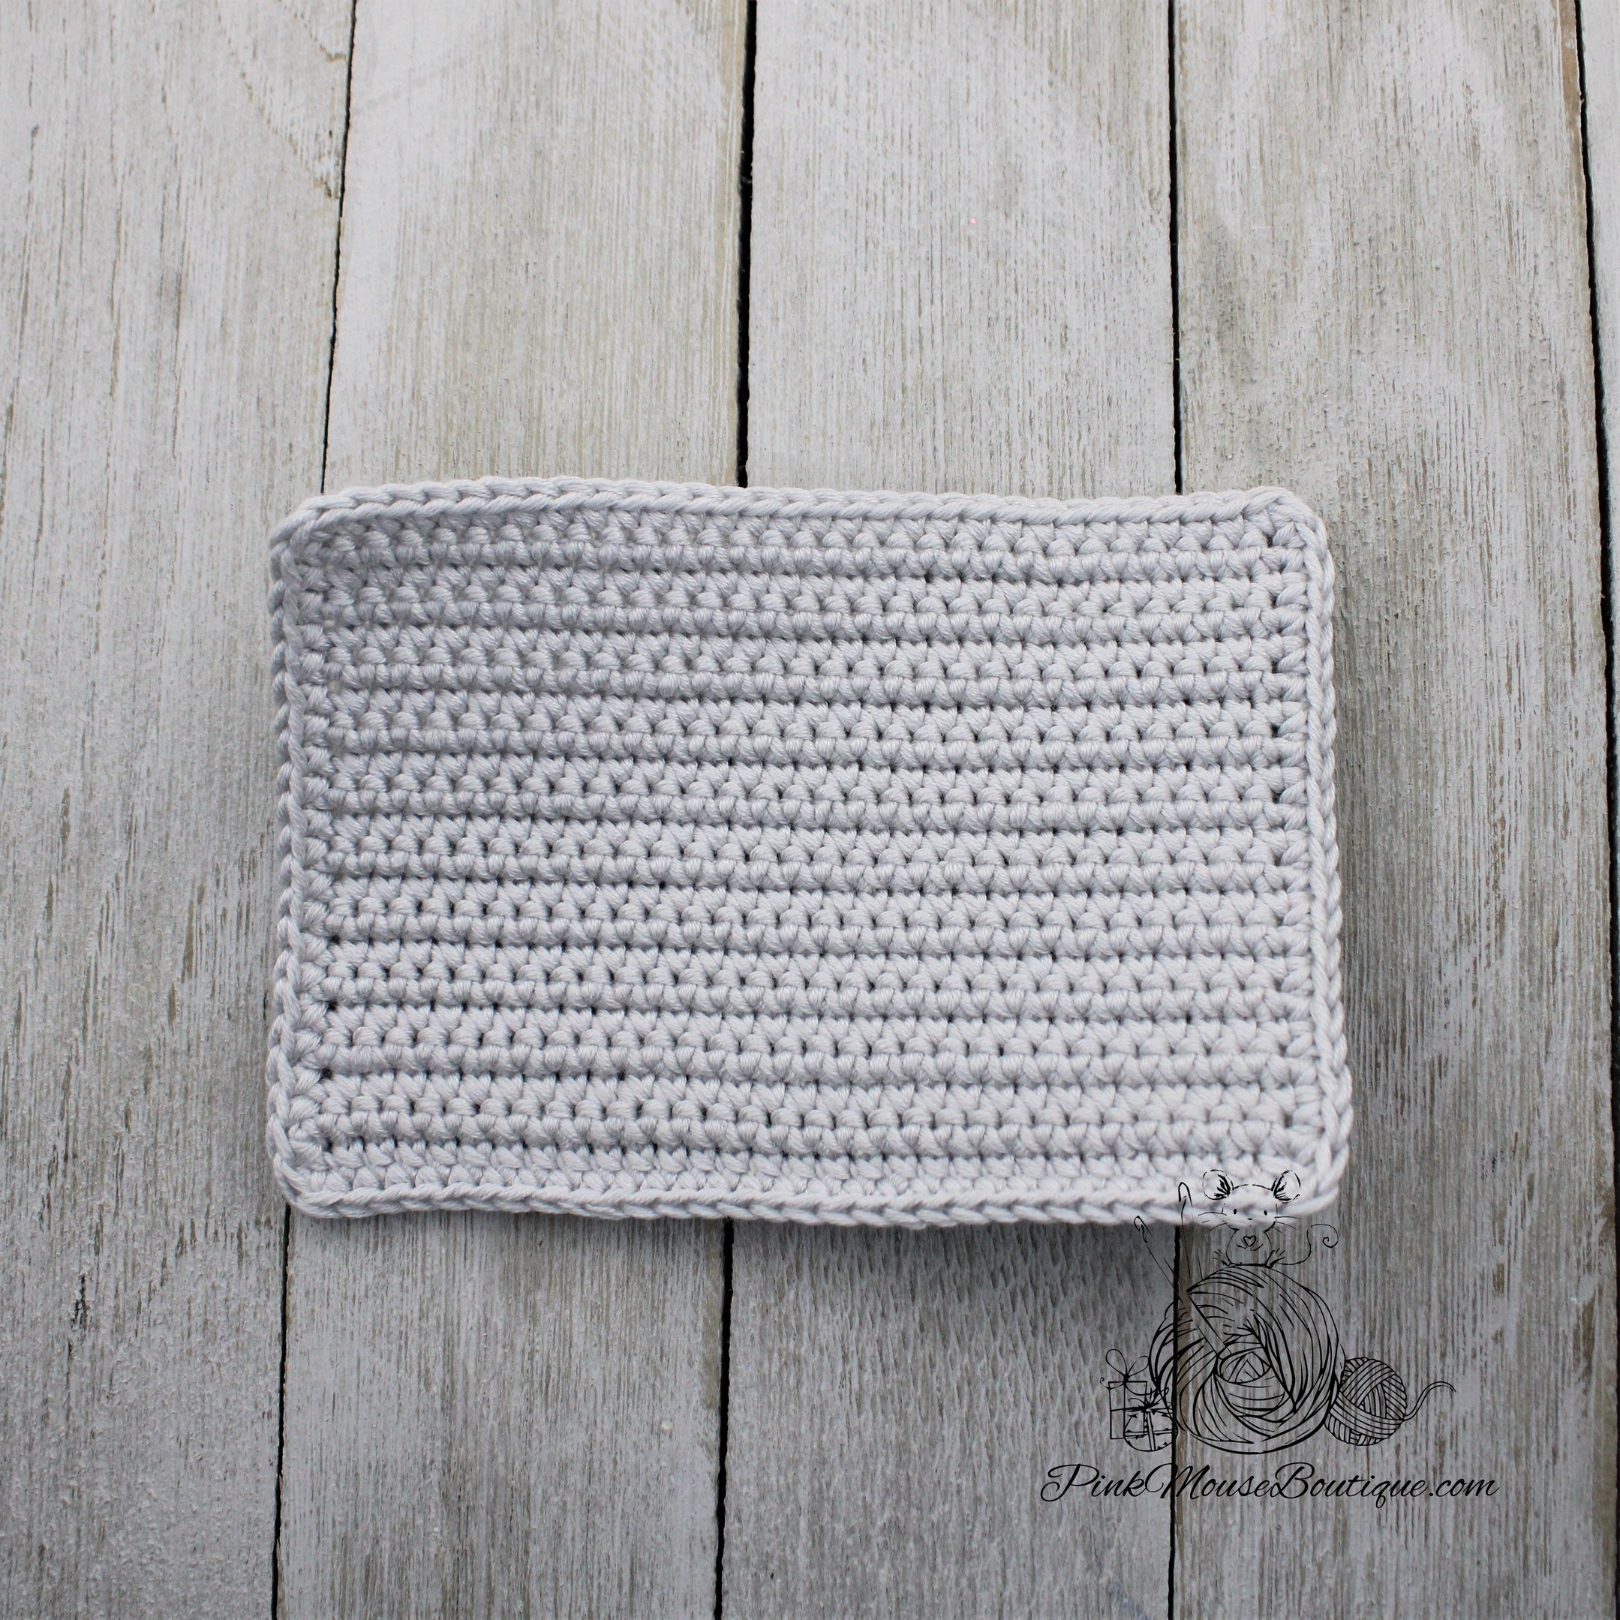
ENVELOPE – FRONT PIECE
Suggested Color – Light Grey
Ch 31
Row 1: in back bump of ch, 1 sc in 2nd ch from hook, 1 sc in every ch; ch 1 and turn – 30 sts
Rows 2 – 20: sc in each st; ch 1 and turn – 30 sts (19 rows)
Row 21: sc in each st – 30 sts
1 sc in each row going down the left side of the piece – 20 sts
2 sc in the corner st
1 sc in each st – 28 sts
2 sc in the corner st
Sc in each row going up – 28 sts
Fasten off and weave in the ends.
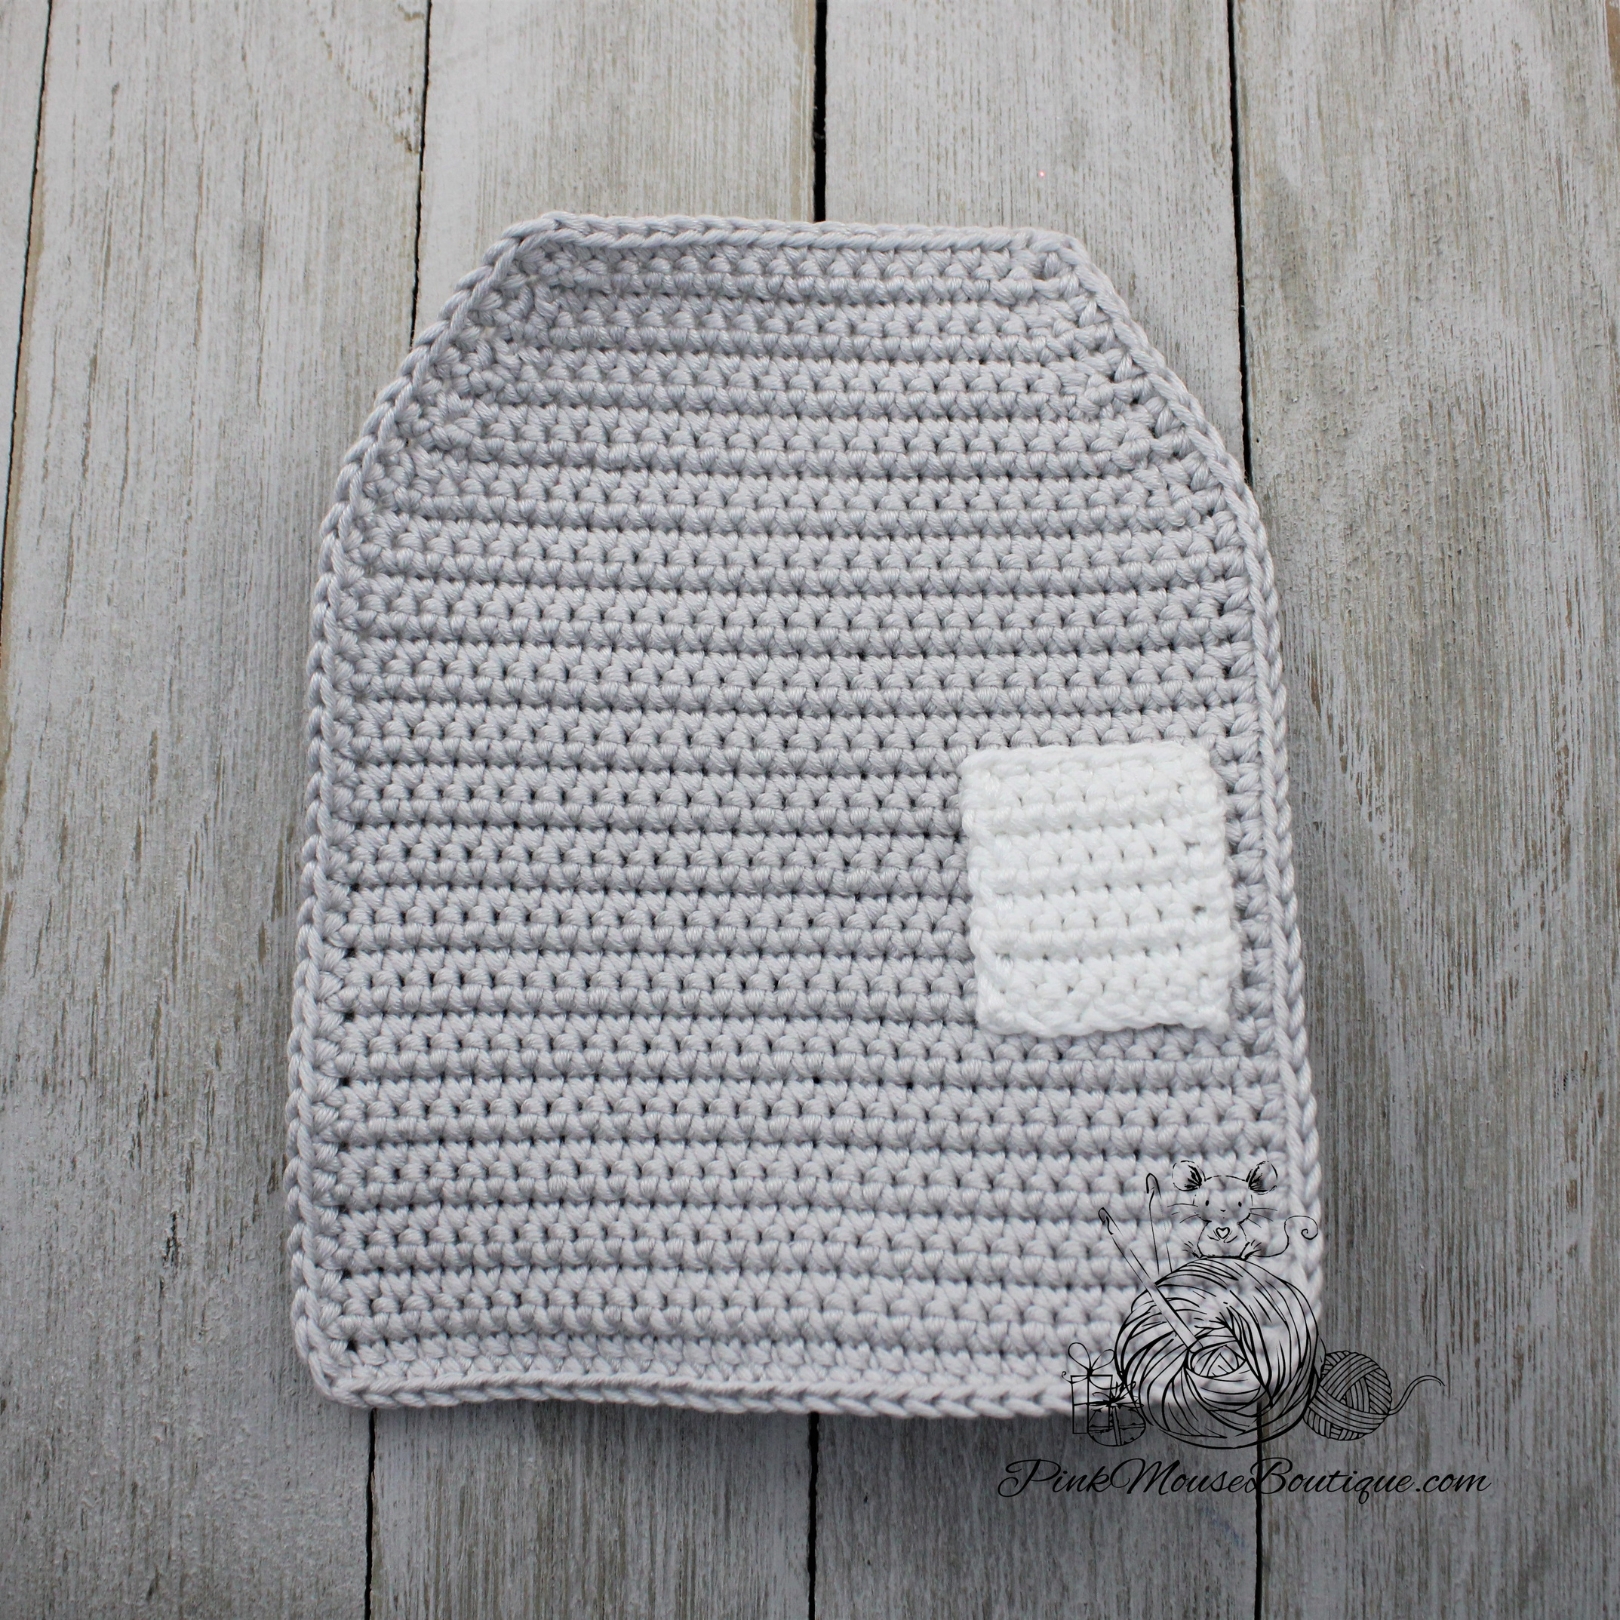
ENVELOPE – BACK PIECE
Suggested Color – Light Grey
Ch 31
Row 1: in back bump of ch, 1 sc in 2nd ch from hook, 1 sc in every ch; ch 1 and turn – 30 sts
Rows 2 – 28: sc in each st; ch 1 and turn – 30 sts (27 rows)
Row 29: sc, in FLO dec, 24 sc, in FLO dec, sc; ch 1 and turn – 28 sts
Row 30: sc, in BLO dec, 22 sc, in BLO dec, sc; ch 1 and turn – 26 sts
Row 31: sc in each st; ch 1 and turn – 26 sts
Row 32: sc, in BLO dec, 20 sc, in BLO dec, sc; ch 1 and turn – 24 sts
Row 33: sc, in FLO dec, 18 sc, in FLO dec, sc; ch 1 and turn – 22 sts
Row 34: sc in each st; ch 1 and turn – 22 sts
Row 35: sc, in FLO dec, 16 sc, in FLO dec, sc; ch 1 and turn – 20 sts
Row 36: sc, in BLO dec, 14 sc, in BLO dec, sc; ch 1 and turn – 18 sts
Row 37: sc in each st – 18 sts
Sc in each row going down – 36 sts
2 sc in the corner st
1 sc in 28 sts
2 sc in the corner st
Sc in each row going up – 36 sts Fasten off and weave in the ends.

ASSEMBLY
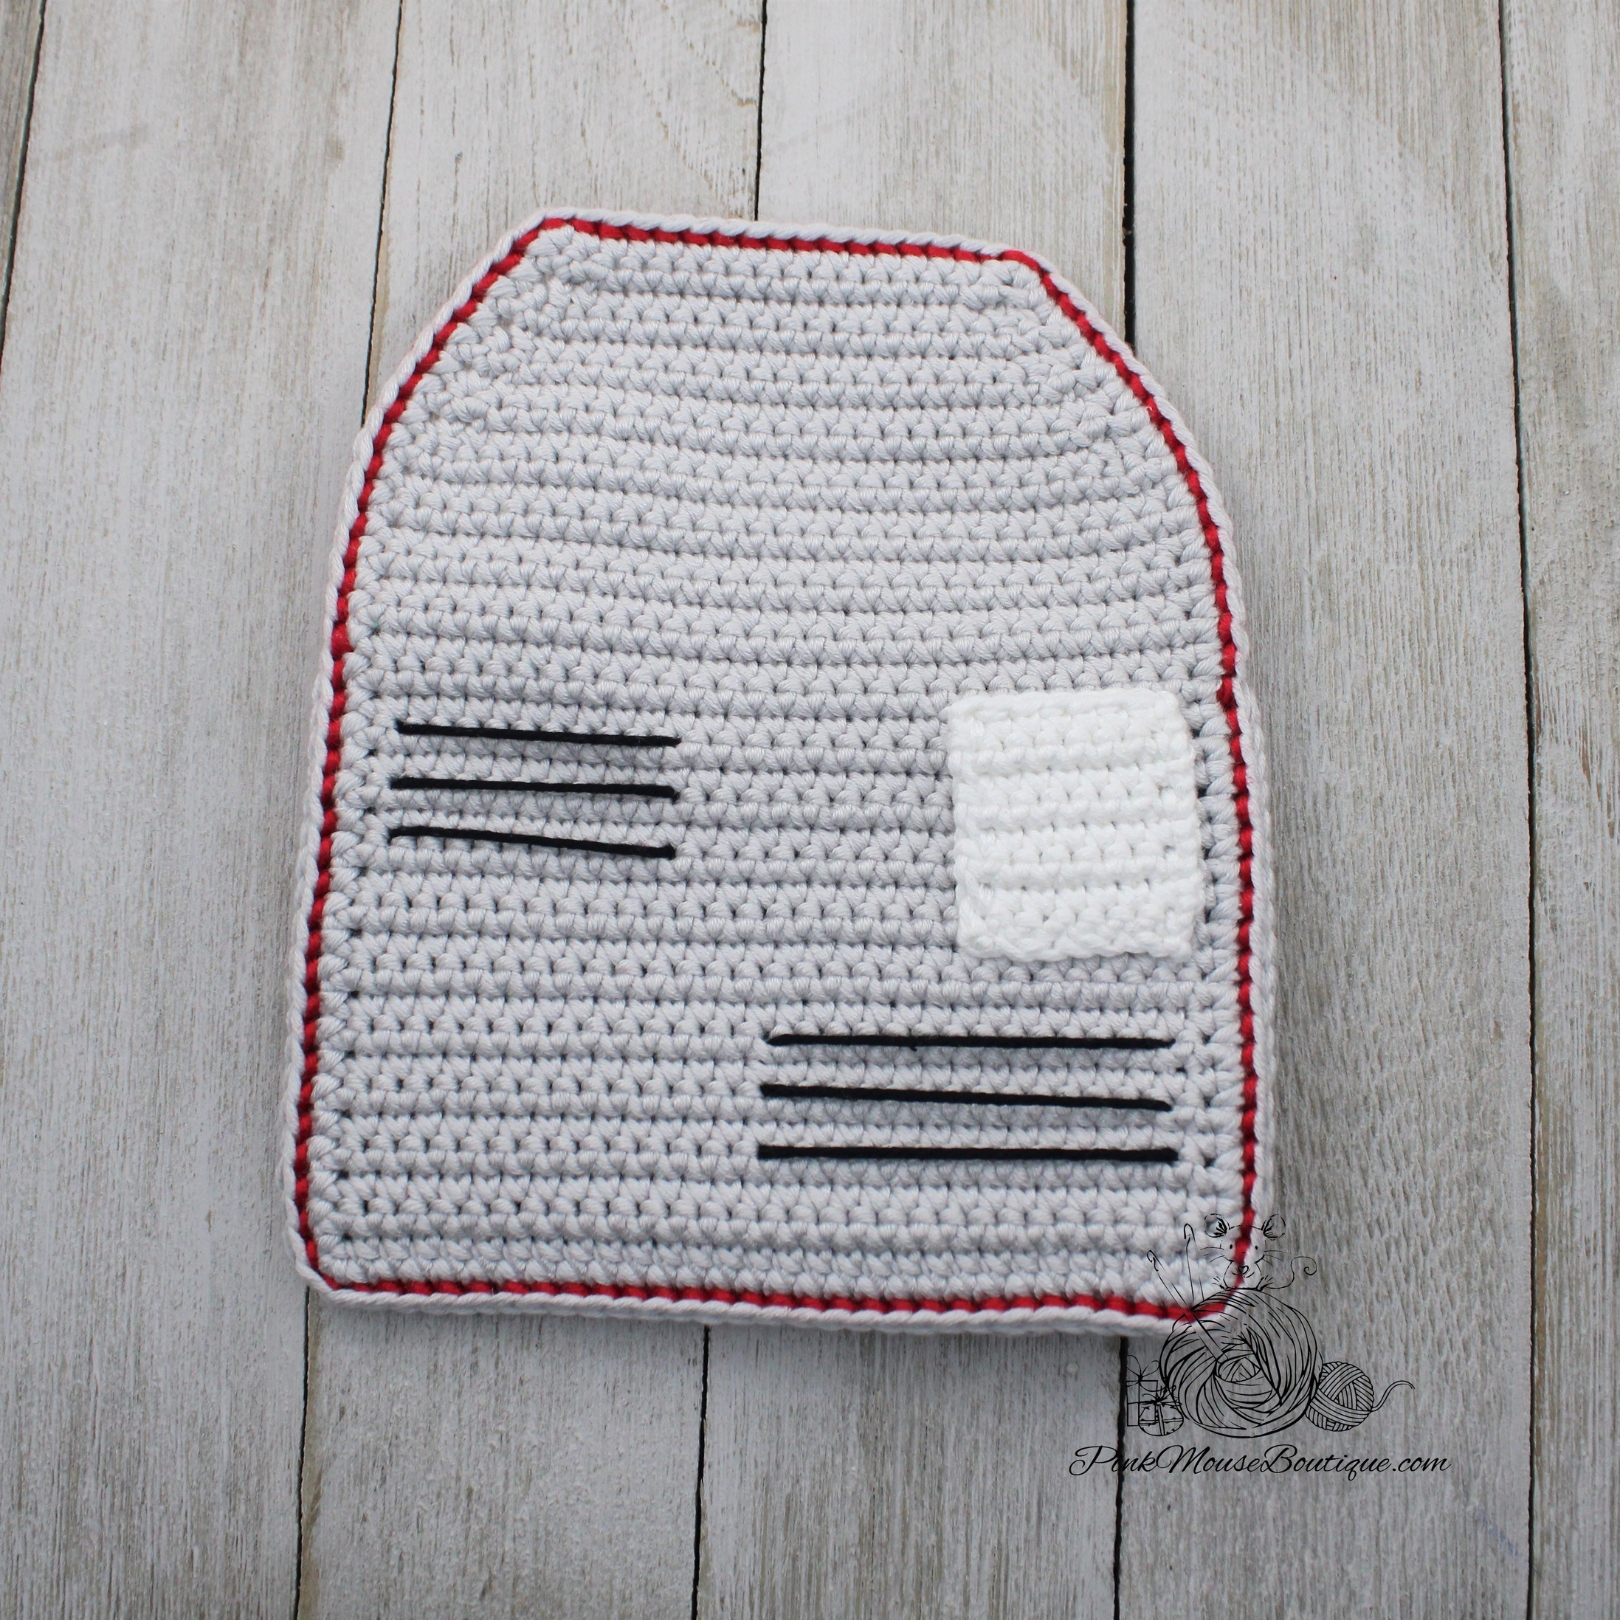
- Sew the stamp to the BACK PIECE between Rows 11 and 21. Weave in the ends.
- Using black yarn, sew 3 black lines starting 2 rows below the stamp. The lines should be 12 to 14 stitches long and sewn two rows apart. Weave in the ends.
- Using black yarn, sew three lines to the left of the stamp. The first line should be sewn on Row 15, the second line – on Row 17, and the last line – on Row 19. Weave in the ends.
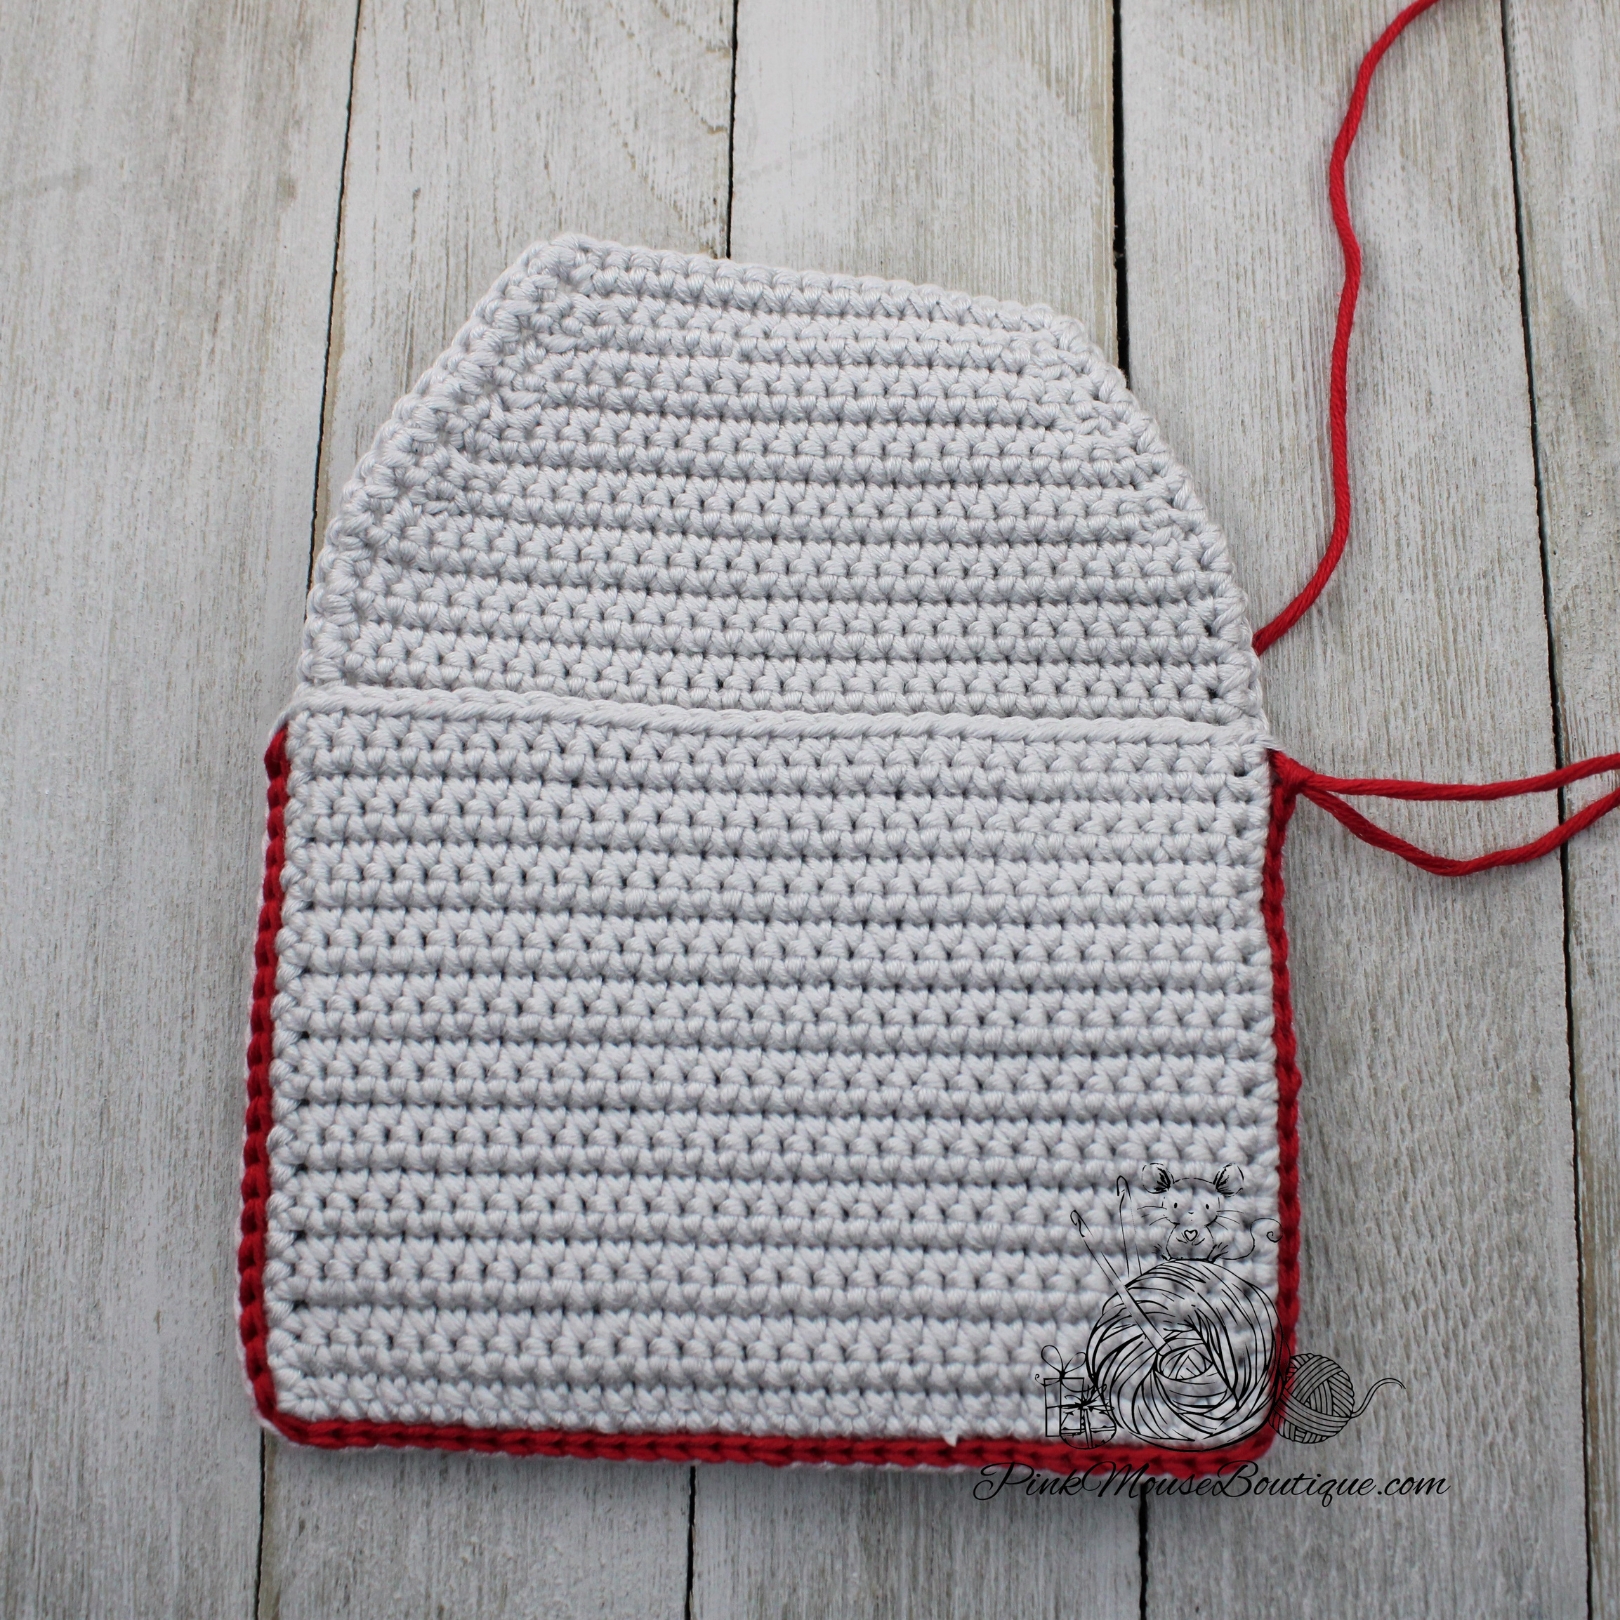
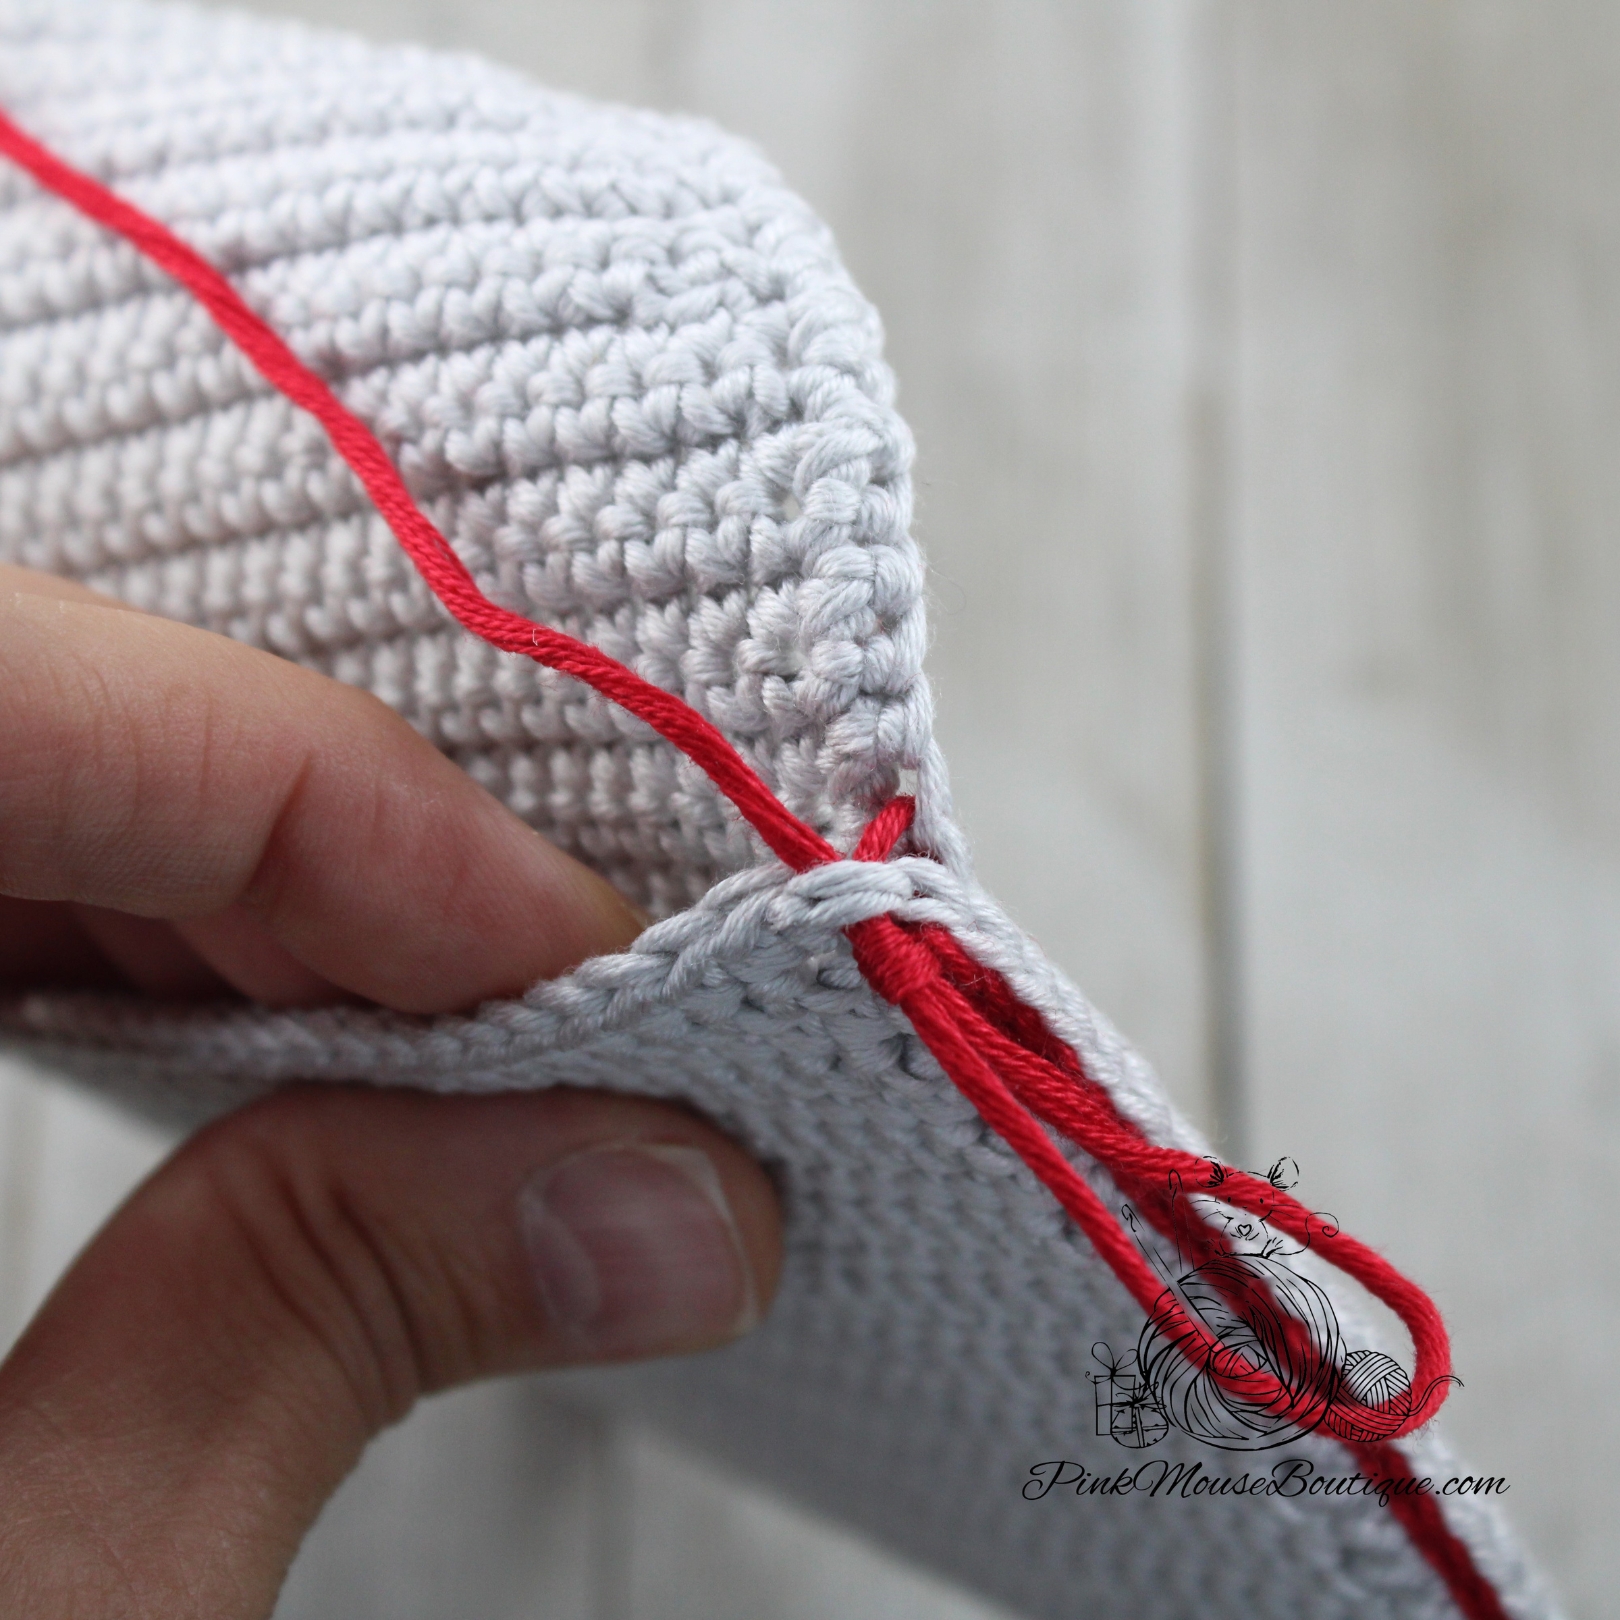
- Flip the back of the envelope so that the inside is facing you. Place the FRONT PIECE on top. Align the bottom and sides of the two pieces. Using red yarn, slip stitch through both starting at the top left corner of the FRONT (the rectangular piece). Slip stitch all around the left side, the bottom, and then the right side.
- Cut the yarn leaving a long tail and without fastening off pull the end out only of the BACK part of the envelope.
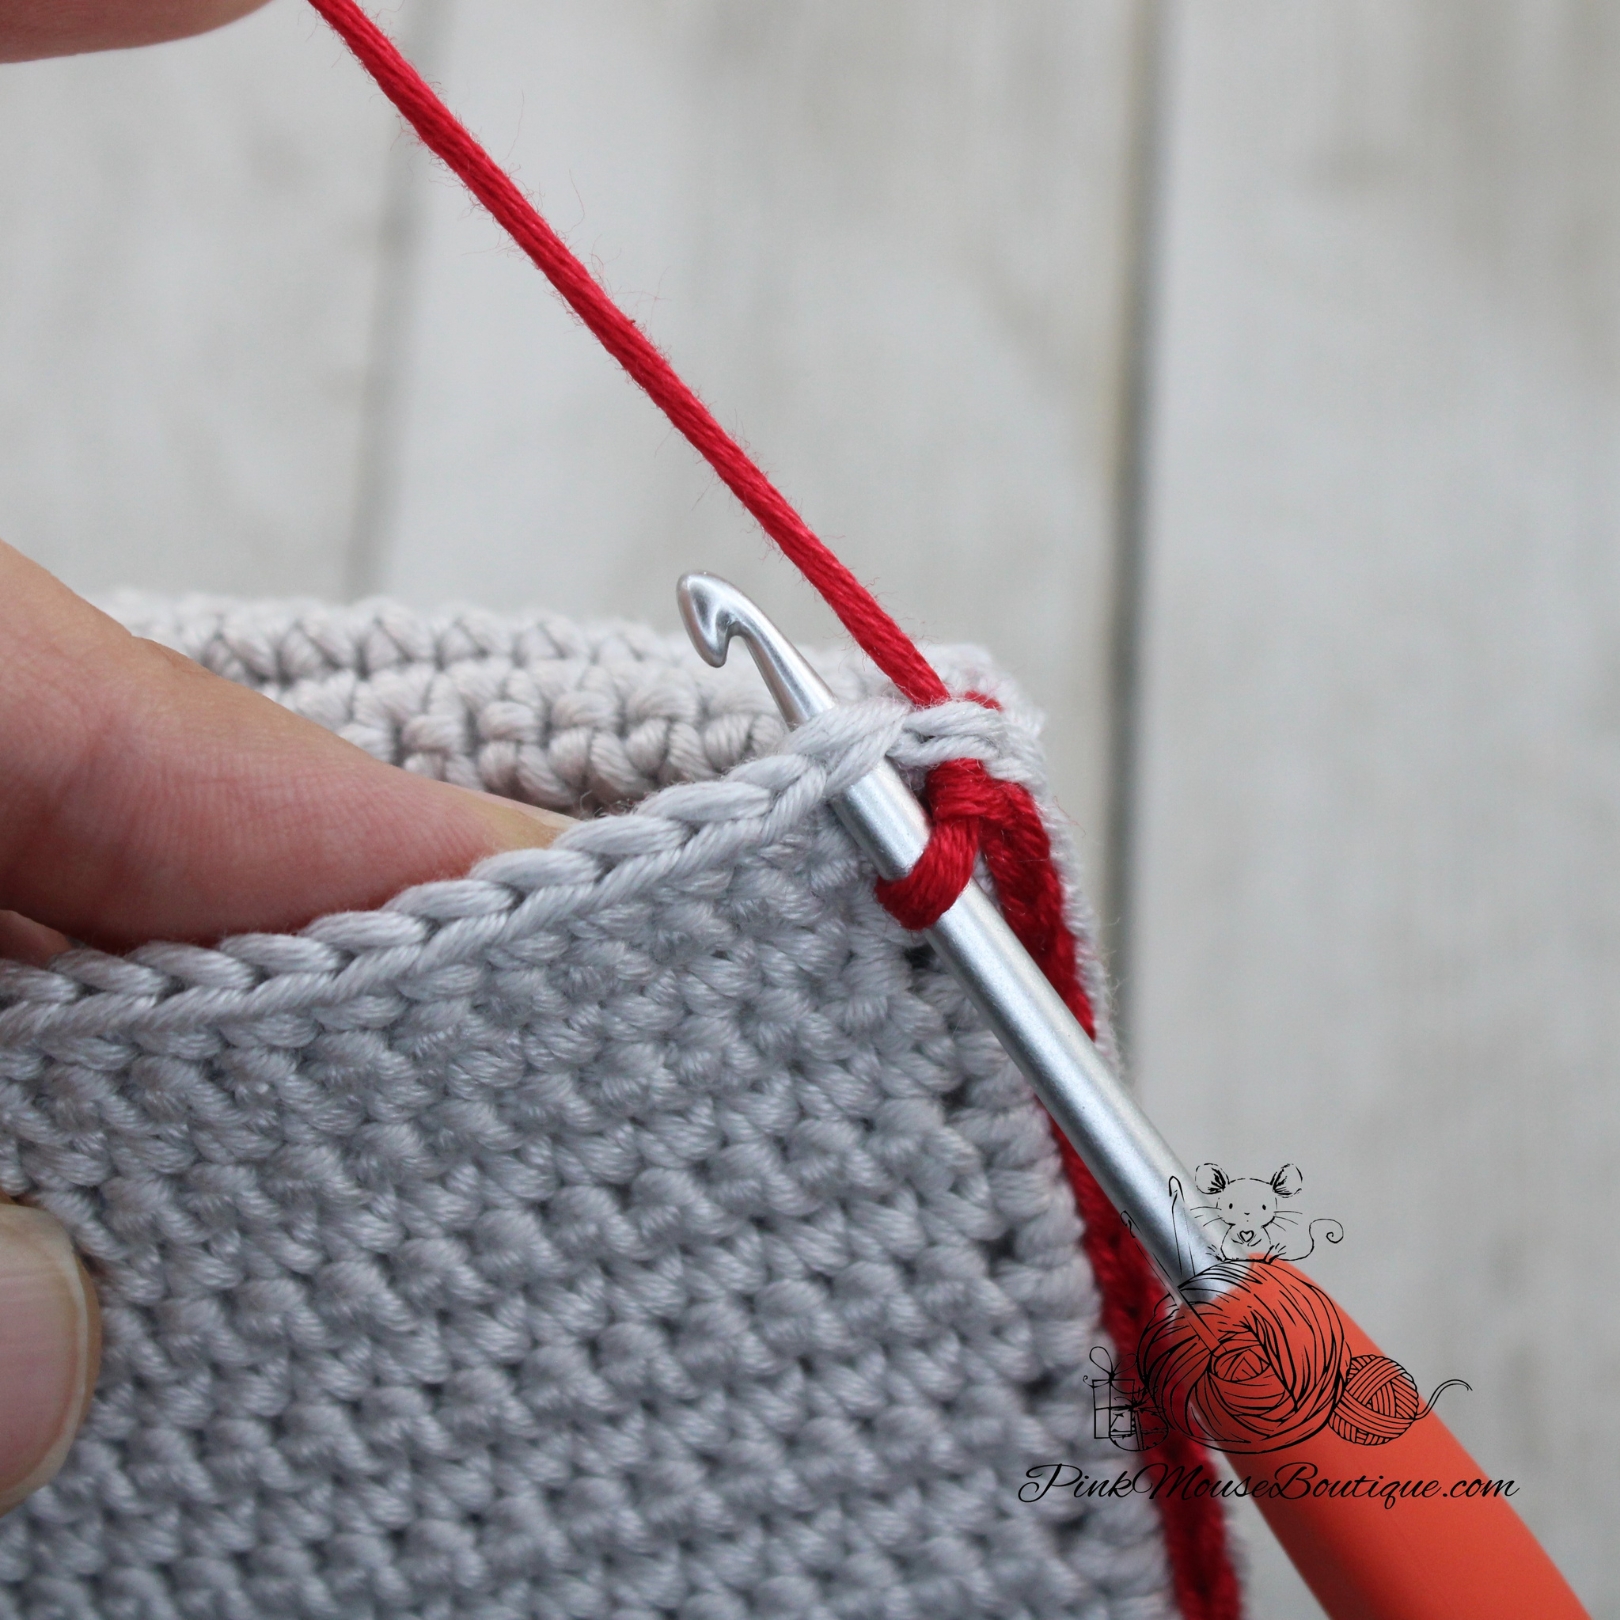
- Continue slip stitching only through the top of the rectangle part of the envelope.
- Once finished, fasten off and weave in the ends.
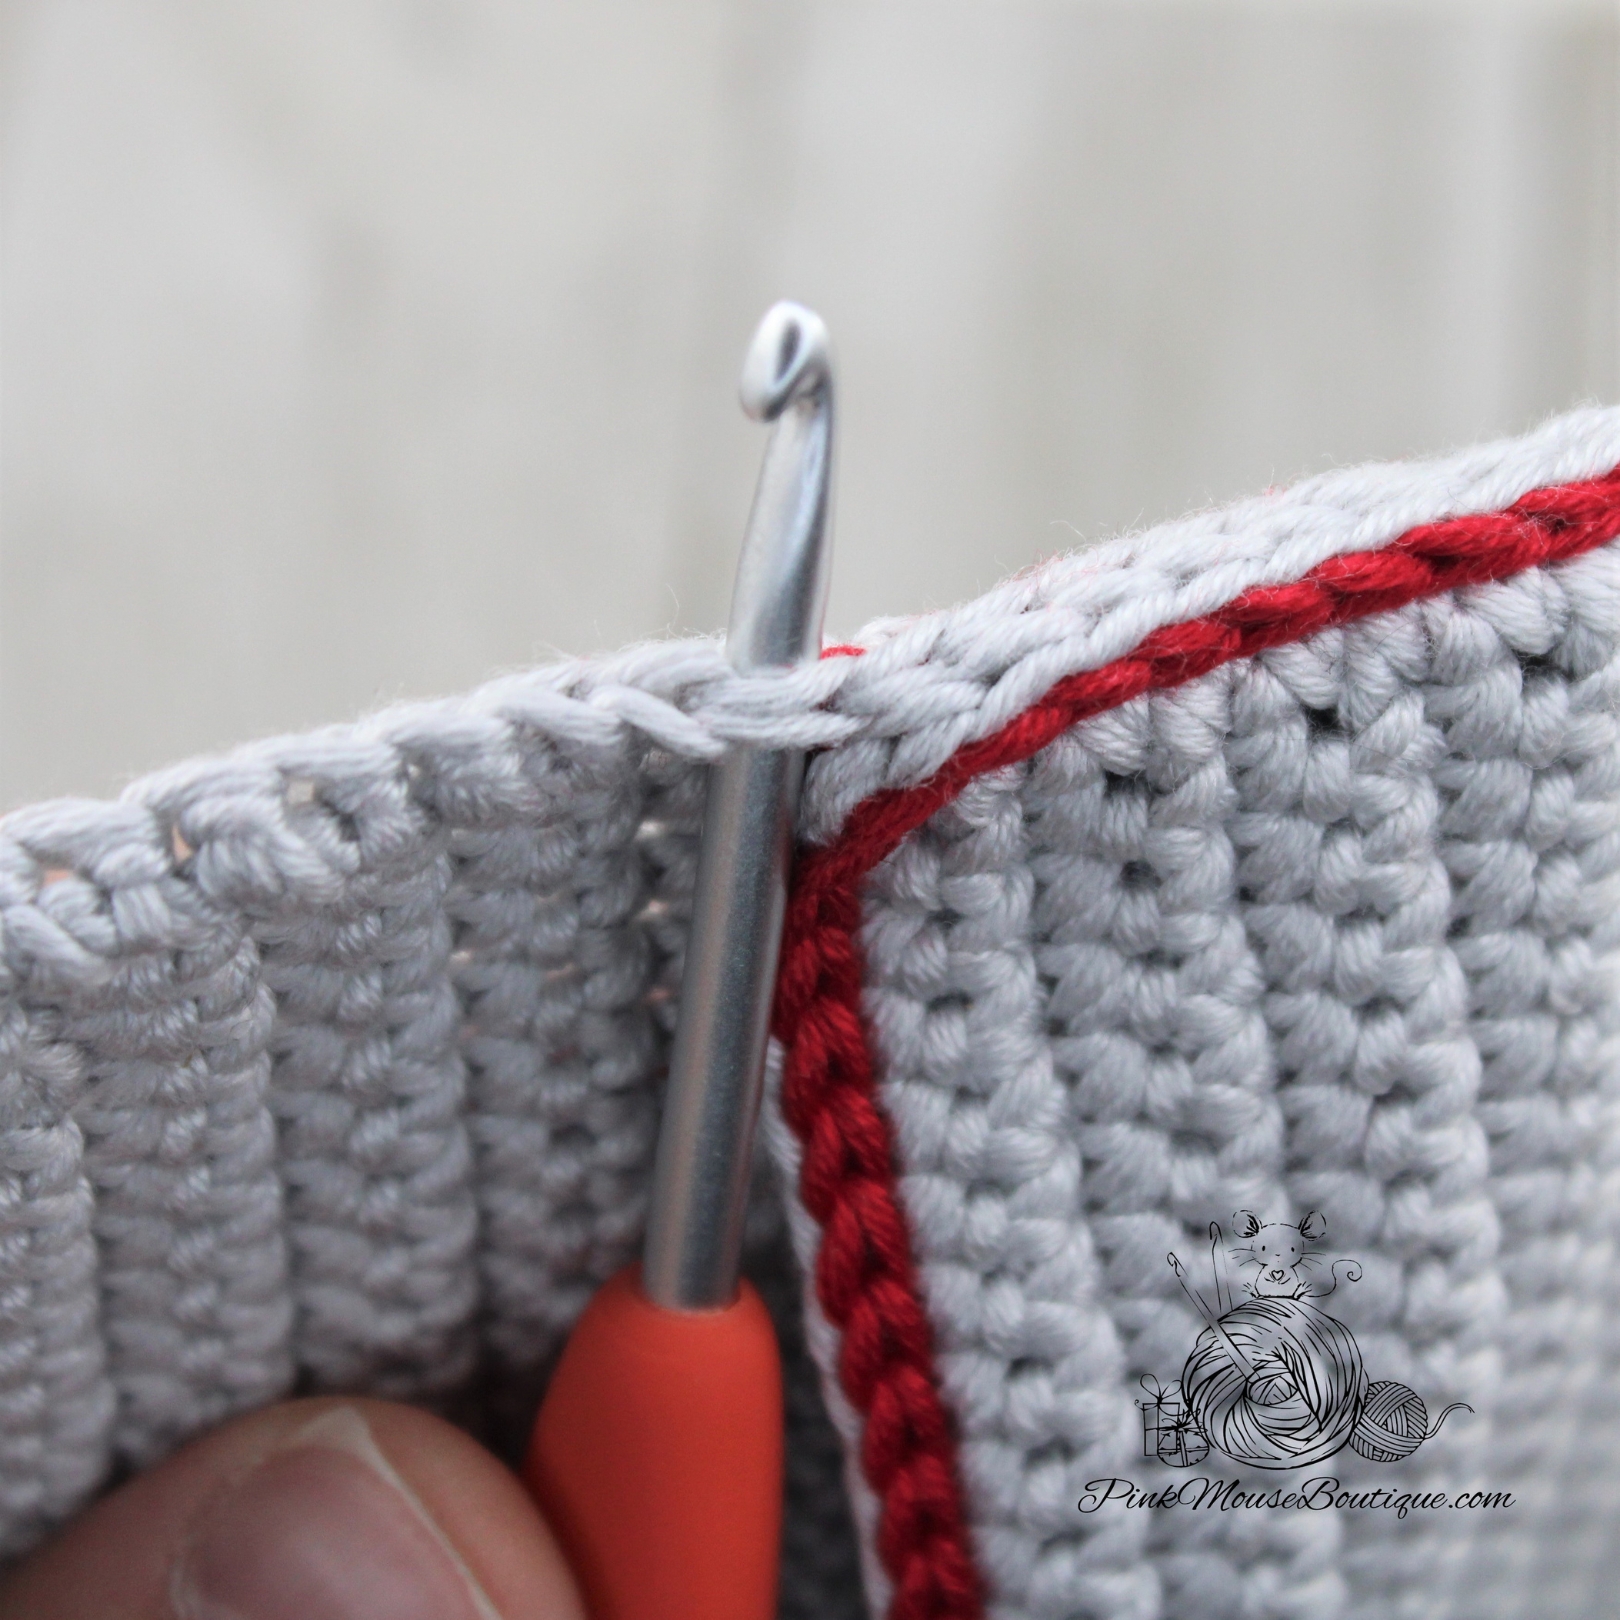
- Insert hook in the same stitch where you last crocheted through the FRONT and BACK on the right. With red slip stitch all around the top of the BACK PIECE (the flap). Fasten off and weave in the ends.
- Sew the strap on Row 15 or 16 making sure you can close the envelope and that the strap will hold it closed.


Thank you so much
LikeLike
I love these little patterns, easy to follow and so cute when finished, thank you for bringing to us all who love crochet another sweet creation to add to our collection.
LikeLike