


Well, I am excited to have finally published Part 5 of the Pocket Valentines, the Bee. I hope you like this little one as much as the other parts in the series.
Part 1: Envelope, Speech Bubble, and Heart
Part 5: Bee
Materials
- Drops Muskat Worsted Weight: Dark Yellow, Black, Dark Pink, White
- Crochet Hook, 3.25 mm
- Stuffing
- Others: sewing needle, scissors
Abbreviations
mr – magic ring
ch – chain
st – stitch
sl st – slip stitch
sc – single crochet
hdc – half double crochet
dc – double crochet
inc – increase
Helpful Tutorials
Note: Make sure to read through the whole pattern and look at all the step-by-step pictures before crocheting the bee.
WINGS (x 2)
Suggested Color – White
Ch 5
Row 1: 1 sc in 2nd ch from hook, 1 sc in 2 ch, 4 sc in last ch; working on the opposite side of chain 1 sc in 3 ch; ch 1 and turn – 10 sts
Row 2: 1 sc in 2 sts, hdc, 4 dc inc, hdc, 1 sc in 2 sts – 14 sts
Fasten off leaving a long tail for sewing. Set aside.
ANTENNAE (x 2)
Suggested Color – Dark Yellow
Ch 4
Row 1: 2 dc in 2nd ch from hook, sc in last 2 chains – 4 sts
Fasten off leaving a tail for sewing.
ARMS (x 2)
Suggested color – Dark Yellow
Ch 4
Row 1: in back bump of ch only sc in 2nd ch from hook, sc in next, hdc in last ch – 3 sts
Fasten off leaving a tail for sewing.
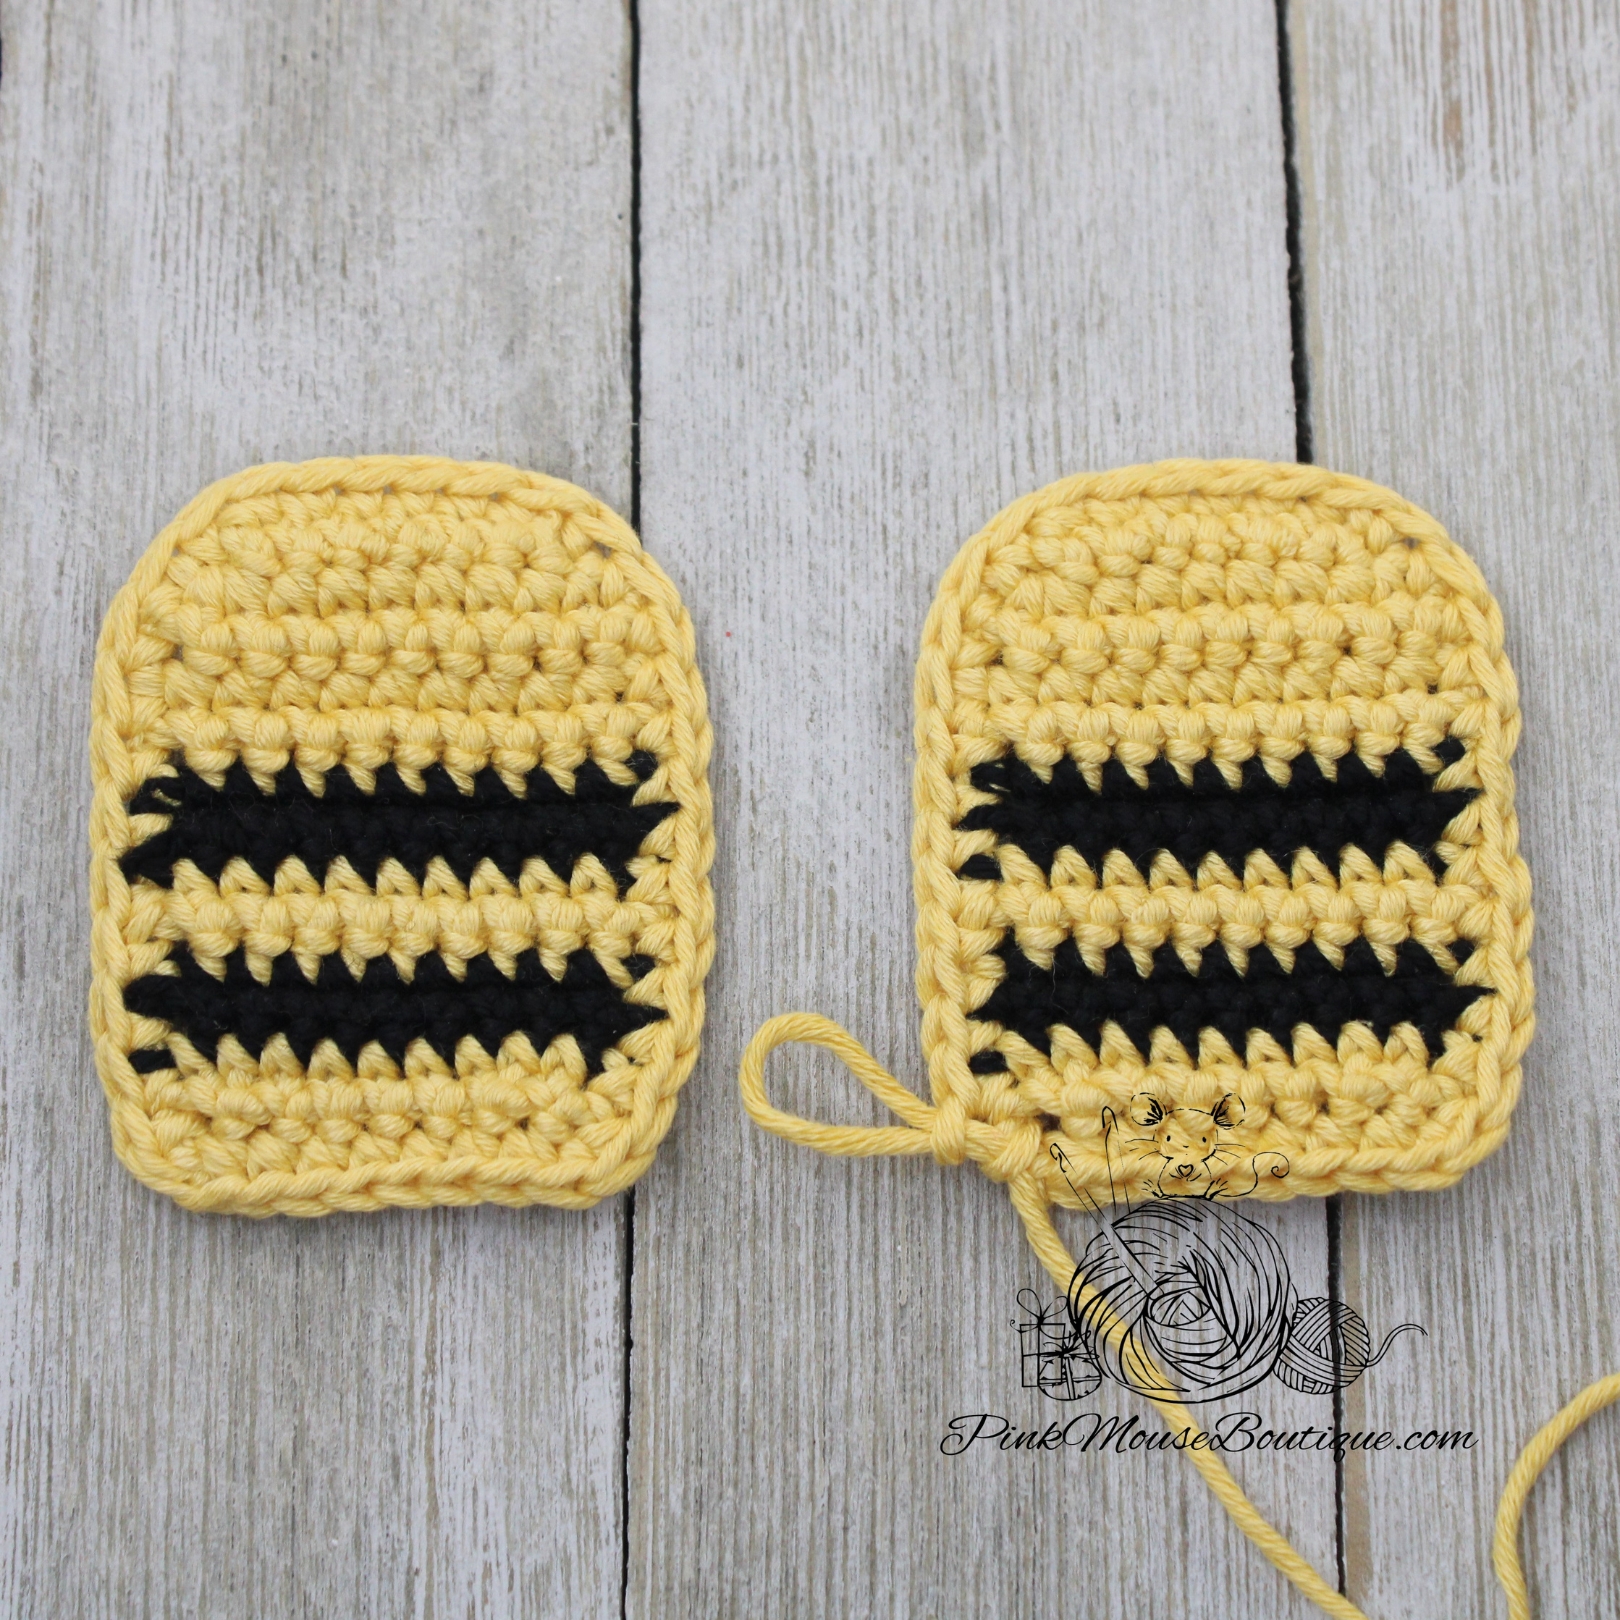
BODY (x 2)
Suggested Colors – Dark Yellow and Black
NOTE: I do not weave in the ends. I tie knots and hide them inside since we will make two pieces for the body and then crochet them together to join.
With Dark Yellow, ch 7
Row 1: in back bump of ch only 2 sc in 2nd ch from hook, 1 sc in 4 ch, 2 sc in last ch; ch 1 and turn – 8 sts
Row 2: inc, 1 sc in 6 sts, inc; ch 1 and turn – 10 sts
Rows 3 – 5: sc in each st; ch 1 and turn – 10 sts (2 rows)
Change color – Black
Rows 6 – 7: sc in each st; ch 1 and turn – 10 sts (2 rows)
Change color – Dark Yellow
Rows 8 – 9: sc in each st; ch 1 and turn – 10 sts (2 rows)
Change color – Black
Rows 10 – 11: sc in each st; ch 1 and turn – 10 sts (2 rows)
Change color – Dark Yellow
Row 11: sc in each st; ch 1 and turn – 10 sts
Row 12: sc, in BLO dec, 1 sc in 4 sts, in BLO dec, sc; ch 1 and turn – 8 sts
Row 14: sc in each st
Continue sc around the entire body, in every st and row.
Sl st to the 1st st of Row 14.
Fasten off the 1st piece. Do not break the yarn from the 2nd piece.

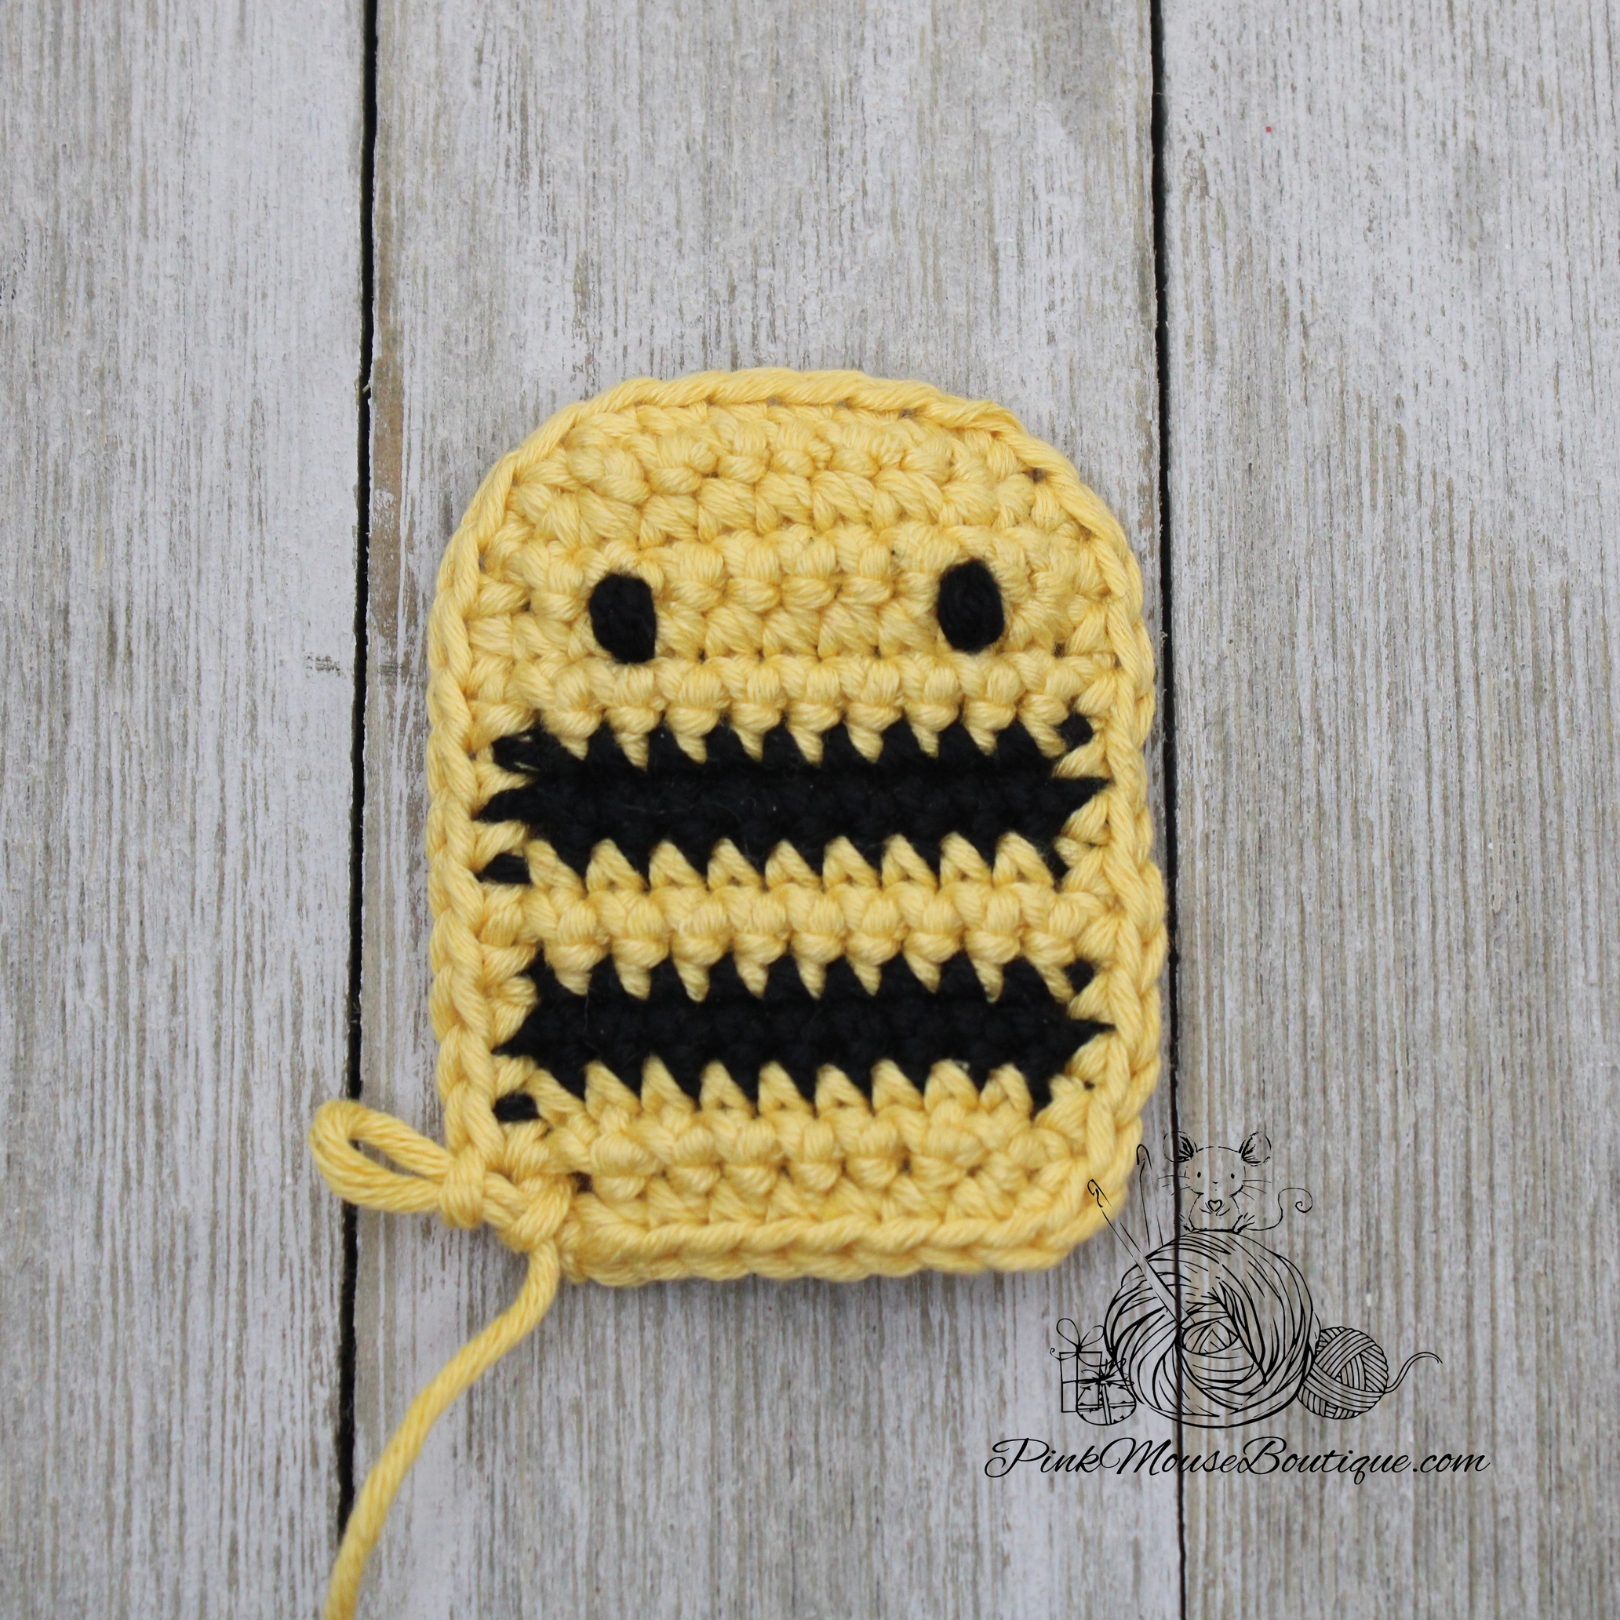
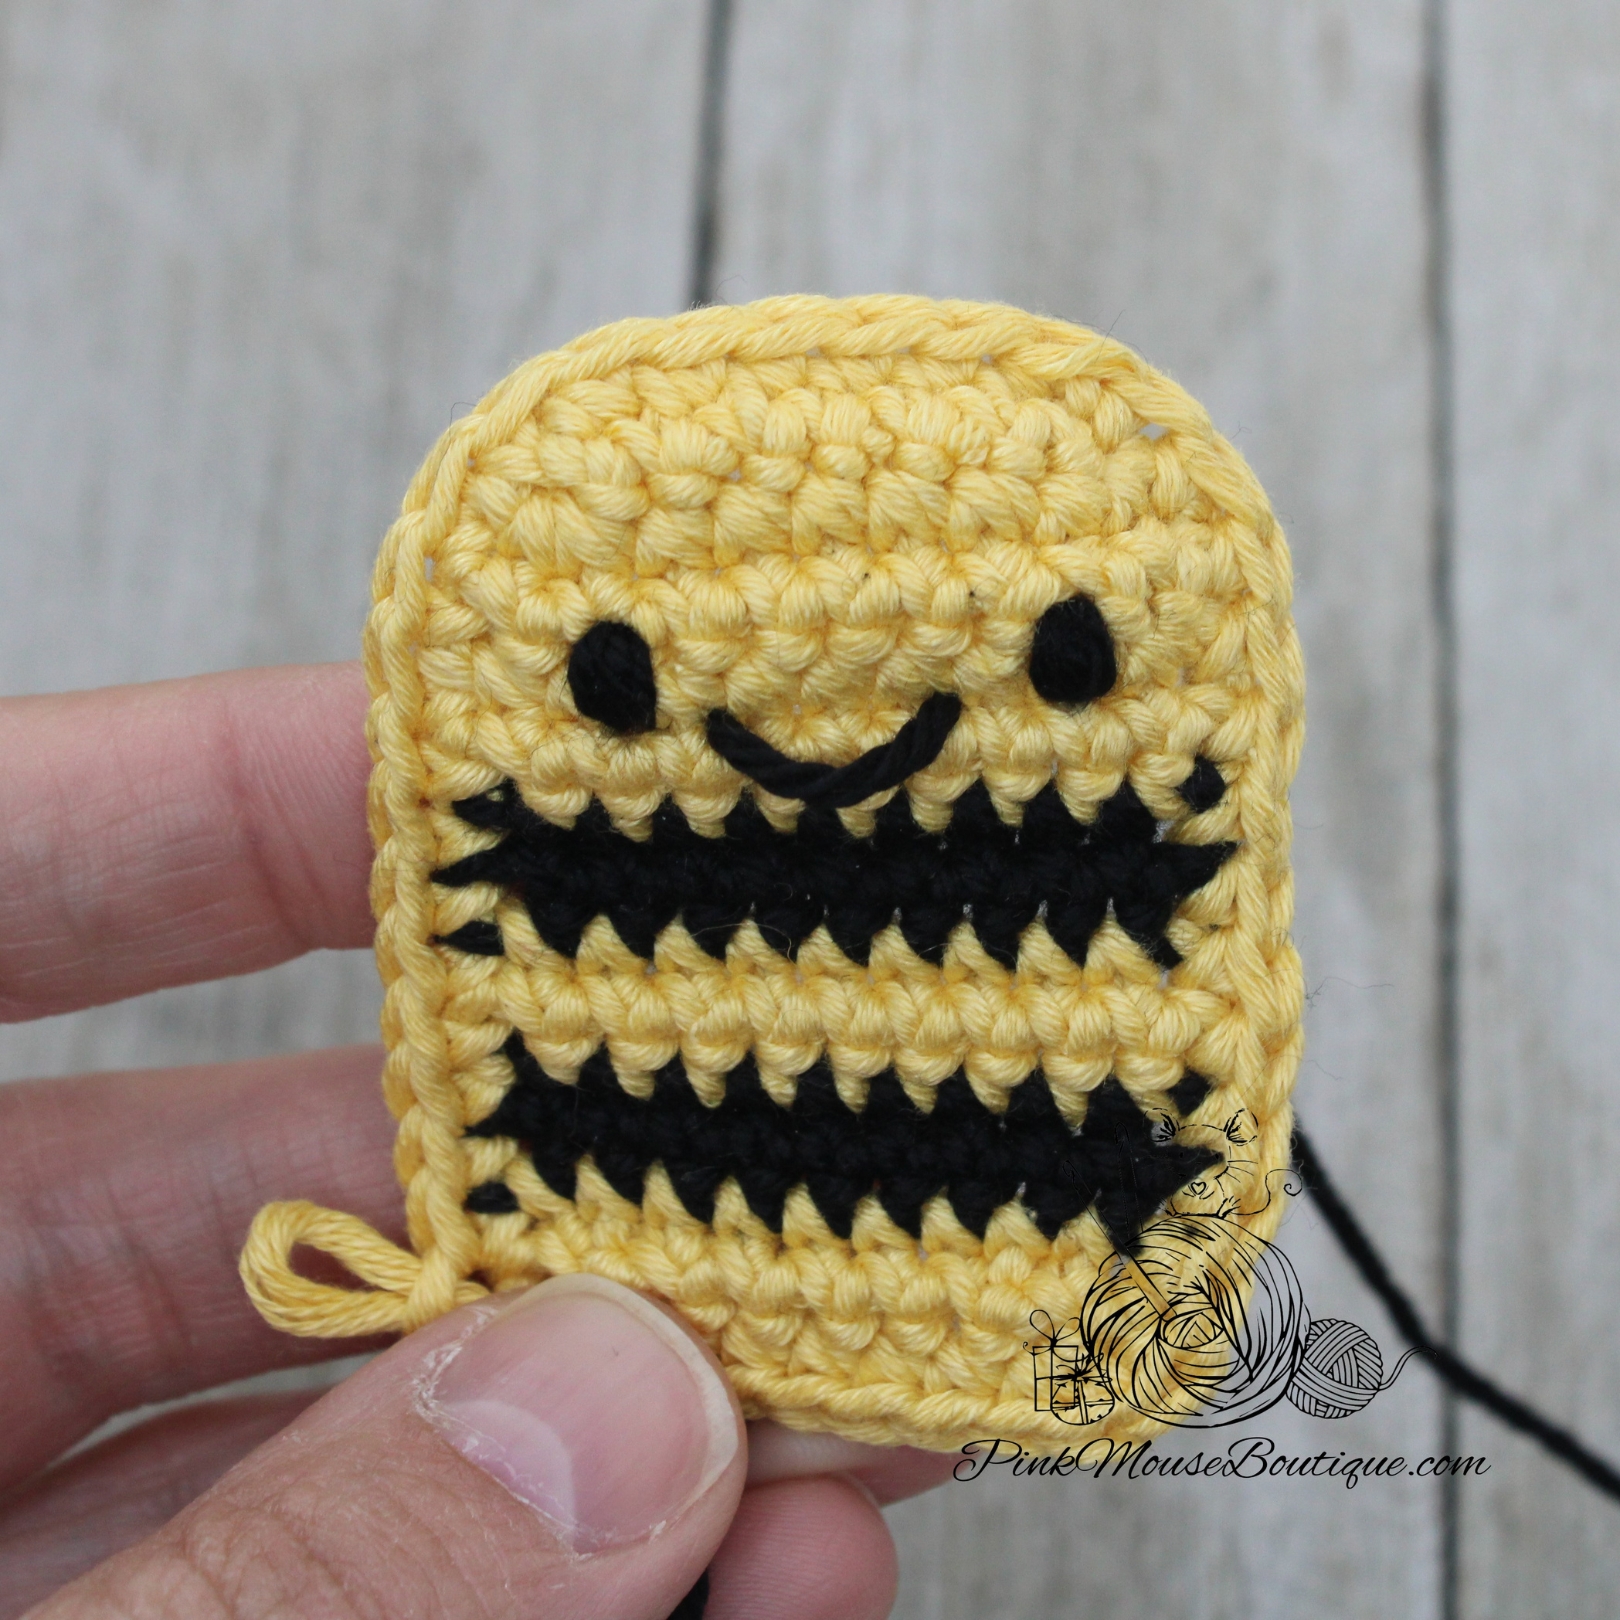
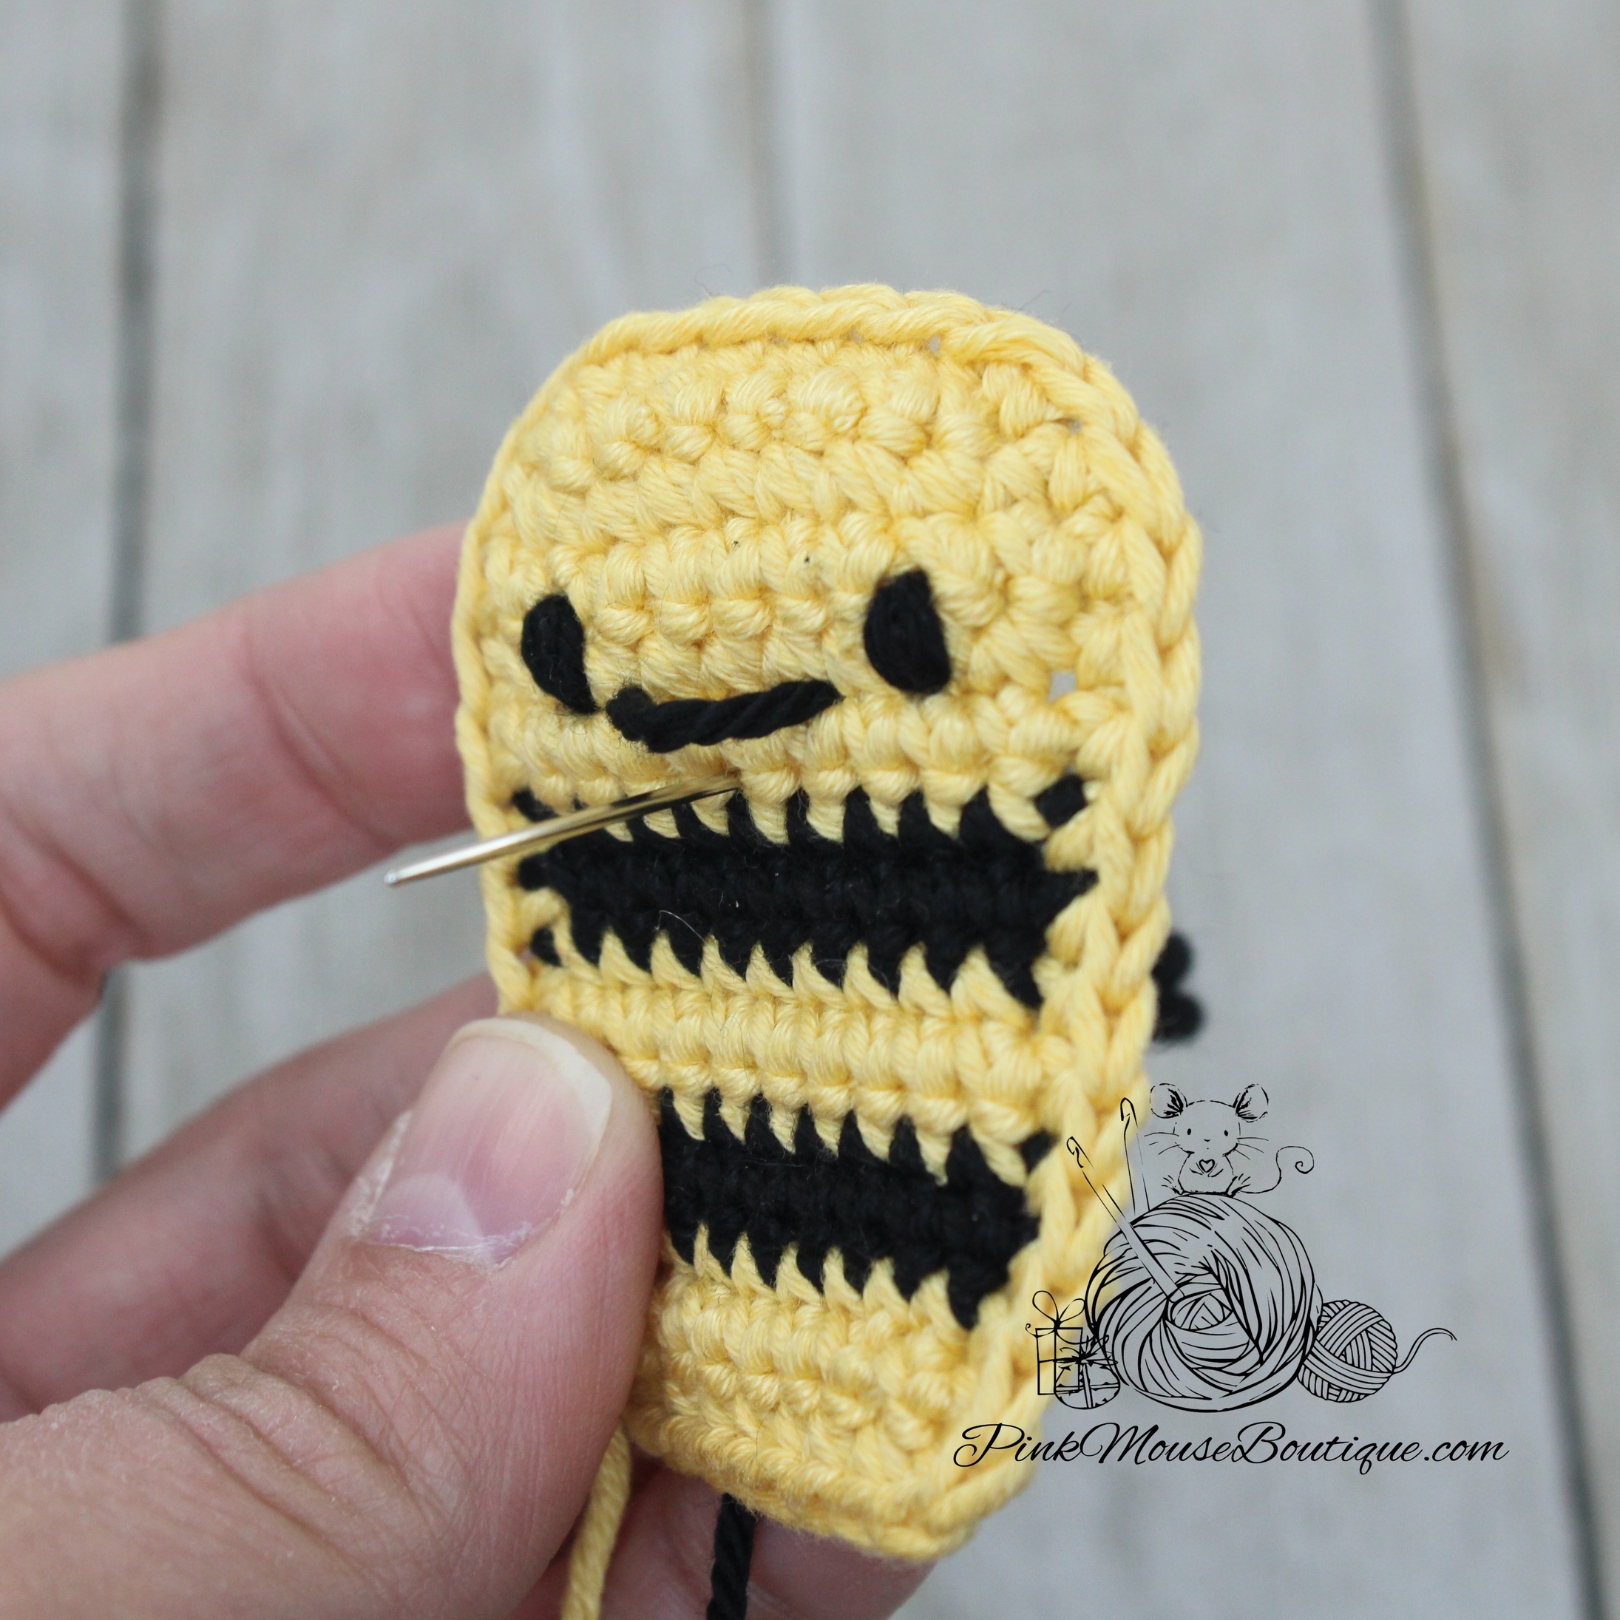
ASSEMBLY
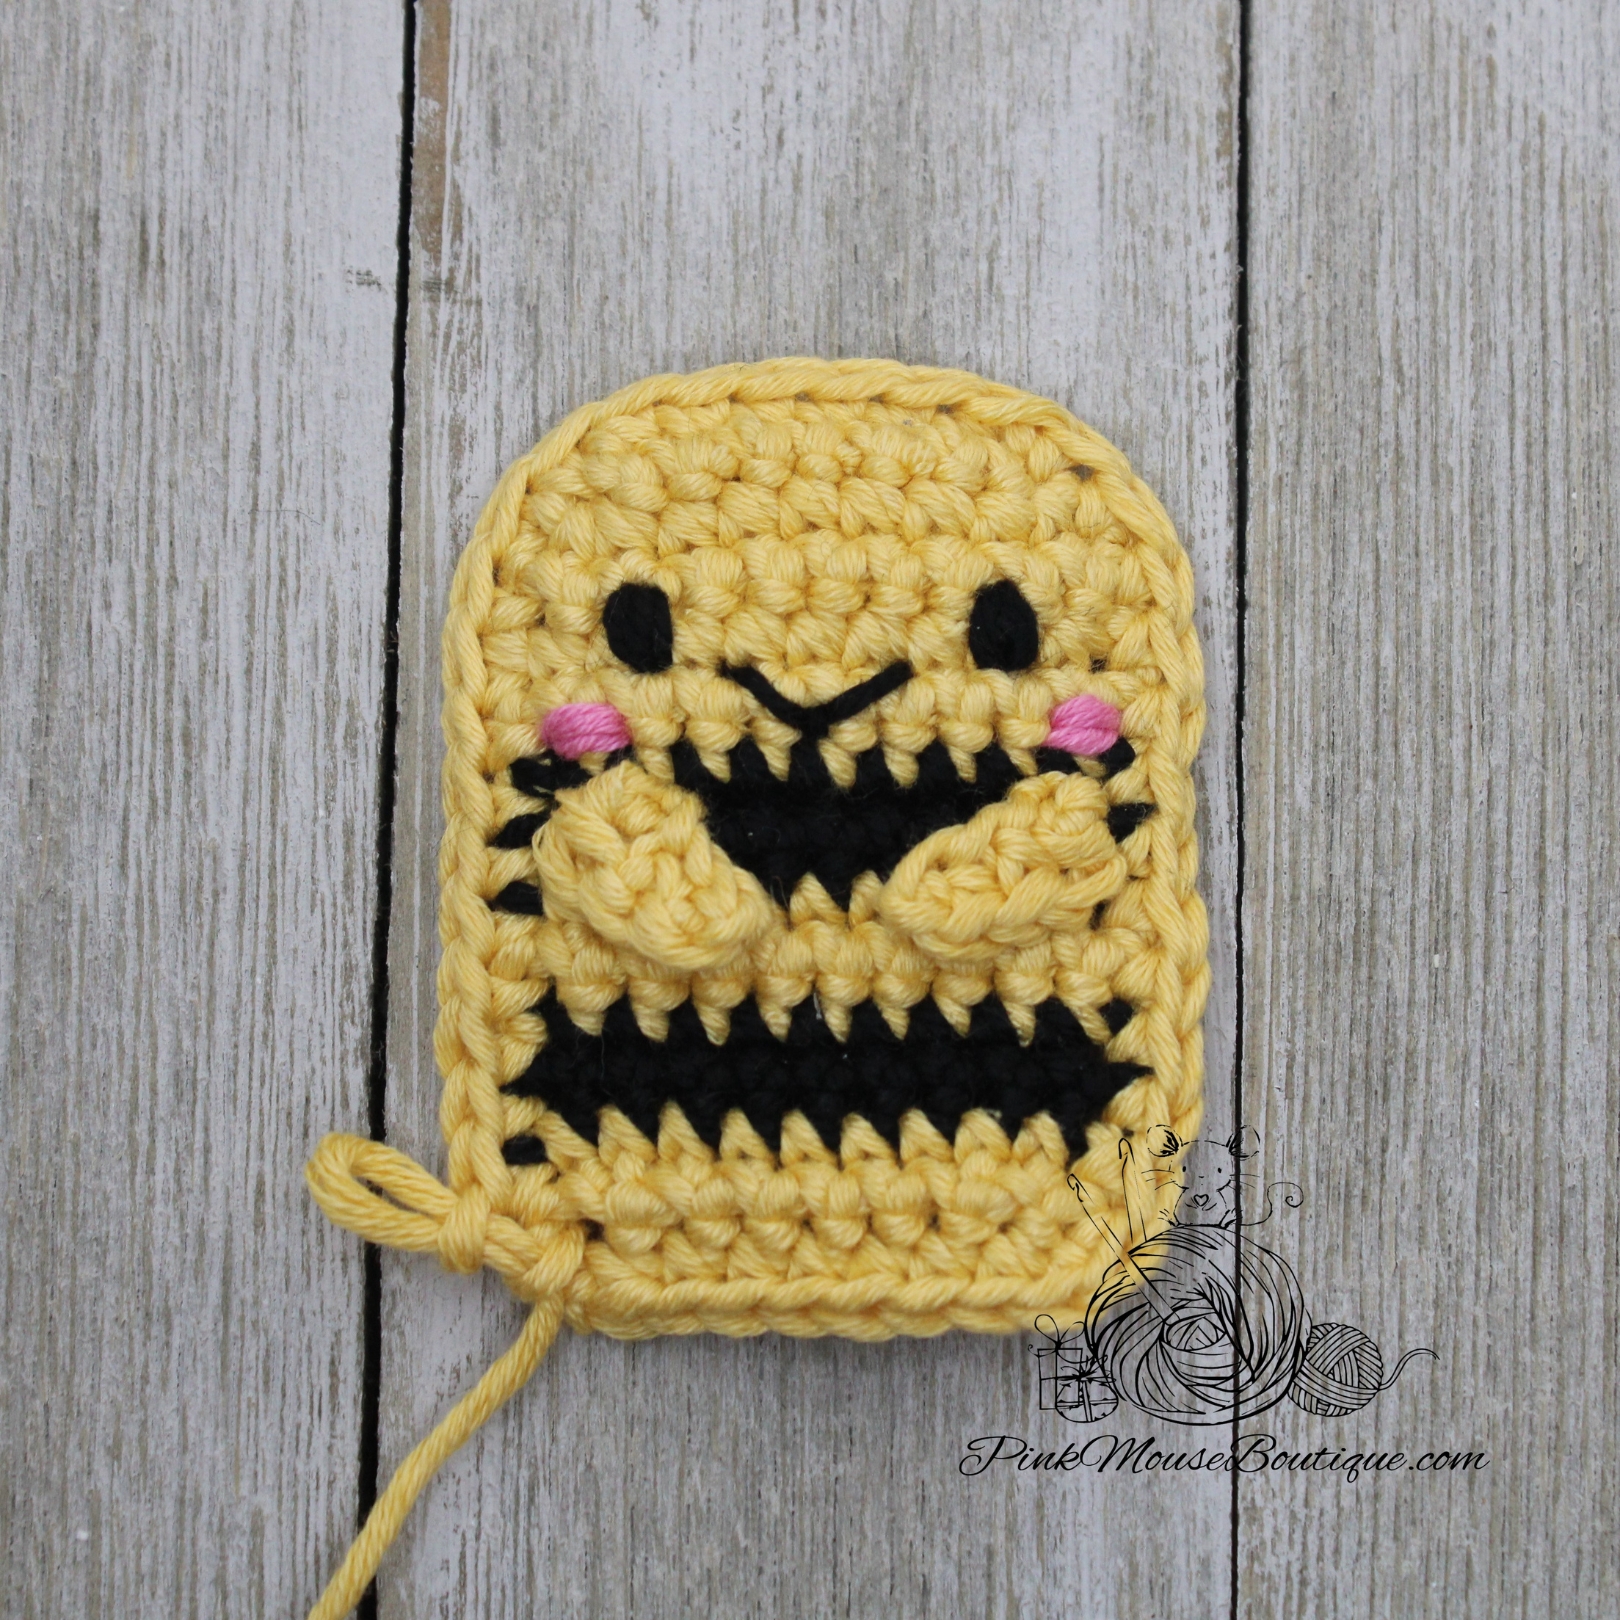
- The facial features will be sewn to the piece that has not been fasten off.
- With Black yarn, sew the eyes on Row 4 or 5, 5 stitches apart.
- With Black yarn, sew a line between the eyes. The line should be 3 stitches long.
- Insert the needle a row below the mouth and in the middle. Pull and go around the mouth to form a curve. Insert the needle again through the same stitch and pull. Tie a knot to secure the ends.
- With Dark Pink, sew a couple of times a row below the eyes to make the cheeks.
- Sew the arms a row below the cheeks.


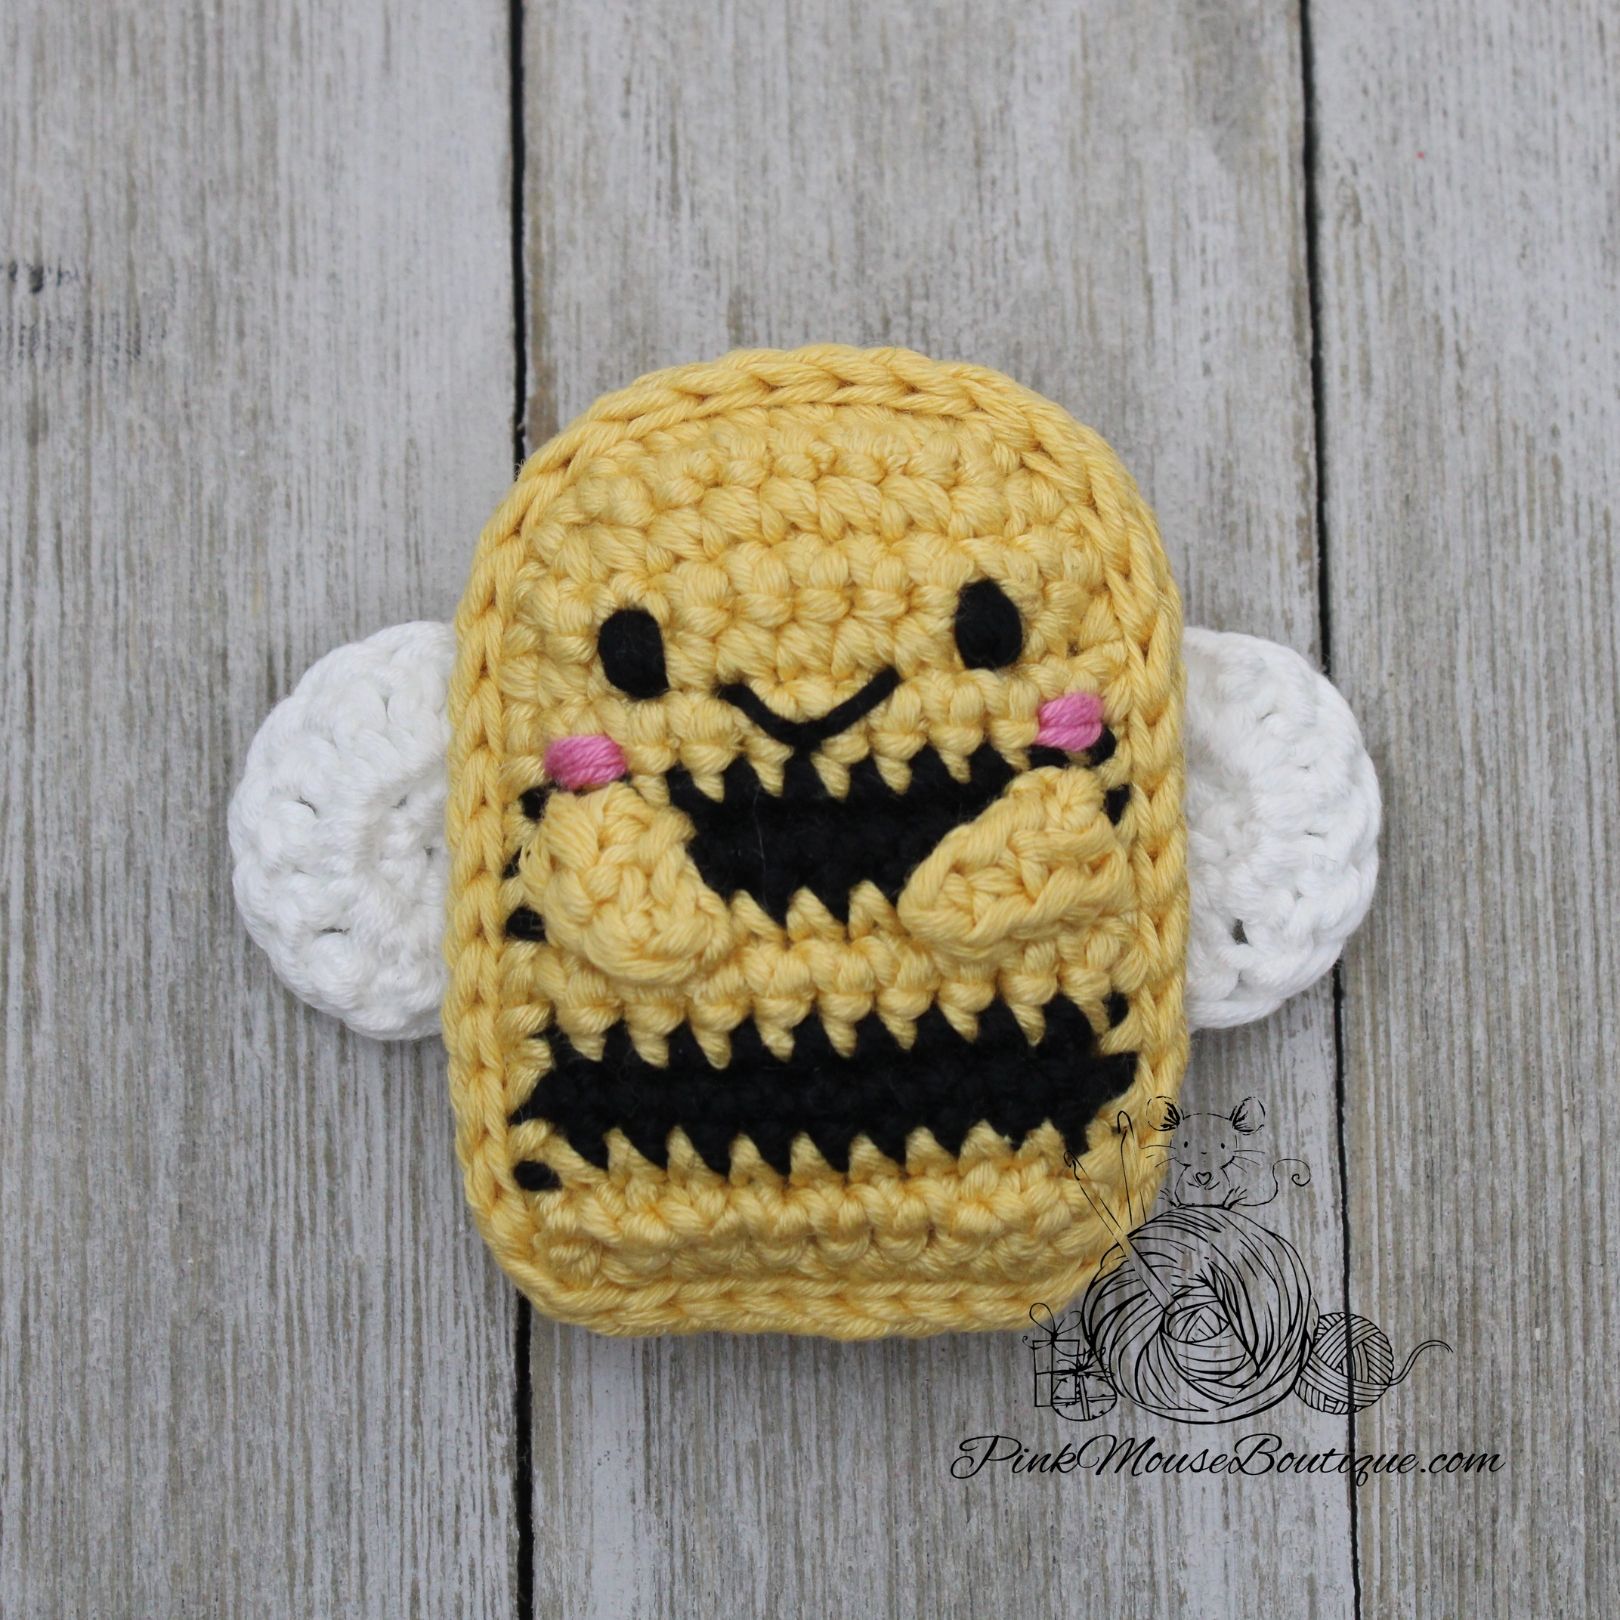
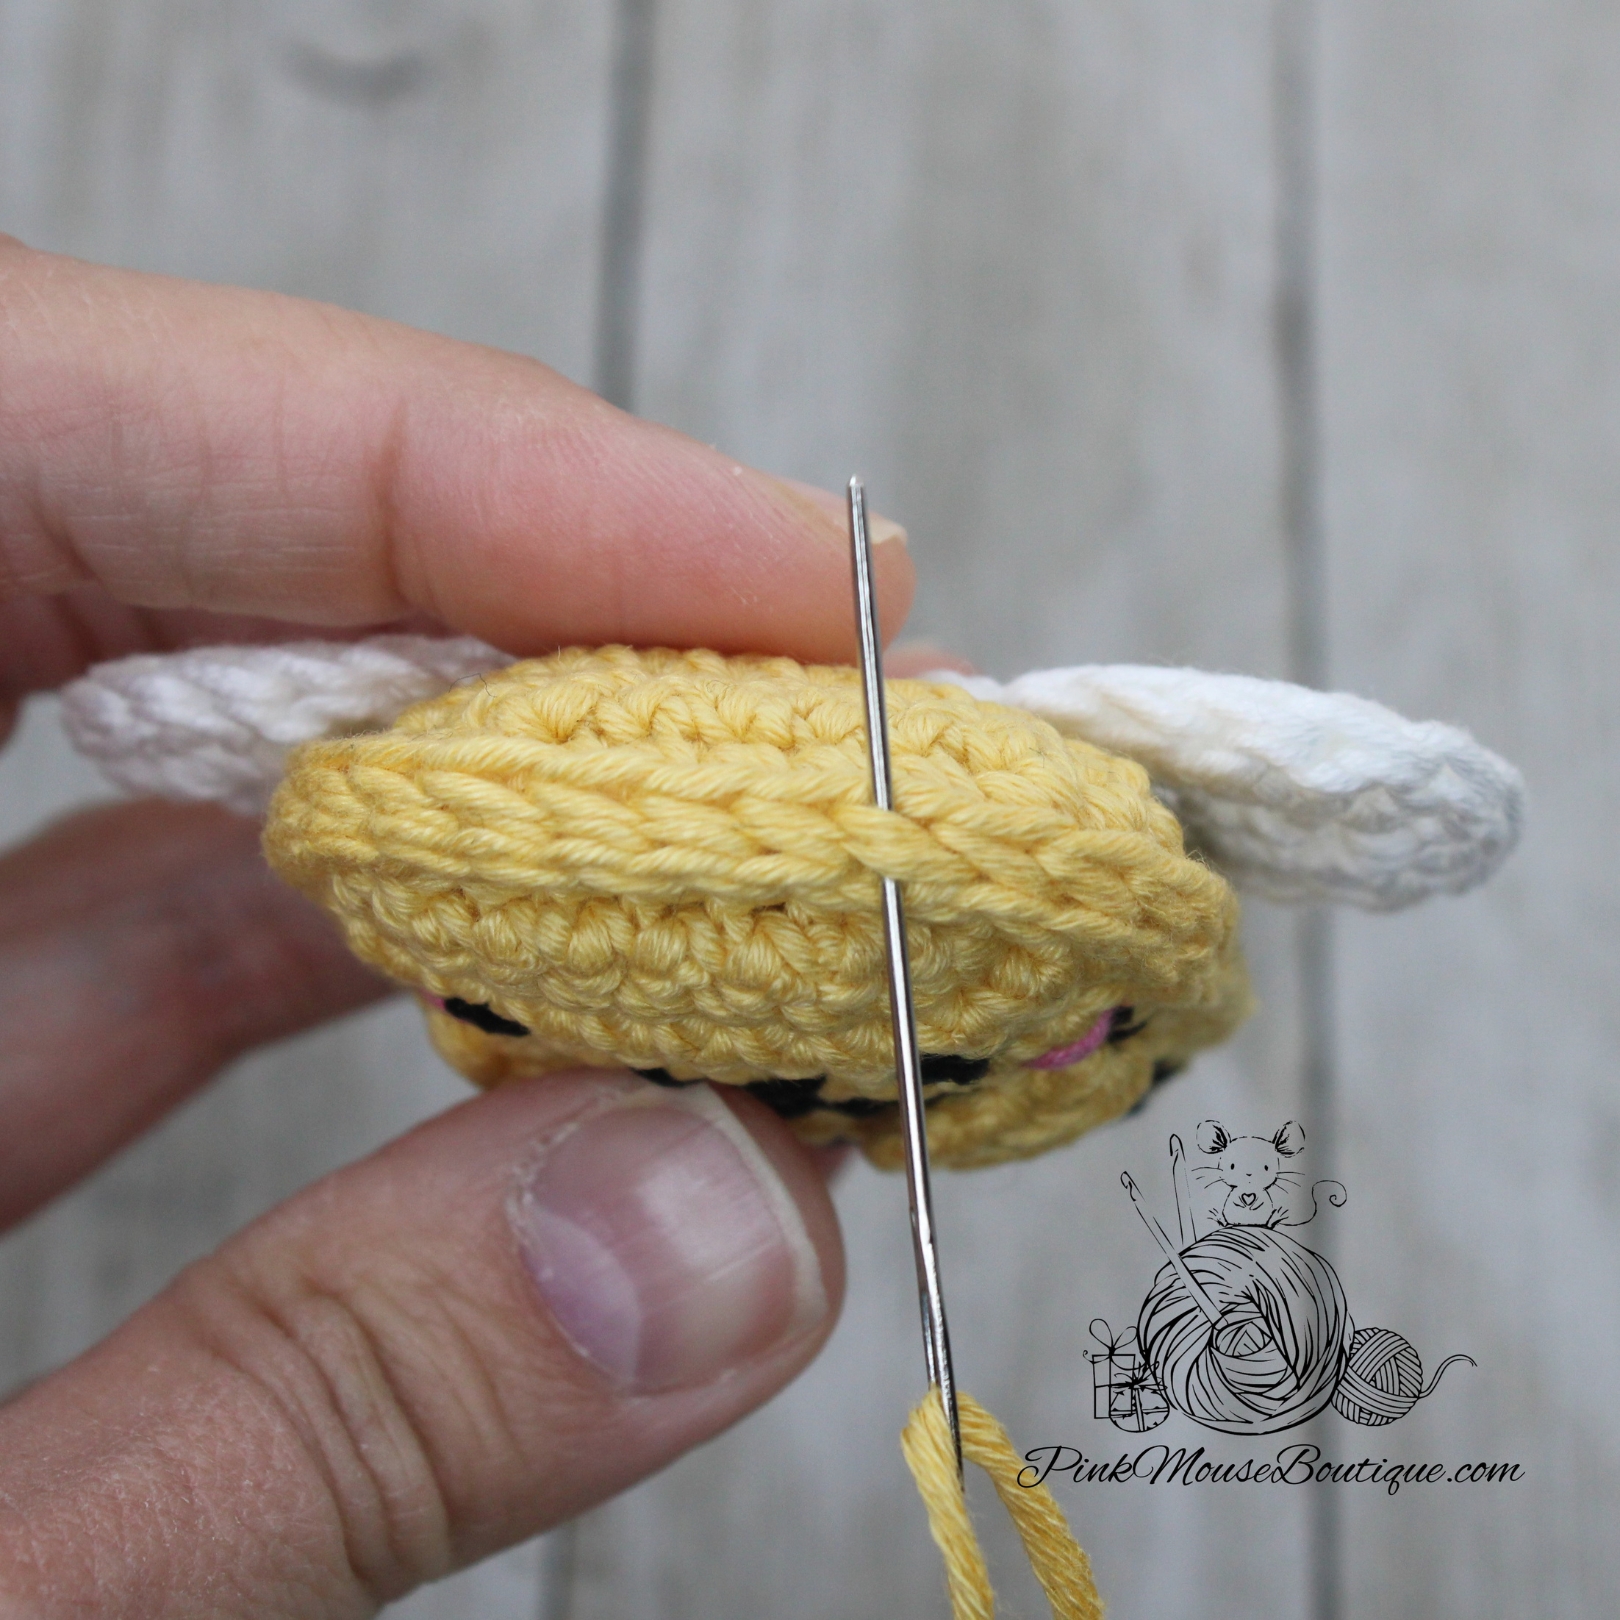
7. Place the two pieces of the body together with the right side facing out. Slip stitch all around going through both pieces. Stuff lightly before you finish closing the body. Finish closing the body, fasten off, and secure the stitches (I tie knots and stuff inside the body).
8. Sew the wings at the back of the body.
9. Sew the antennae in place using the BLO of the front piece and the FLO of the back piece.

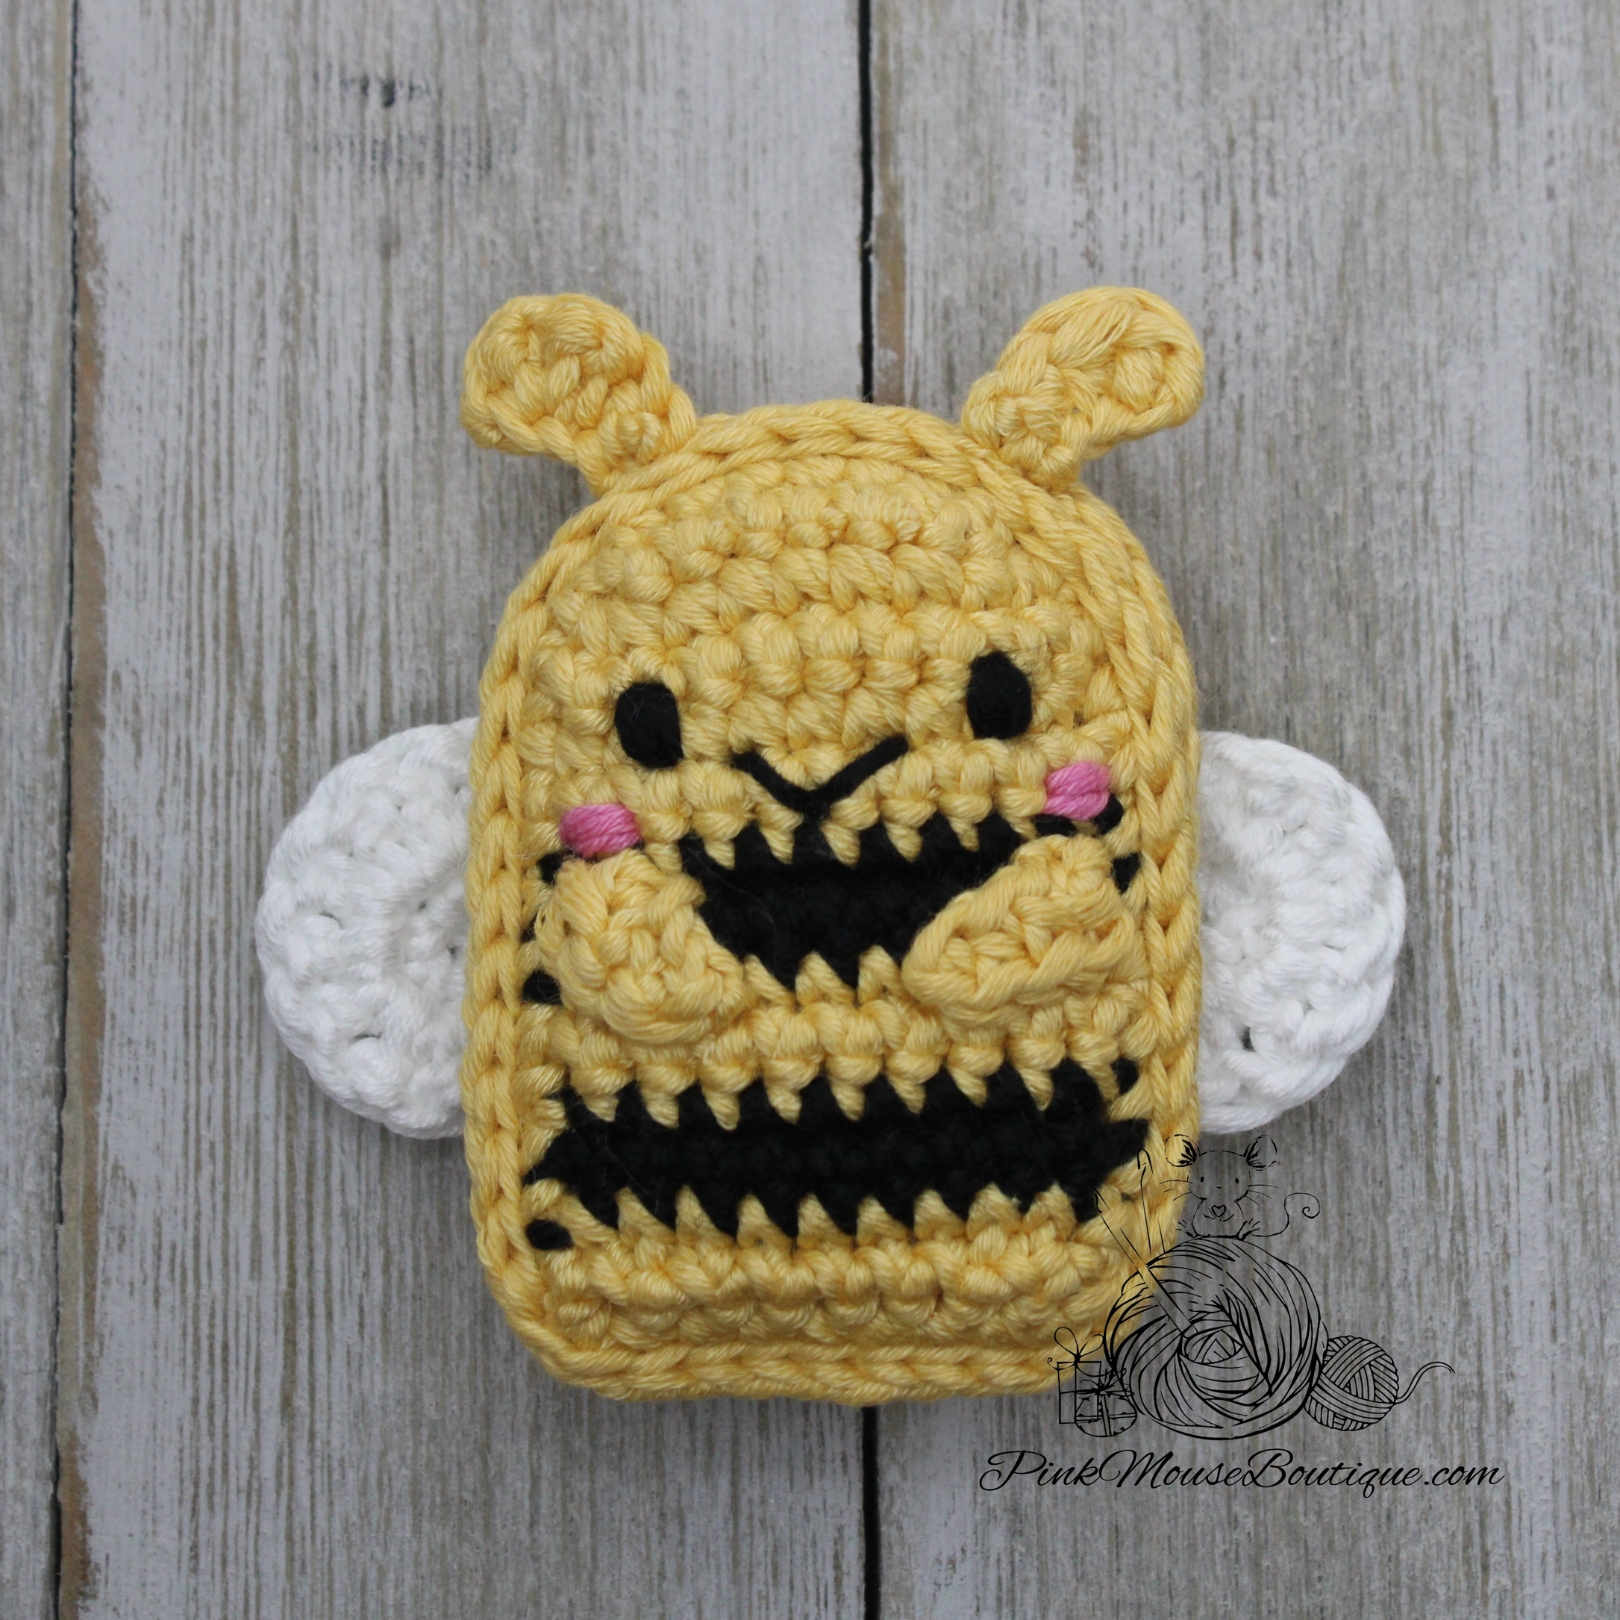


And your little bee is finished!
I hope you enjoyed making this critter. Please let me know in the comments.
Happy Crochet!

Thank you so much. I am working on the bear. I had to wait on the yarn. I am new, and wondered if you knew what size hook would be best with Yarn Art Begonia. I have some that I have never used, and I thought maybe I could try some of it for the colors I do not have.
Again, thank you so much. Very easy to follow pattern. Ready to sew my bear together, but that’s where I end up with the most problems.
Vickie
LikeLike
I have never used that yarn. But whatever hook size they suggest on the packaging, just use one number smaller for amigurumi.
I hear you on the sewing. It’s not my favorite part either. 🙂
LikeLike
Thank you so much.
LikeLike