Pocket Valentines – Part 1 (Crochet Pattern)

This year for Valentine’s Day, I wanted to create a design that is adorable, but also easy and quick to make; something that even a beginner can crochet without frustration; something that can be made last minute. My first idea was to put a tiny bear in an envelope. But once I made that, the idea of the speech bubble with the little heart came to me. Then while my testers were testing the pattern, I crocheted several other little animals using the pattern for the bear. And now, we have a pattern with several parts. Best of all, you have choices of what animal to make depending on who you are making this Valentine for.

And because the pattern is growing and because I wanted to make it easy to follow, I decided to split it in small parts.

Please note that the instructions for all Pocket Valentines will be available on my blog free of charge. If you’d like the PDF version which includes all patterns in a convenient downloadable document, you can visit my shops below.

Pocket Valentines on Etsy

Pocket Valentines on Ravelry

Or click on the links below to access the free version for each little critter.

Part 1: Envelope, Speech Bubble, and Heart

Part 2: Bear

Part 3: Narwhal

Part 4: Frog, Bunny, and Pig

Part 5: Bee

Part 6: Fox

Part 7: Axolotl

Part 8: Jellyfish

Part 9: Butterfly

There may be more critters in the future, but today we will begin by making Part 1.

MATERIALS

  1. Drops Muskat, Cotton Yarn Worsted
  2. Light grey: envelope
  3. Red: seams
  4. White: stamp
  5. Crochet hook – Clover Amour, 3.25 mm
  6. Sewing needle and scissors

Abbreviations

mr – magic ring

ch – chain

st – stitch

sl st – slip stitch

sc – single crochet

hdc – half double crochet

dc – double crochet

BLO – back loop only

FLO – front loop only

inc – increase

dec – decrease

Helpful Tutorials

Back Bump of Chain

Front Loop Only and Back Loop Only

Note: You will notice that when I decrease in the pattern, I either crochet in the BLO or the FLO. I do that because it makes the decrease neater, or invisible. You can do a normal decrease and insert the hook in both loops when decreasing if that is what you prefer.

SPEECH BUBBLE PATTERN

Suggested color – White

Ch 7

Row 1: in back bump of ch only 2 sc in 2nd ch from hook, 1 sc in 4 chains, 2 sc in last ch; ch 1 and turn – 8 sts

Row 2: inc, 1 sc in 6 sts, inc; ch 1 and turn – 10 sts

Rows 3 – 6: sc in each st; ch 1 and turn – 10 sts (4 rows)

Row 7: sc, in FLO dec, 1 sc in 4 sts, in FLO dec, sc; ch 1 and turn – 8 sts

Row 8: 1 sc in 4 sts; ch 1 and turn – 4 sts

Row 9: in FLO 2 dec; ch 1 and turn – 2 sts

Row 10: in BLO dec; ch 1 and turn – 1 st

Row 11: 1 sc

Sc all around the speech bubble, in every st and row. Slip stitch to join to the st of Row 11. You should have 31 sts.

Fasten off and weave in the ends.

HEART PATTERN

Suggested color – Dark Pink

Round 1: in a mr 2 sc, hdc, 3 dc, ch 2 and sl st, ch 2 and 3 dc, hdc, 2 sc; sl st to join – 13 sts

Fasten off. Pull beginning tail to close the ring.

I used a hot glue gun to attach the heart to the speech bubble.

Set it aside and let’s continue with the Stamp and Envelope.
STAMP

Suggested Color – White

Ch 8

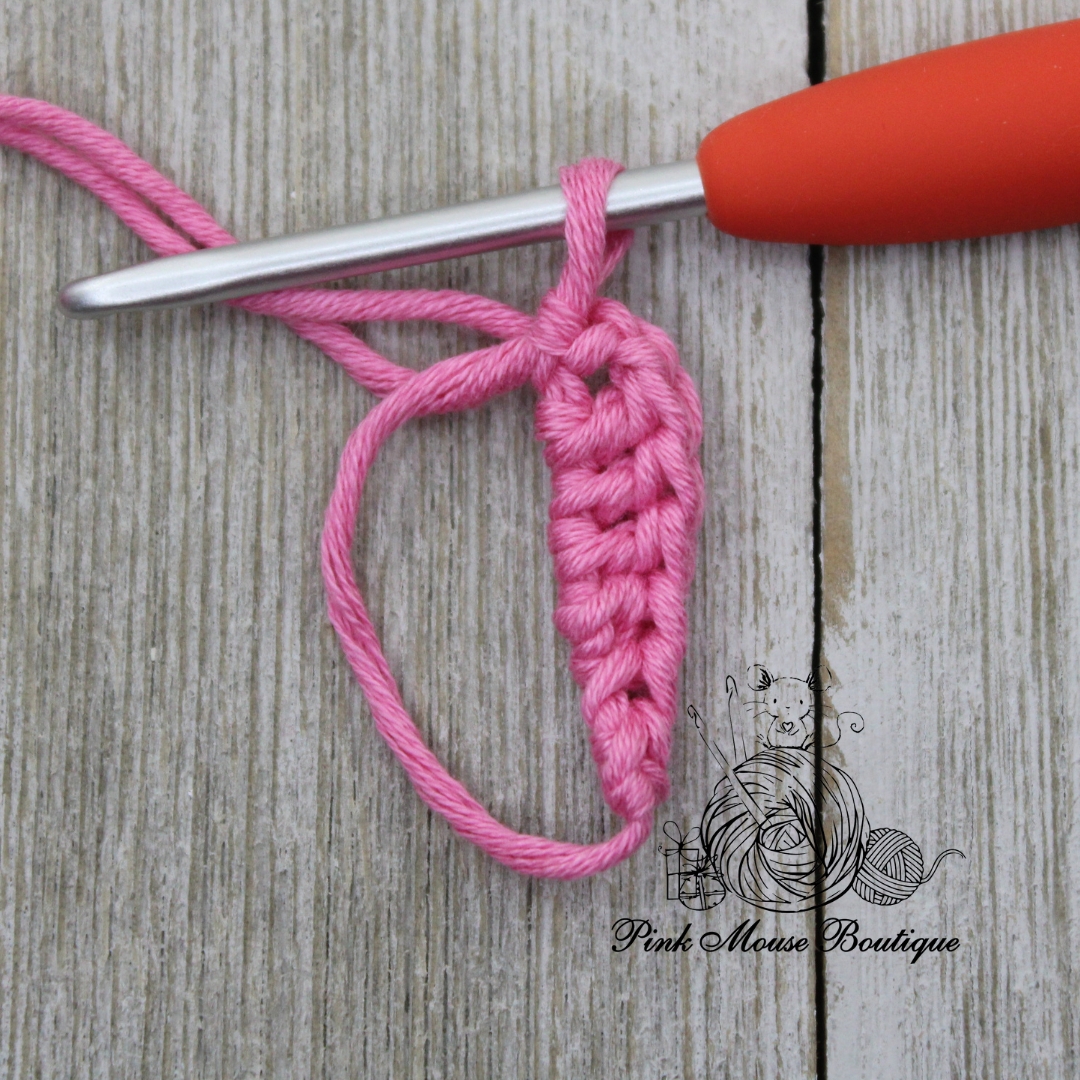
Row 1: in back bump of ch, 1 sc in 2nd ch from hook, 1 sc in every ch; ch 1 and turn – 7 sts

Rows 2 – 7: sc in each st; ch 1 and turn – 7 sts (6 rows)

Row 8: sc in each st – 7 sts

Fasten off leaving a tail for sewing.

STRAP

Suggested Color – Light Grey

Leaving a long beginning tail 23 fsc. Fasten off leaving a tail for sewing. Set aside.

ENVELOPE – FRONT PIECE

Suggested Color – Light Grey

Ch 31

Row 1: in back bump of ch, 1 sc in 2nd ch from hook, 1 sc in every ch; ch 1 and turn – 30 sts

Rows 2 – 20: sc in each st; ch 1 and turn – 30 sts (19 rows)

Row 21: sc in each st – 30 sts

1 sc in each row going down the left side of the piece – 20 sts

2 sc in the corner st

1 sc in each st – 28 sts

2 sc in the corner st

Sc in each row going up – 28 sts

Fasten off and weave in the ends.

ENVELOPE – BACK PIECE

Suggested Color – Light Grey

Ch 31

Row 1: in back bump of ch, 1 sc in 2nd ch from hook, 1 sc in every ch; ch 1 and turn – 30 sts

Rows 2 – 28: sc in each st; ch 1 and turn – 30 sts (27 rows)

Row 29: sc, in FLO dec, 24 sc, in FLO dec, sc; ch 1 and turn – 28 sts

Row 30: sc, in BLO dec, 22 sc, in BLO dec, sc; ch 1 and turn – 26 sts

Row 31: sc in each st; ch 1 and turn – 26 sts

Row 32: sc, in BLO dec, 20 sc, in BLO dec, sc; ch 1 and turn – 24 sts

Row 33: sc, in FLO dec, 18 sc, in FLO dec, sc; ch 1 and turn – 22 sts

Row 34: sc in each st; ch 1 and turn – 22 sts

Row 35: sc, in FLO dec, 16 sc, in FLO dec, sc; ch 1 and turn – 20 sts

Row 36: sc, in BLO dec, 14 sc, in BLO dec, sc; ch 1 and turn – 18 sts

Row 37: sc in each st – 18 sts

Sc in each row going down – 36 sts

2 sc in the corner st

1 sc in 28 sts

2 sc in the corner st

Sc in each row going up – 36 sts Fasten off and weave in the ends.
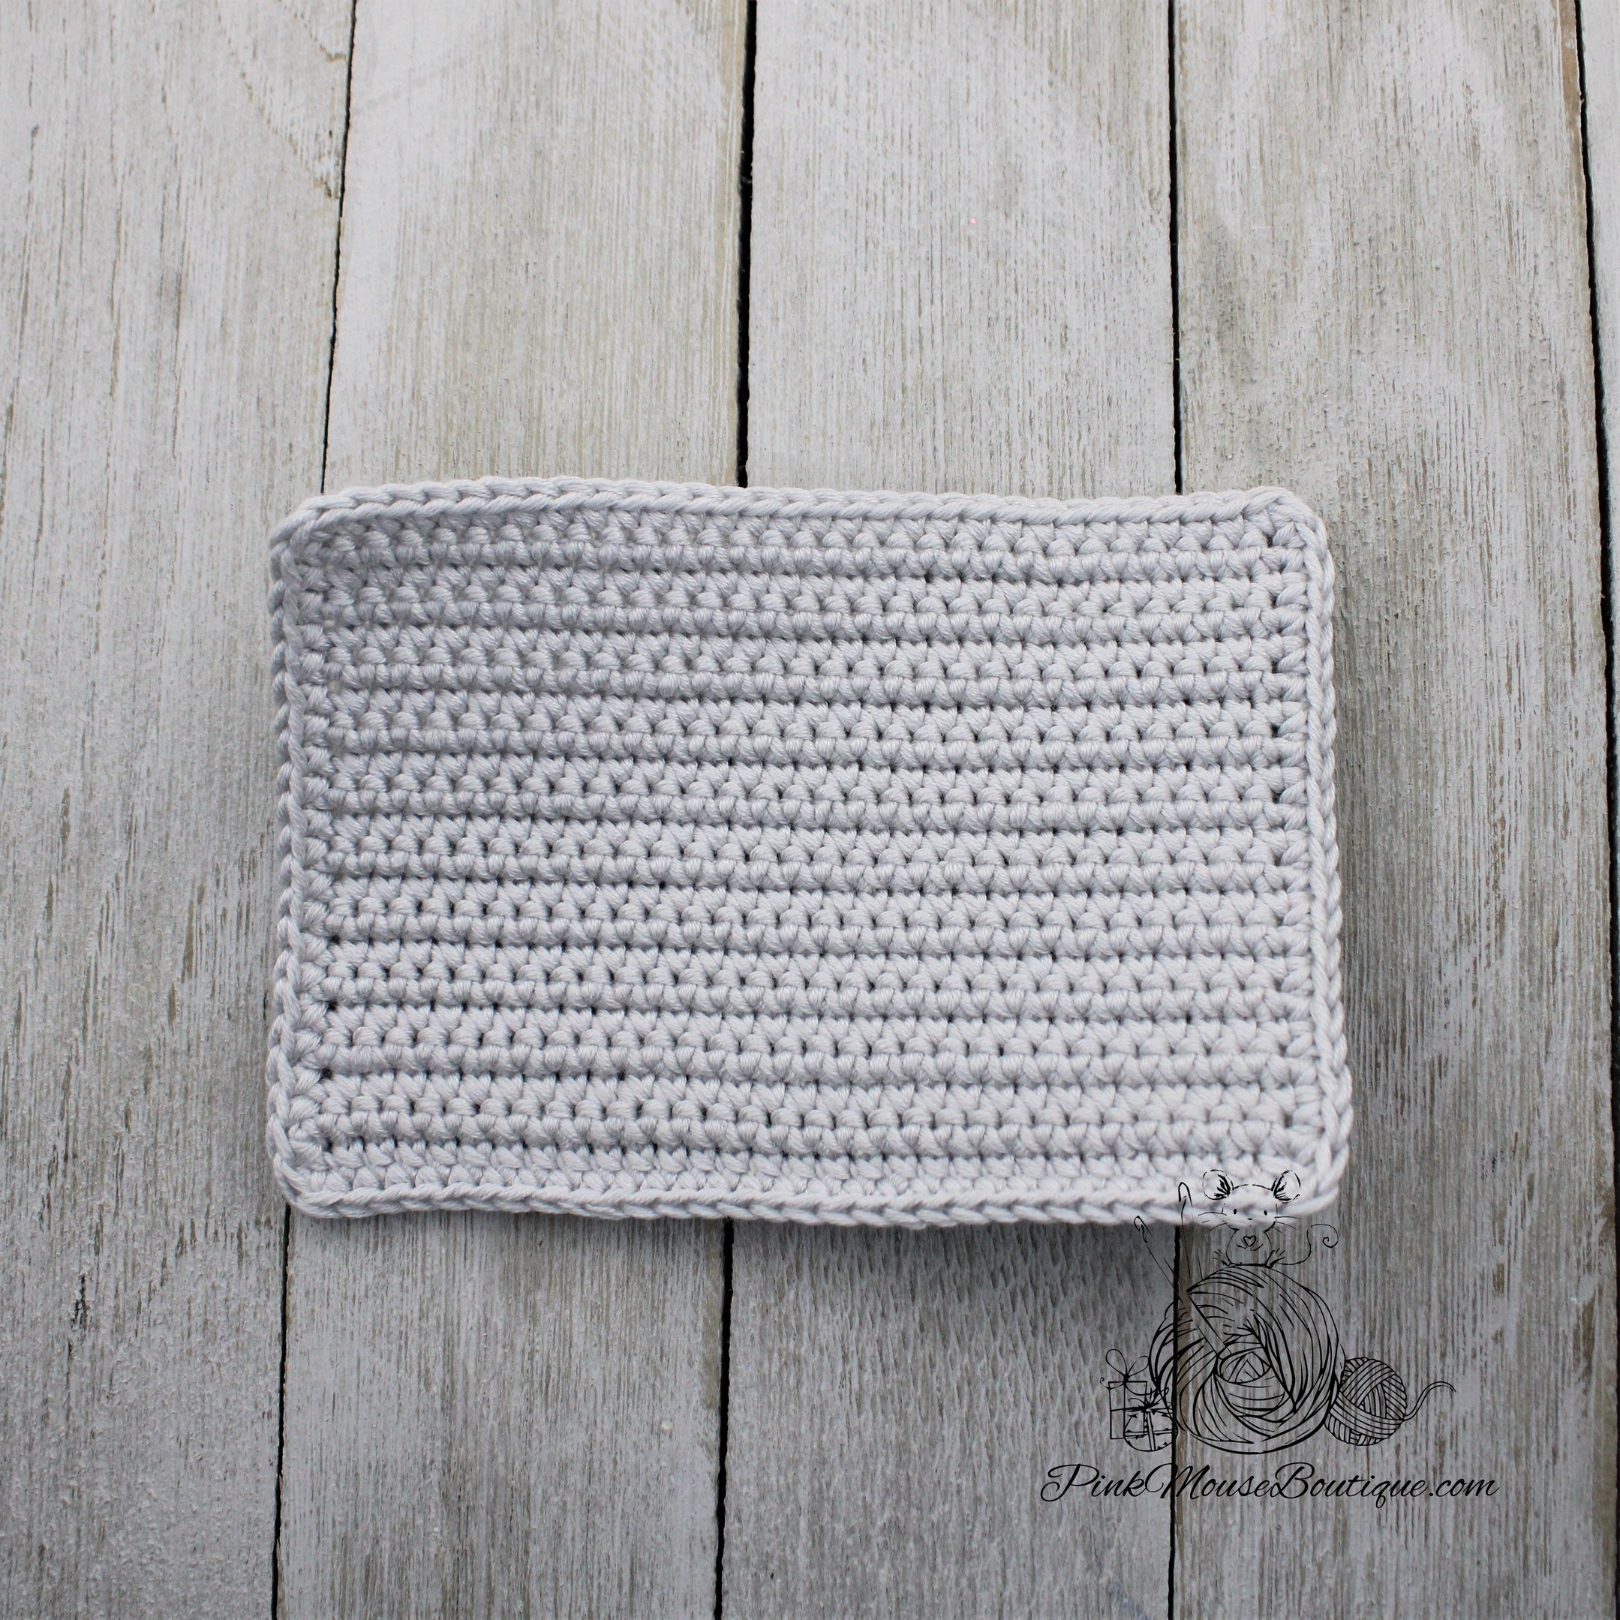
ASSEMBLY

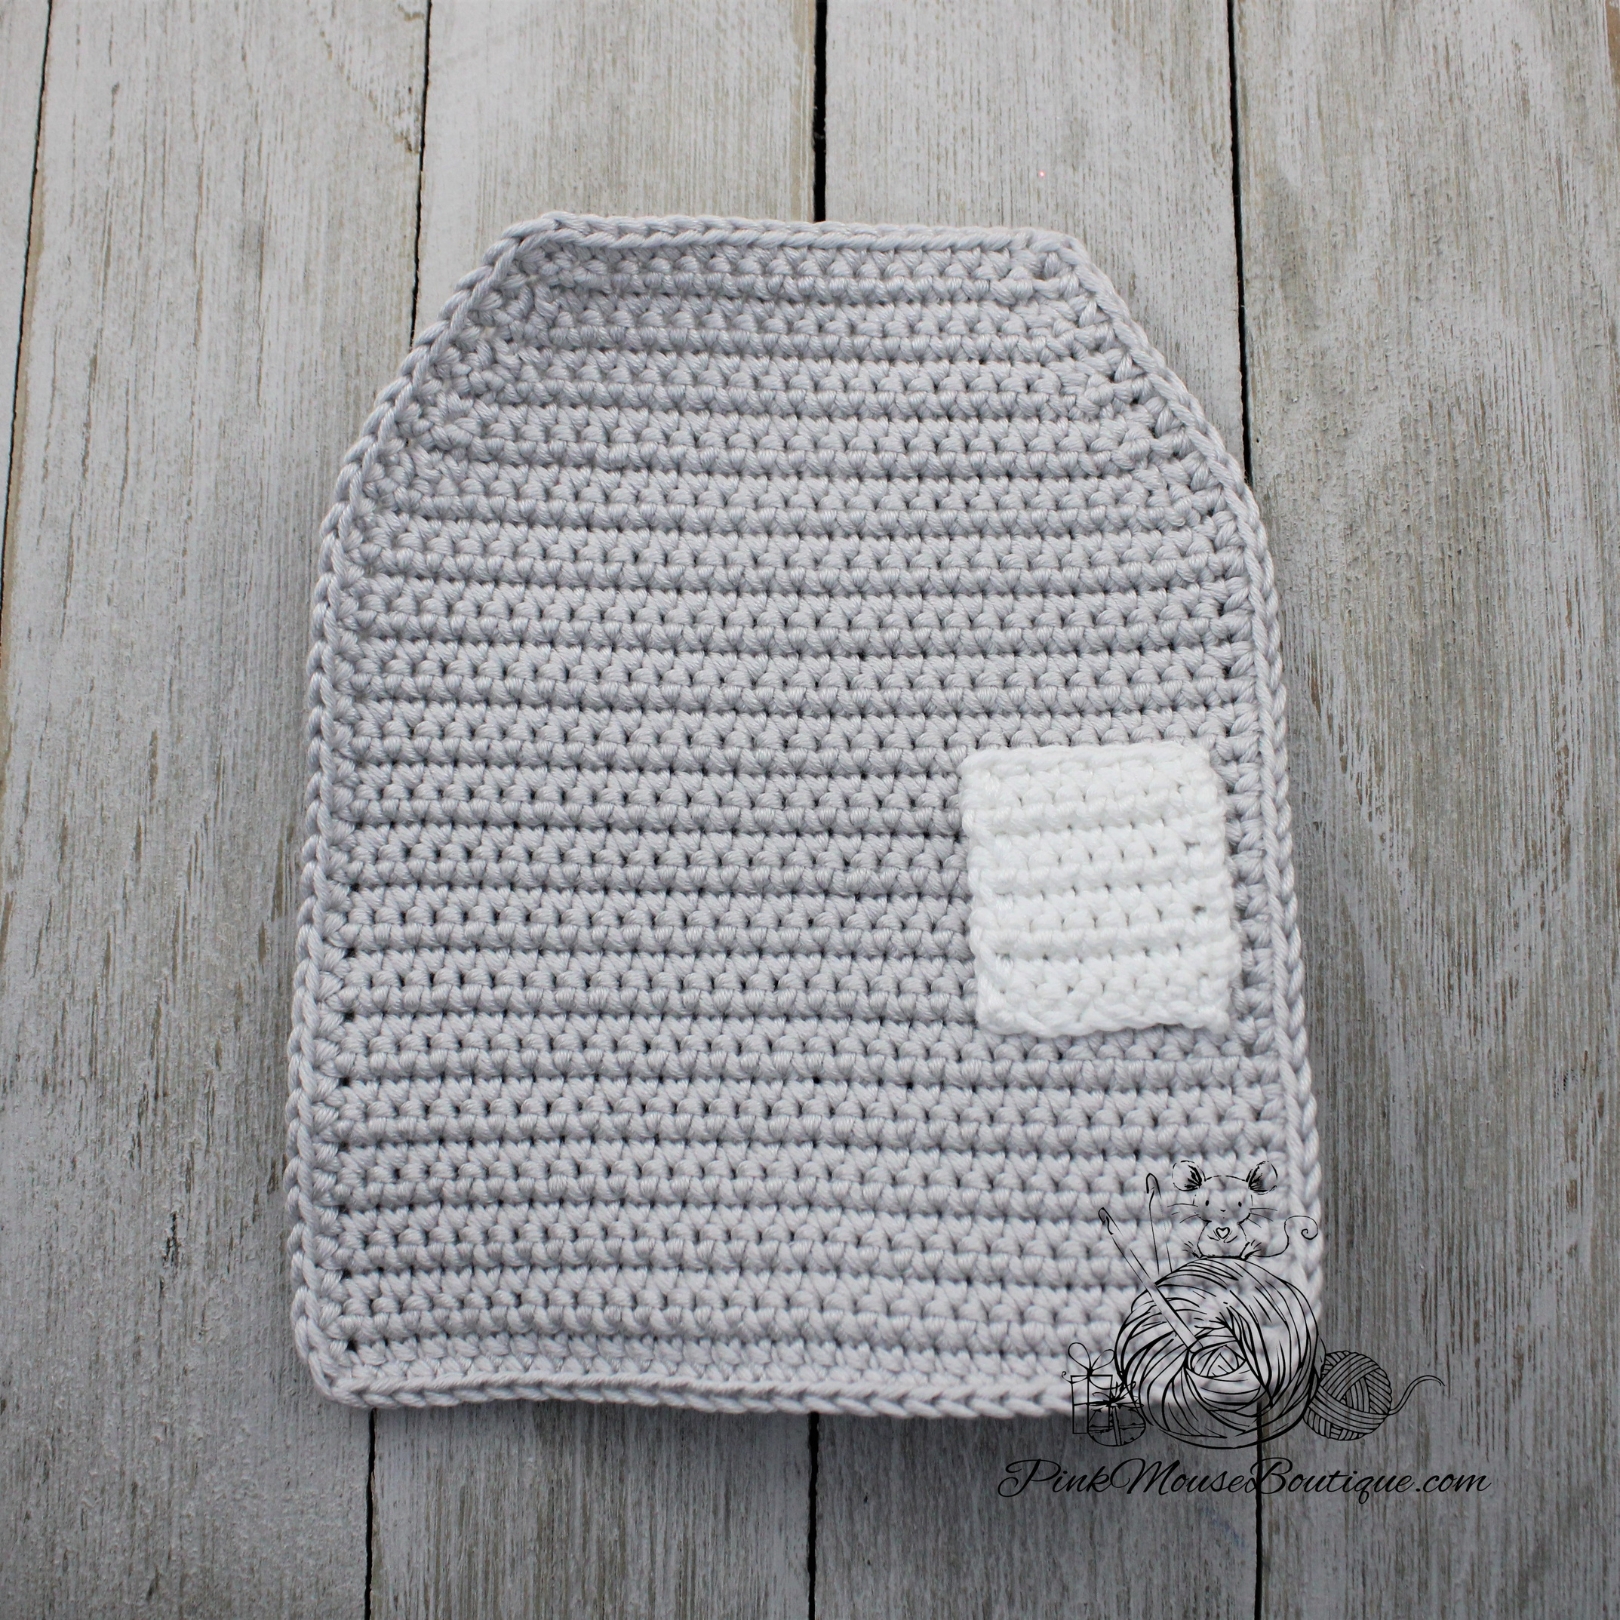
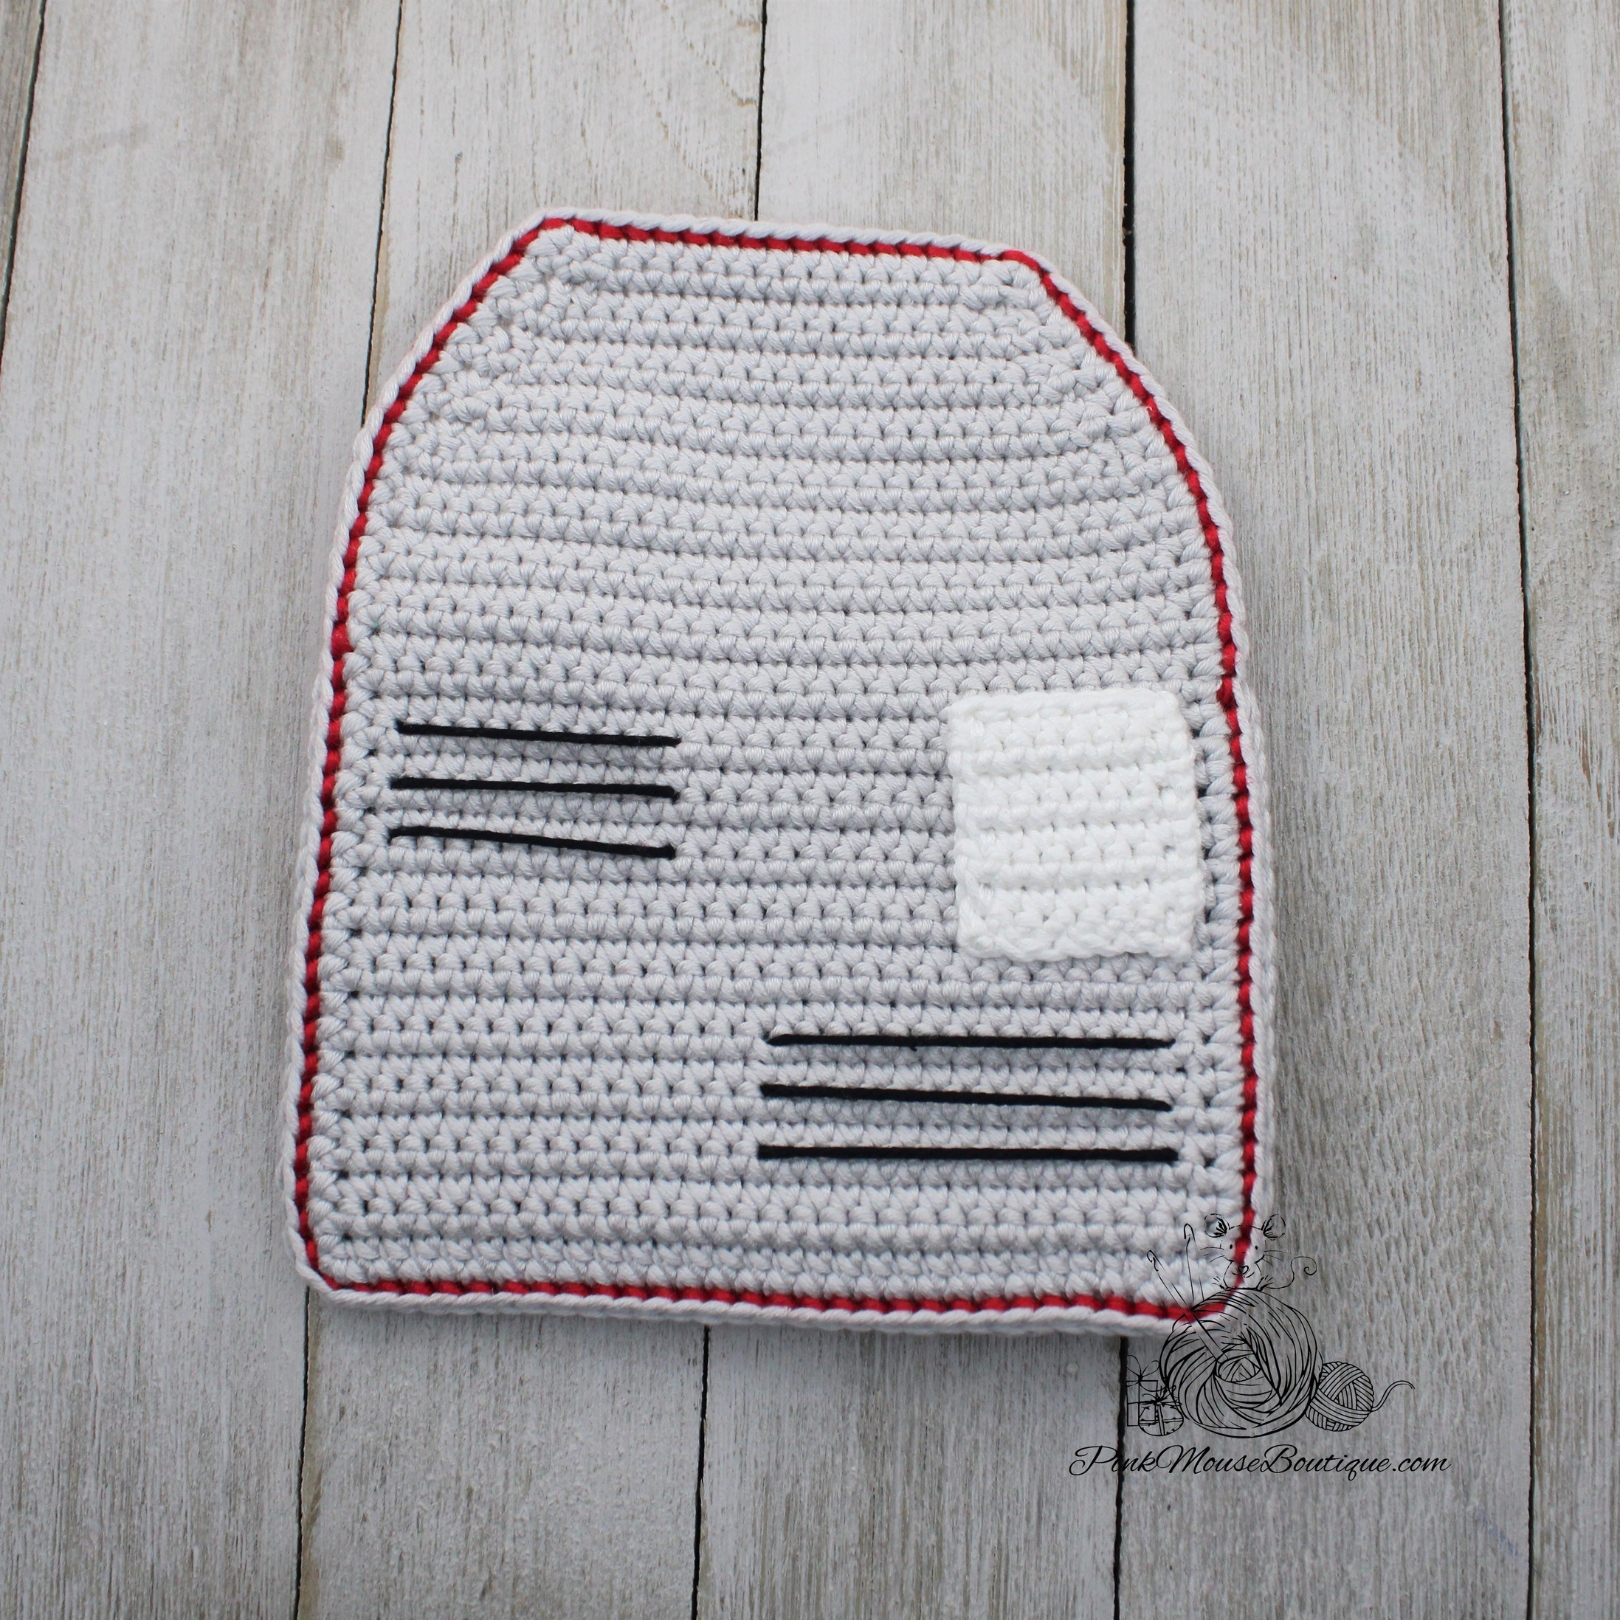
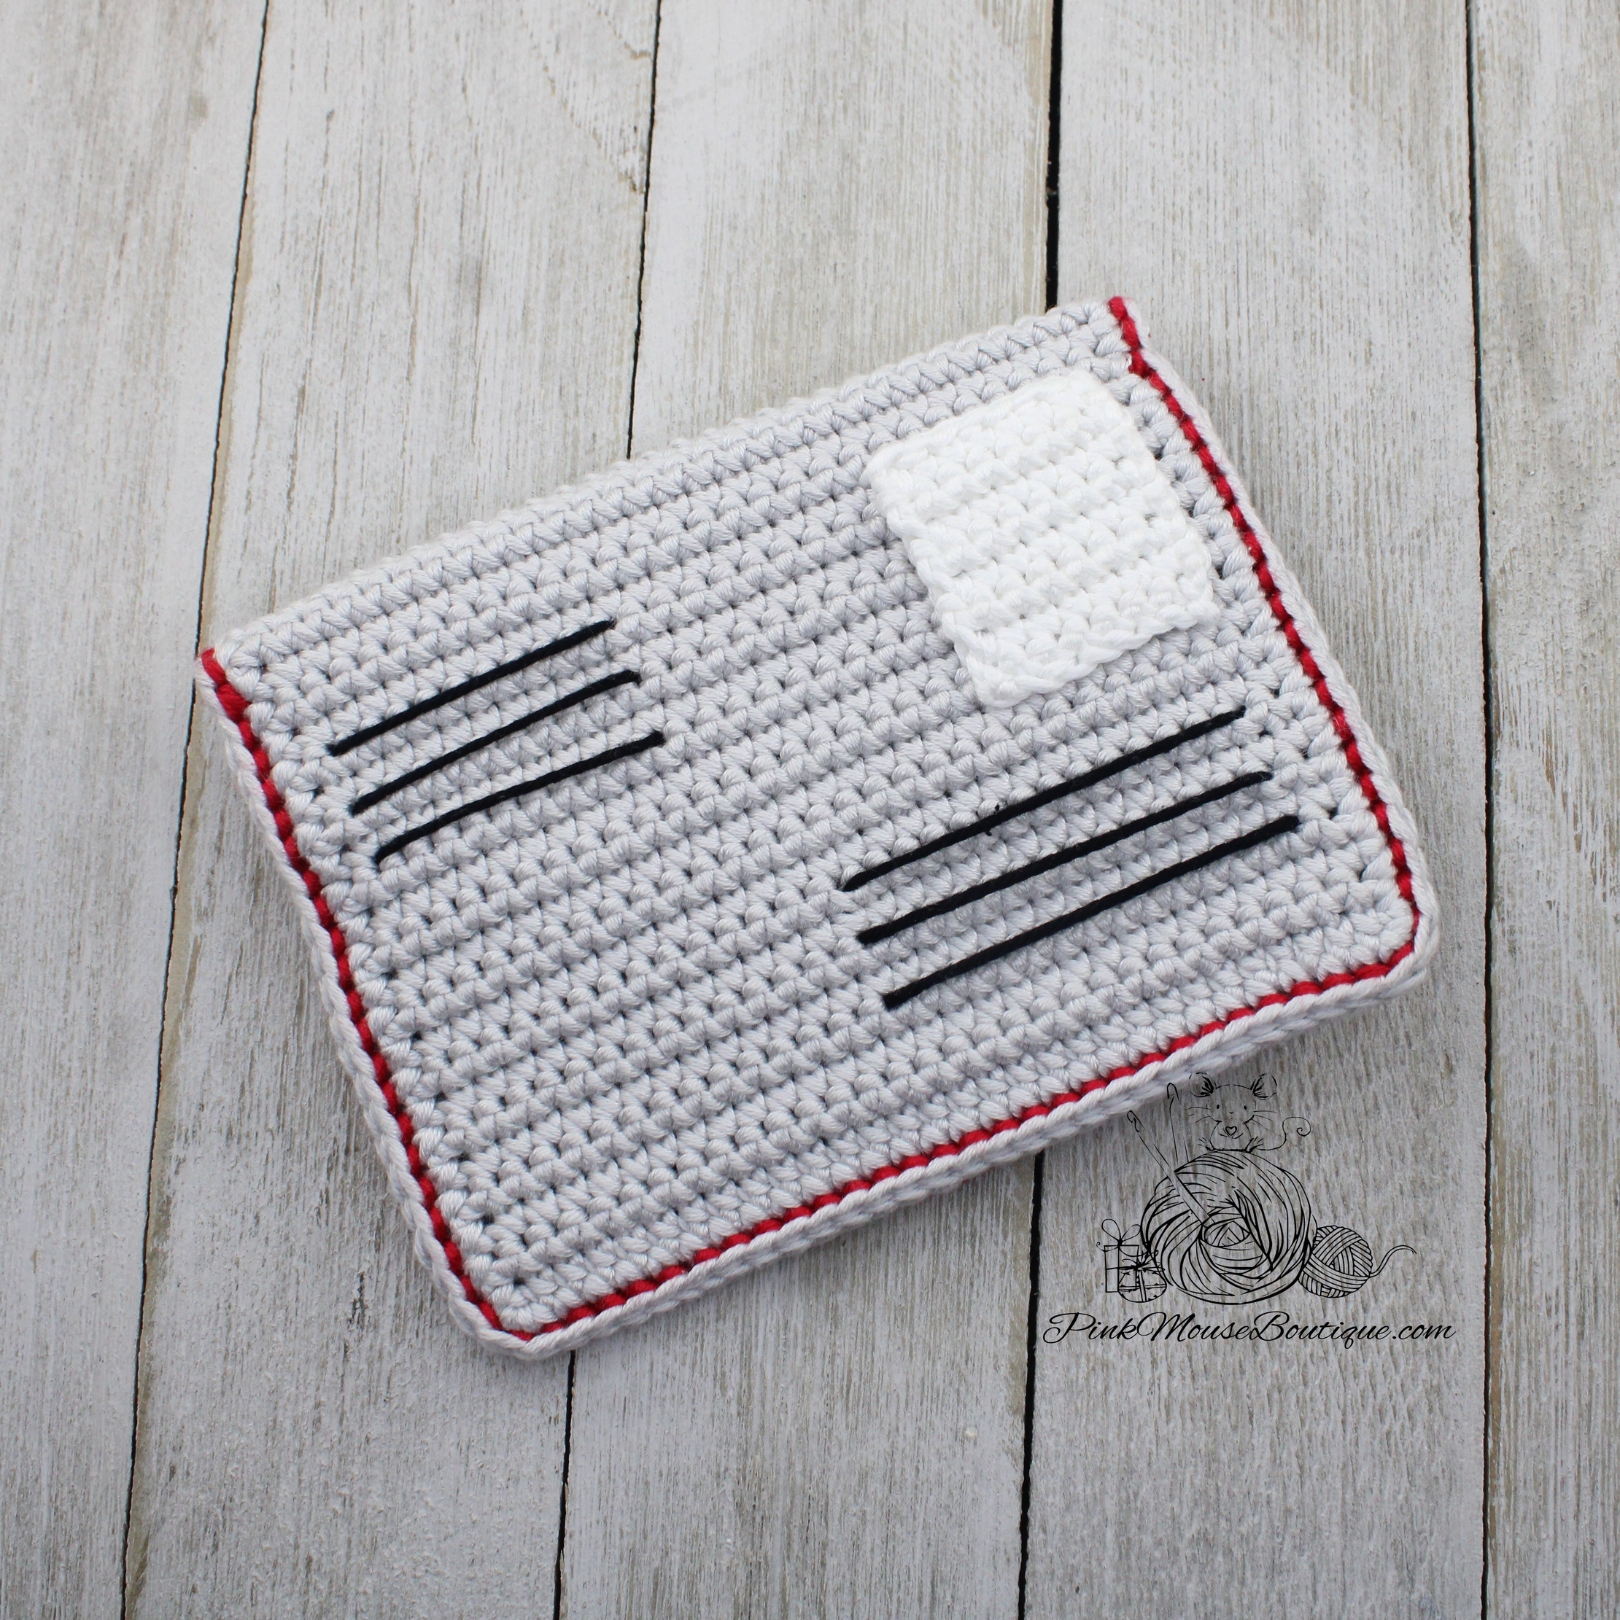
  1. Sew the stamp to the BACK PIECE between Rows 11 and 21. Weave in the ends.
  2. Using black yarn, sew 3 black lines starting 2 rows below the stamp. The lines should be 12 to 14 stitches long and sewn two rows apart. Weave in the ends.
  3. Using black yarn, sew three lines to the left of the stamp. The first line should be sewn on Row 15, the second line – on Row 17, and the last line – on Row 19. Weave in the ends.
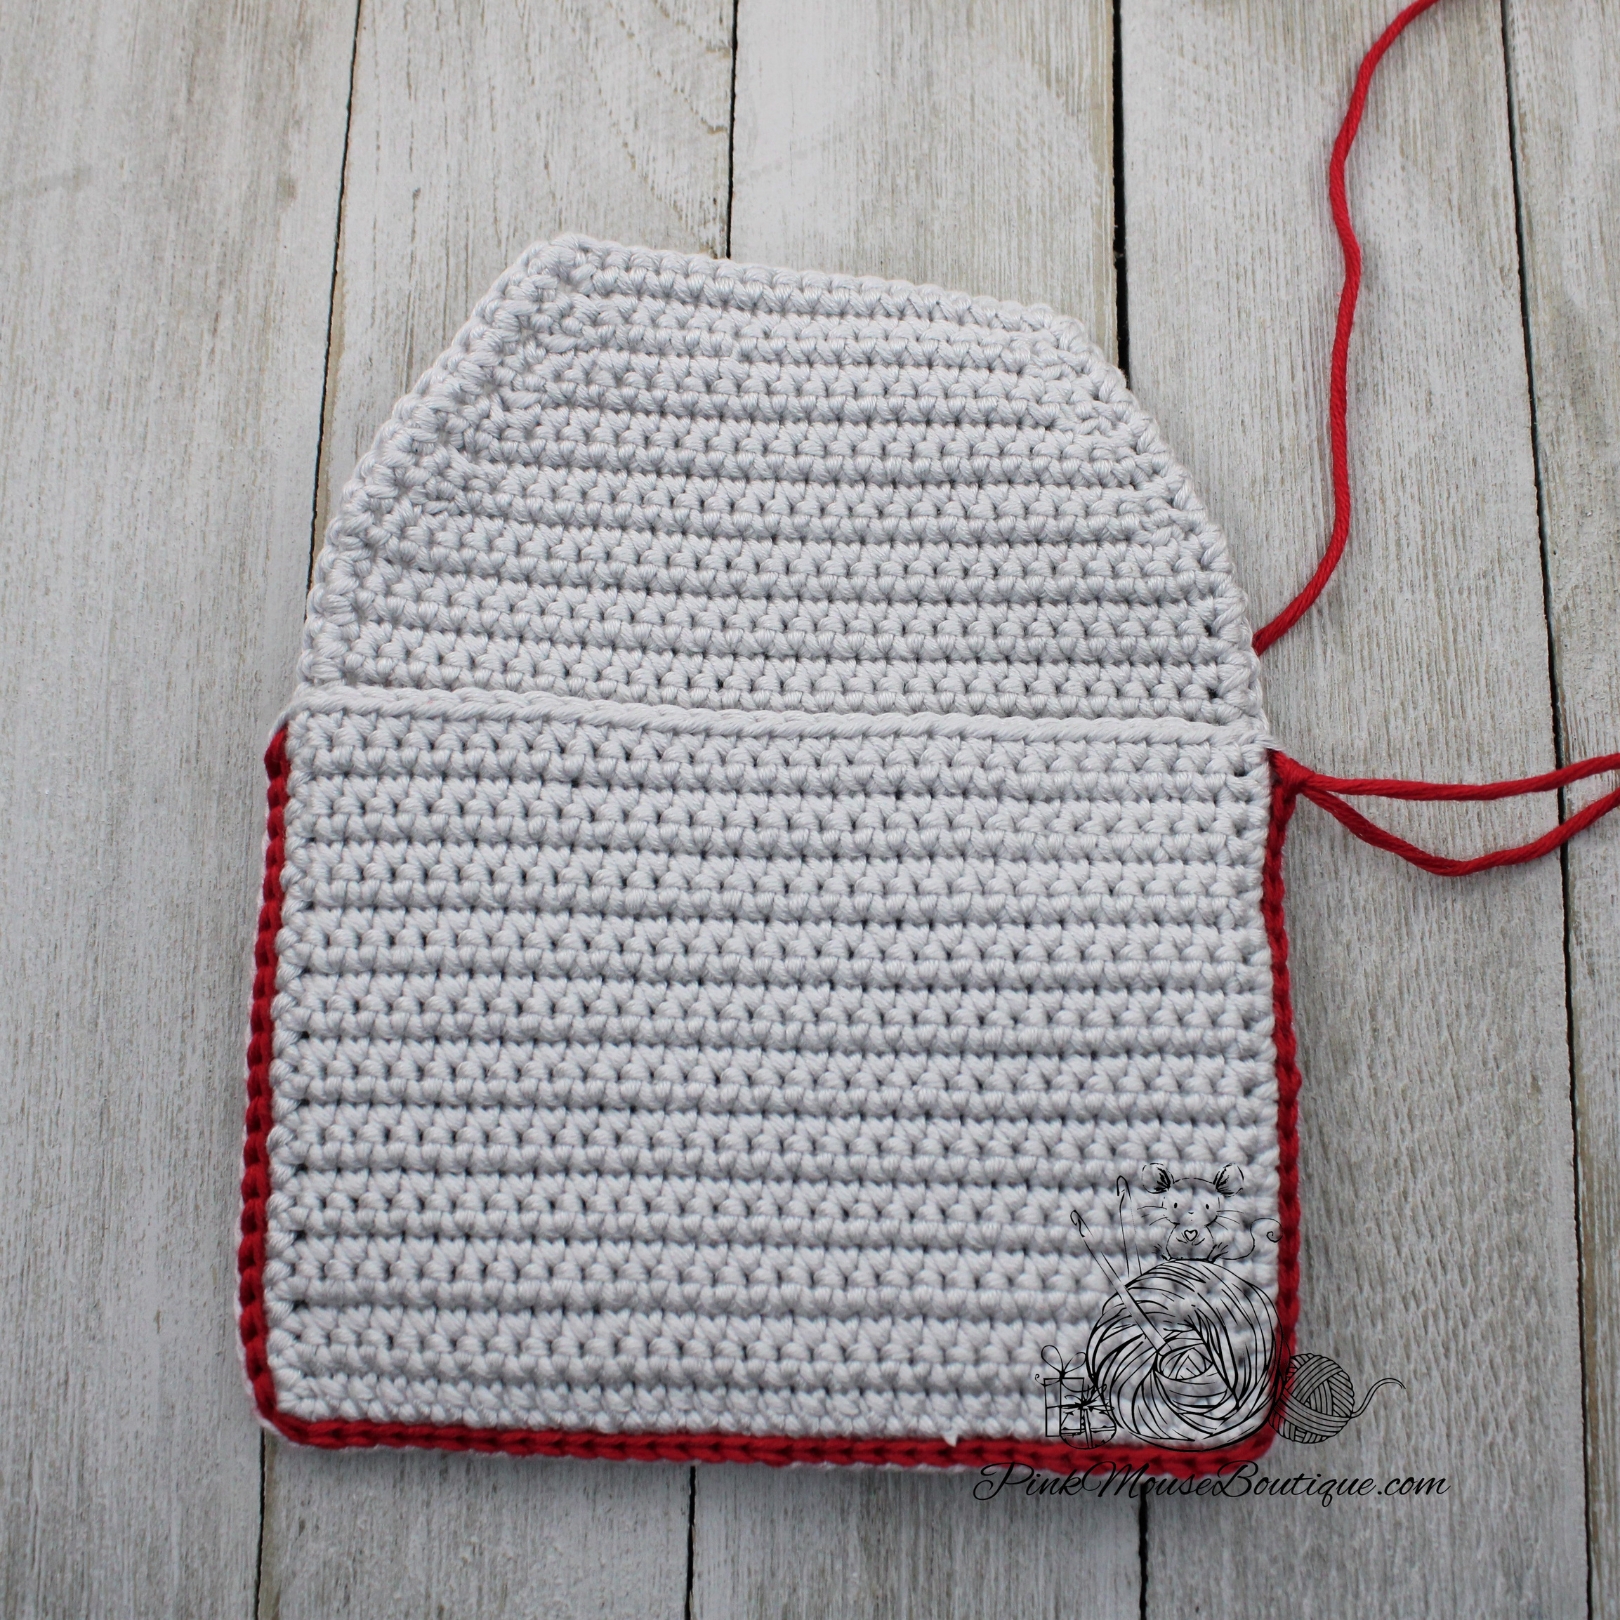
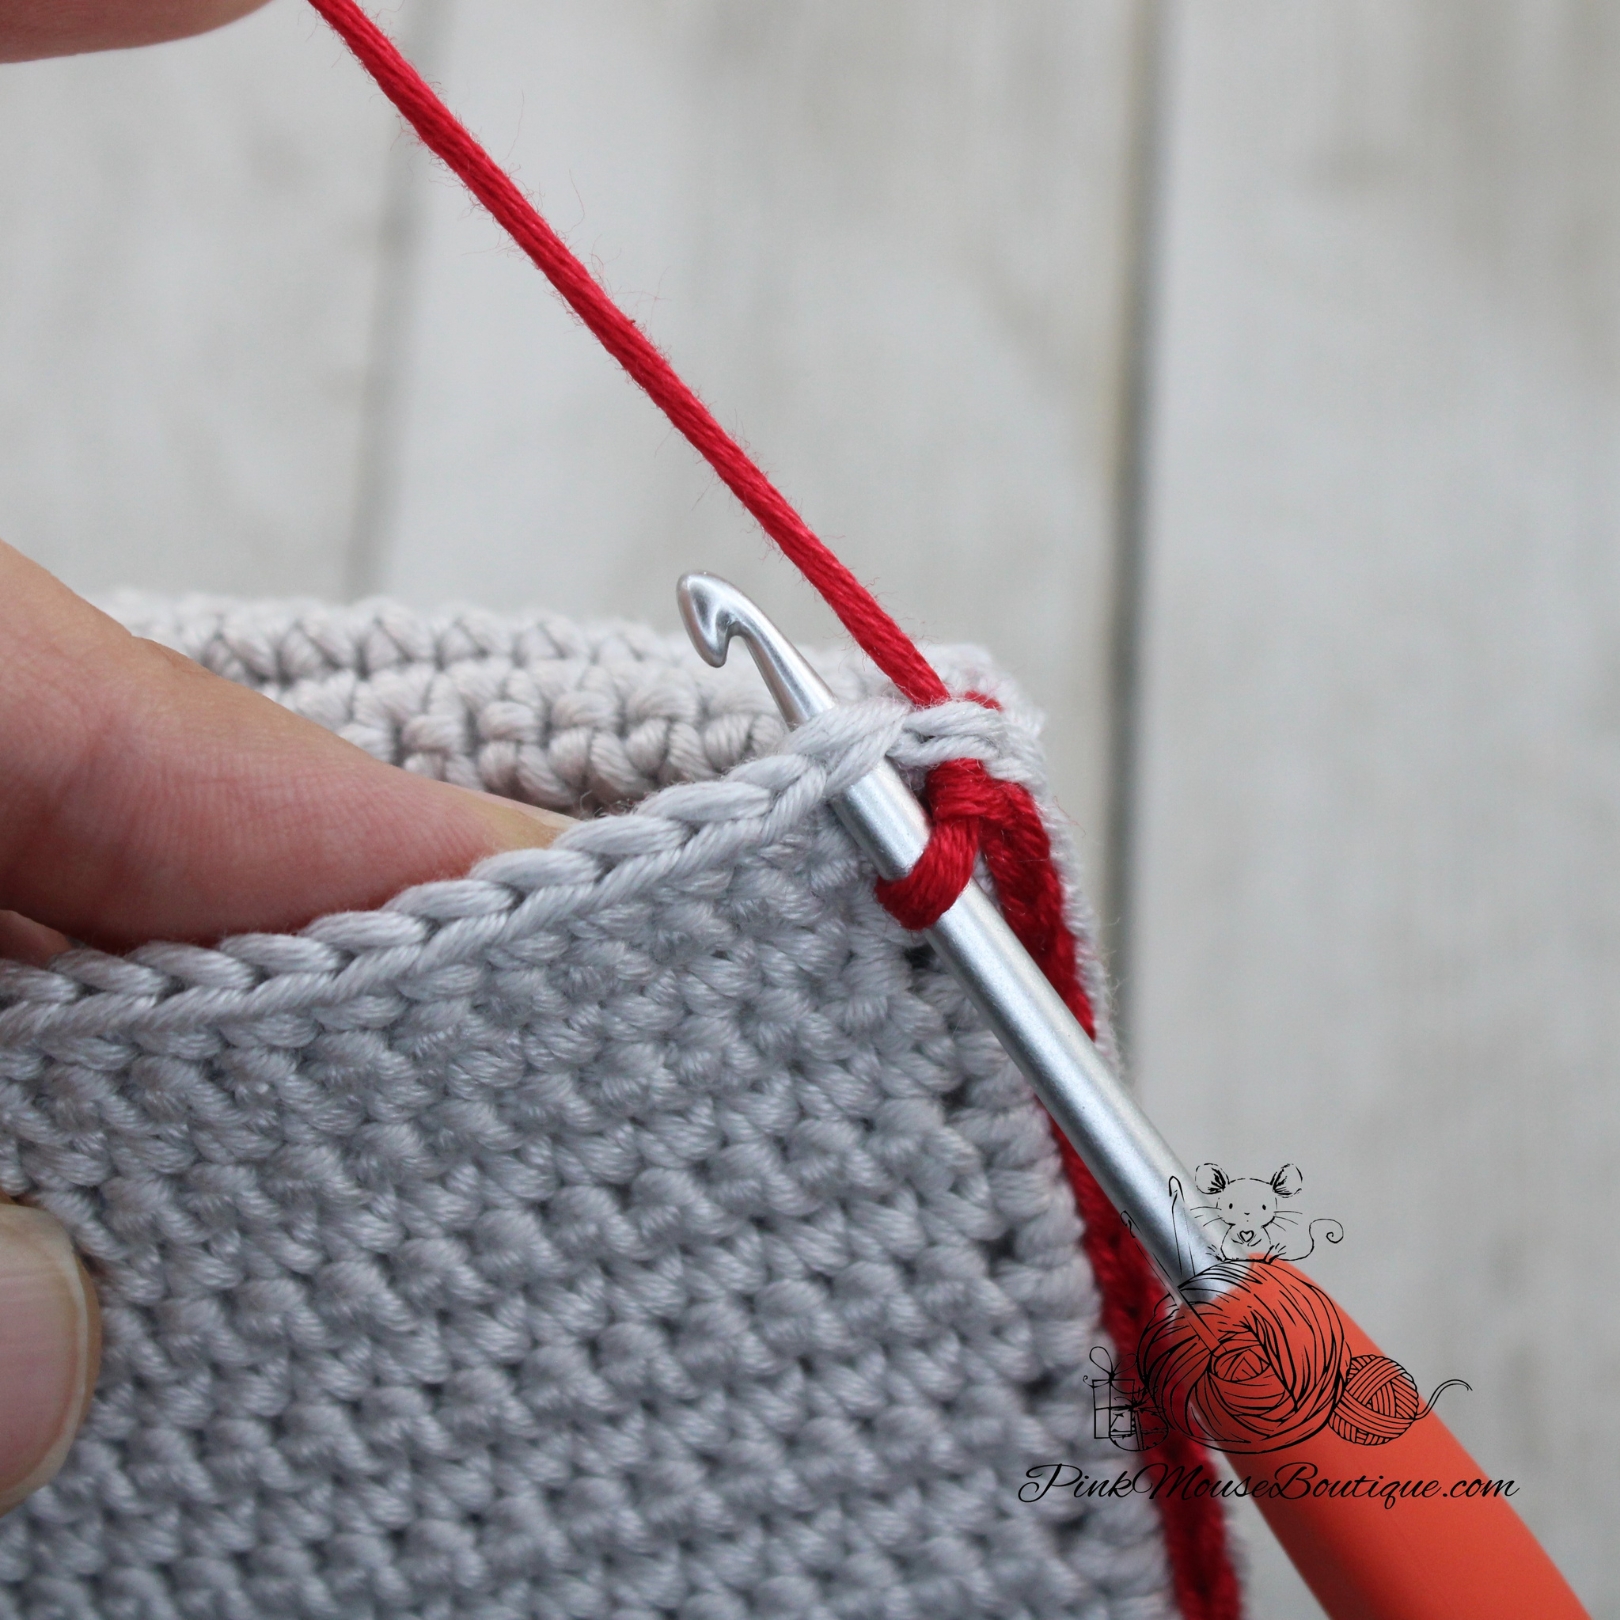
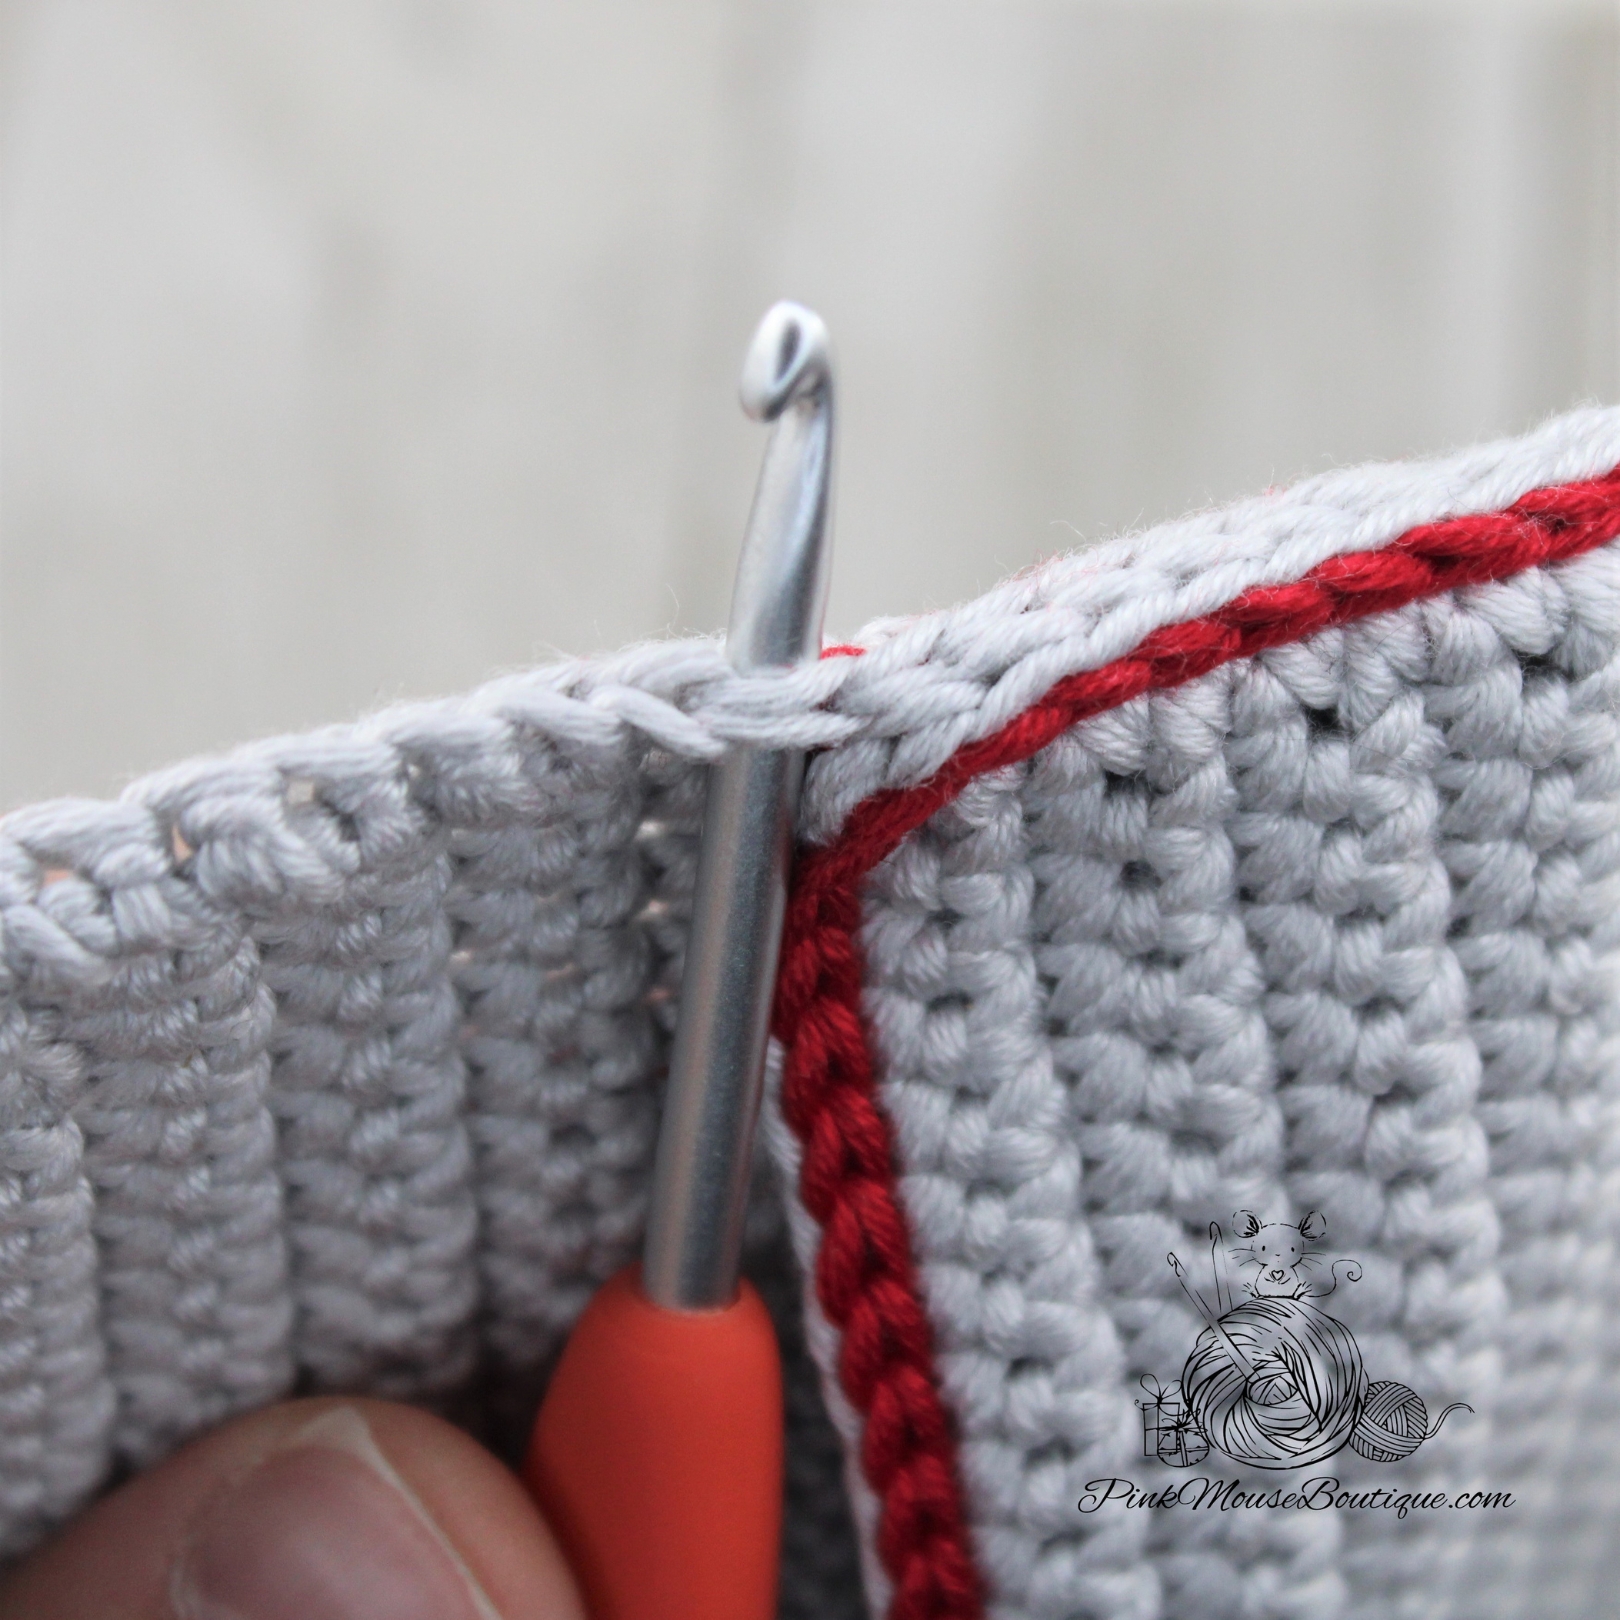
  4. Flip the back of the envelope so that the inside is facing you. Place the FRONT PIECE on top. Align the bottom and sides of the two pieces. Using red yarn, slip stitch through both starting at the top left corner of the FRONT (the rectangular piece). Slip stitch all around the left side, the bottom, and then the right side.
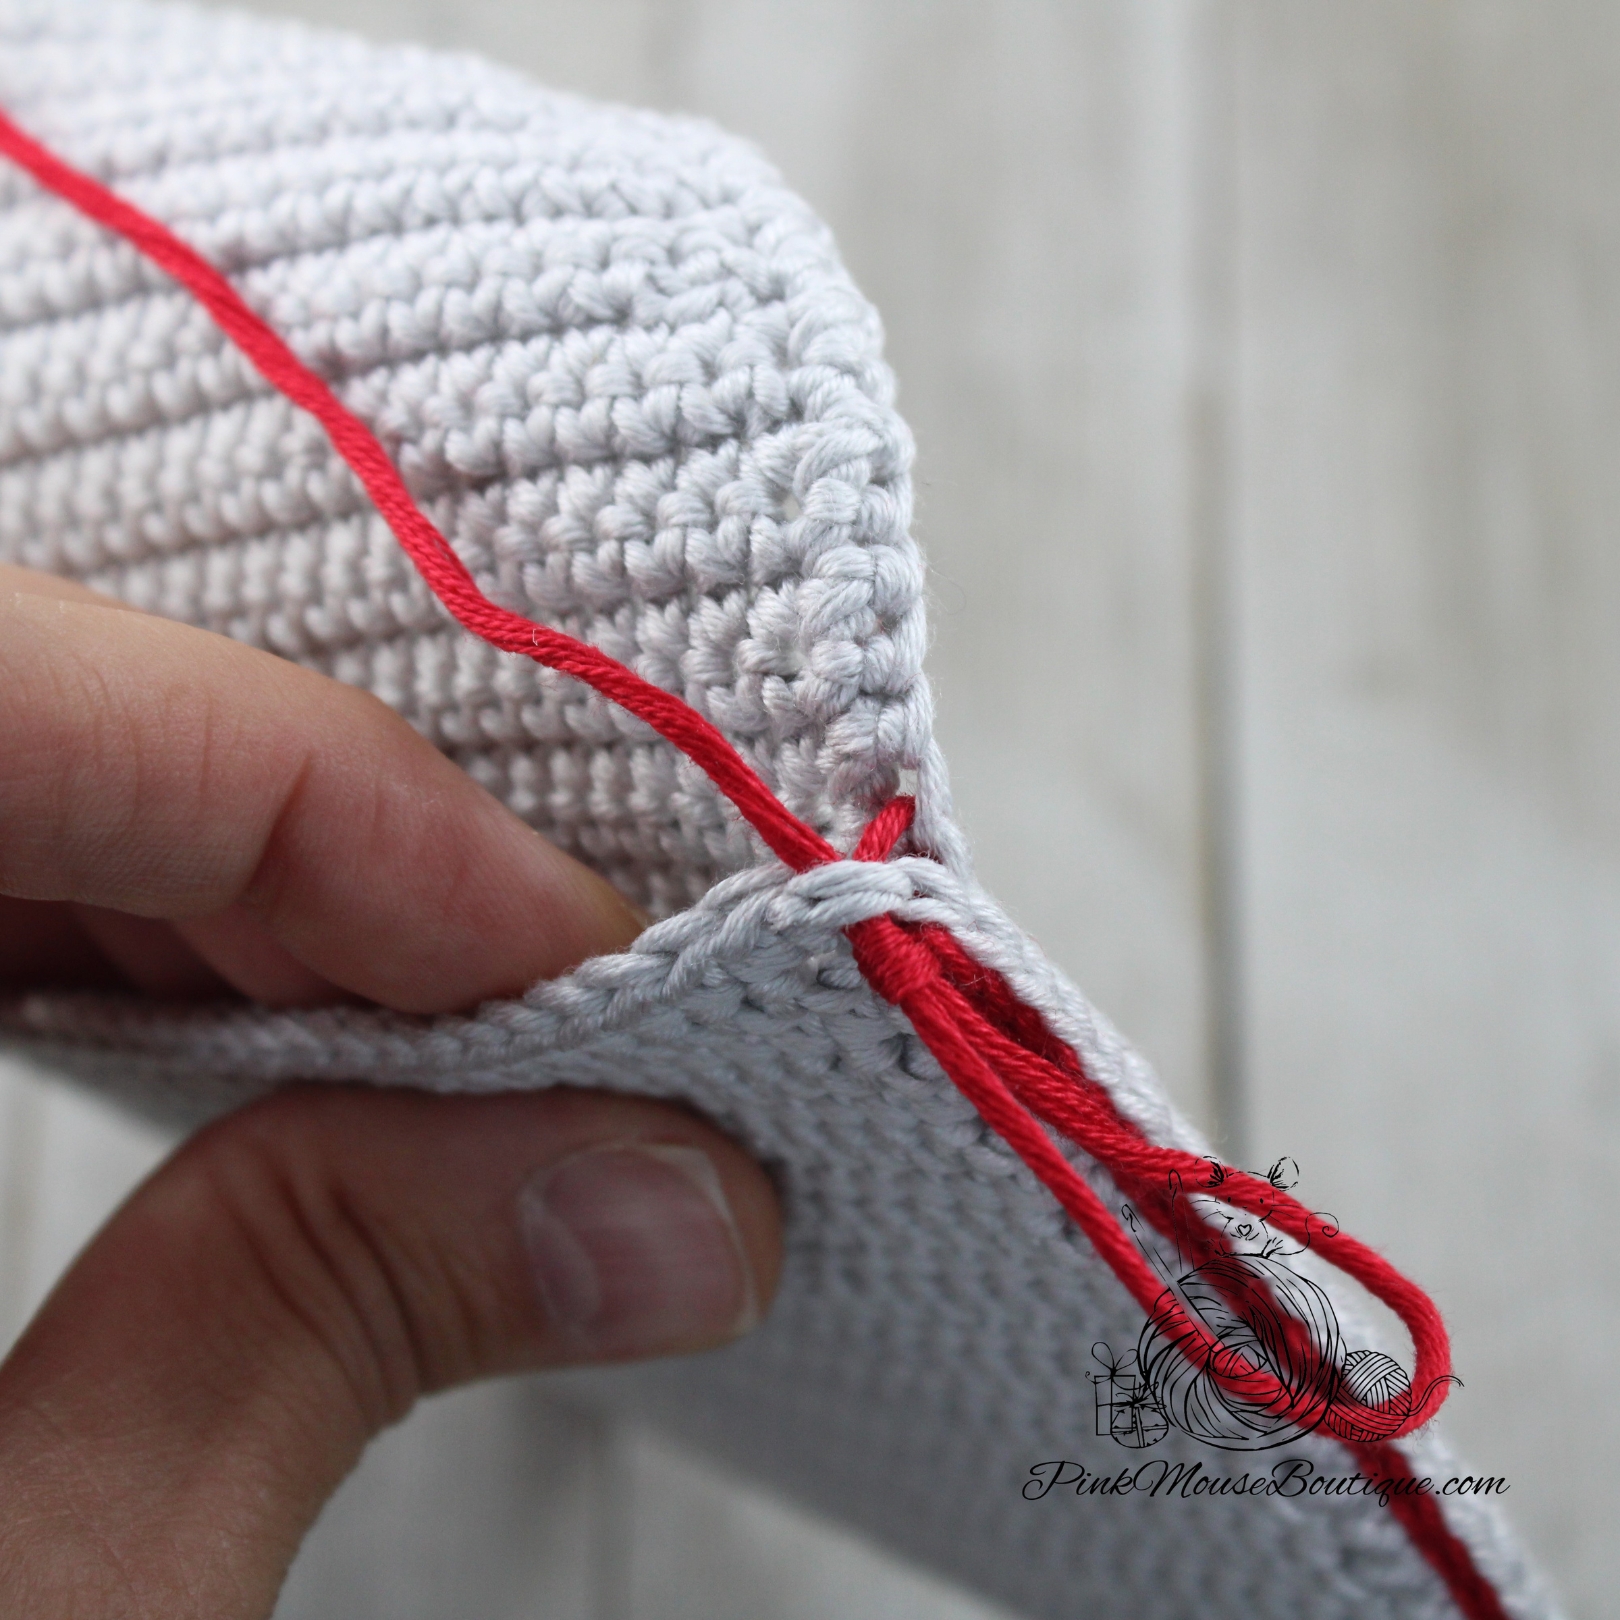
  5. Cut the yarn leaving a long tail and without fastening off pull the end out only of the BACK part of the envelope.
  6. Continue slip stitching only through the top of the rectangle part of the envelope.
  7. Once finished, fasten off and weave in the ends.
  8. Insert hook in the same stitch where you last crocheted through the FRONT and BACK on the right. With red slip stitch all around the top of the BACK PIECE (the flap). Fasten off and weave in the ends.
  9. Sew the strap on Row 15 or 16 making sure you can close the envelope and that the strap will hold it closed.

Unicorn Zombie (Free Version)

The idea to create a Unicorn Zombie was given to me by one of my followers on Instagram last year. It took me a while, but finally I was able to make this cute little guy. And I am so happy with the final look! The bone is a challenge though. 🙂

This version of the pattern is FREE. You can also find a PREMIUM version that includes a drawing of the unicorn that you can use to create fun Halloween cards. The premium version is a PDF file that you can conveniently download and print.

Link to the premium version: UNICORN ZOMBIE

I hope you like the pattern. Let me know in the comments below!

MATERIALS

  1. Curio, size 10 (you can find it here: KnitPicks)
    • Clarity (light blue)
    • Heliotrope
    • Black
    • Conch
  2. DMC floss:
    • Metallic, gold
    • Black
    • White
  3. Hooks, Clover Amour (1.5 mm and 1 mm)
  4. Stuffing
  5. Hard Pastels (I used Prismacolor)
  6. Small brush or a cotton swab

ABBREVIATIONS:

MR – magic ring                                                                

Ch – chain                                                                           

St(es) – stitch(es)                                                               

Sl st – slip stitch                                                                 

Sc – single crochet                                                             

Hdc – half double crochet                                                

Dc – double crochet

Inc – increase

Dec – Decrease (invisible decrease)

BLO/FLO – Back loop only/Front loop only

Sk – skip

HEAD

Round 1: with Clarity 8 sc in a mr – 8 sts

Round 2: 8 inc – 16 sts

Round 3: (sc, inc) x 8 – 24 sts

Rounds 4 – 7: sc around – 24 sts (4 rounds)

Round 8: 4 sc, 4 inc, 8 sc, 4 inc, 4 sc – 32 sts

Round 9: sc around – 32 sts

Change color – Heliotrope

Rounds 10 – 11: sc around – 32 sts (2 rounds)

Round 12: sc in 30 sts, ch 4 and sk 4 (we are moving the beginning of the round) – 32 sts

Round 13: 2 sc, 4 dec, 8 sc, 4 dec, 2 sc, in BLO of chain 4 sc – 24 sts

Round 14: (sc, dec) x 8 – 16 sts

Start stuffing the head.

Round 15: 8 dec – 8 sts

Round 16: 2 dec – 6 sts

We will end Round 16 there. Fasten off, finish off, and secure the stitches.

BODY

Turn the head upside down with the back of the head facing you.

You will notice that there are 2 sets of unworked stitches – 4 that are closest to you (this is where the back of the body will be once you make it) and 4 are further away from you (where the front of the body will be once you make it). Insert the hook in the 2nd to last st beginning with the back (closest to you) and with a sc join Clarity.

Round 1: sc again in same st where you joined thread and inc in next st

Insert hook through the same st as last inc and through the stitch at the front

Inc (but the second sc should be made only in the 1st st at the front; do not grab the last st from the back)

Inc in next 3 sts

Insert hook through the same st as last inc and through the stitch at the front

Inc (but the second sc should be made only in the 1st st at the back; do not grab the last st from the front)

Inc in last st

After you finish Round 1, you should have 16 sts.

Round 2: (3 sc, inc) x 4 – 20 sts

Rounds 3 – 4: sc around – 20 sts (2 rounds)

Round 5: (4 sc, inc) x 4 – 24 sts

Round 6: (5 sc, inc) x 4 – 28 sts

Rounds 7 – 8: sc around – 28 sts (2 rounds)

Round 9: (5 sc, dec) x 4 – 24 sts

Fasten off leaving a long tail for sewing.

Stuff the body well. Leave 8 stitches on each side of the body for legs. Mark the middle 8 stitches (4 at the front and 4 at the back) with thread. Make sure the spaces you are leaving for legs are aligned with the head.

LEGS (x 2)

Turn the body upside down (back side facing you) and with a sc join Clarity thread in one of the stitches you left for the 1st leg.

Round 1: sc in each st until you get to the thread marking the middle sts. Insert hook in same st as last sc and in the st at the other side of the body. 1 sc ; sc until the end of round – 8 sts

Round 2: sc around – 8 sts

Stuff well.

Round 3: 4 dec – 4 sts

Fasten off.

Repeat for the second leg.

Once finished, sew the middle 8 stitches to close.

Secure the stitches.

ARM

Crochet in spiral.

Round 1: 8 sc in a mr – 8 sts

Rounds 2 – 7: sc around – 8 sts (6 rounds)

Round 8: 4 dec – 4 sts

Fasten off leaving a tail for sewing.

BONE

Crochet tight.

Because I used thread, I didn’t need to stuff the bone. If you are using yarn, you may need to stuff a little.

Suggested color – DMC cotton perle 12 with a 1 mm hook (NOTE: I used yarn for the step-by-step pictures)

Ch 4

Round 1: 1 puff stitch in 2nd ch from hook (Please follow the steps below and refer to the pictures)

YO and insert hook through 2nd chain from hook, YO and pull (three loops on hook)

YO and pull through 2 loops (two loops left on hook)

YO and insert hook in same ch, YO and pull (four loops on hook)

YO and pull through 2 loops (3 loops left on hook)

YO and insert hook in same ch, YO and pull (five loops on hook)

YO and pull through all loops (puff stitch created)

1 sc in next chain

2 puff stitches in last ch

Now we will crochet on the other side of the chain

1 sc in next ch

1 puff stitch in last ch

At the end of Round 1, you should have 6 stitches.

Rounds 2 – 7 : sc around – 6 sts (6 rounds)

Round 8: 1 puff stitch, 1 sc, 2 puff stitches, 1 sc, 1 puff stitch – 6 sts

NOTE: Make sure the two ends are aligned.

Fasten off, finish off, and secure the stitches. Leave one of the tails for sewing later.

EAR 1

Round 1: with light blue 2 sc, hdc, 2 sc in a mr; sl st to join and ch 1 – 5 sts

Round 2: 1 sc in 1st st, inc in next, (hdc, dc, hdc) in third st, inc in next, 1 sc in last st; sl st to join – 9 sts

Fasten off leaving a tail for sewing.

EAR 2

Round 1: with light blue 2 sc, hdc, 2 sc in a mr; sl st to join and ch 1 – 5 sts

Round 2: 1 sc in 1st st, inc in next, (1 hdc, ch 2 and sl st in 3rd st), inc in next, 1 sc in last st; sl st to join – 8 sts

Fasten off leaving a tail for sewing.

EYE

Suggested color: DMC cotton perle 12, black with a 1 mm hook

Round 1: 6 sc in a mr; sl st to join and ch 1 – 6 sts

Round 2: (1 sc in 2 sts, 3 sc in next st) x 2; sl st to join – 10 sts

Fasten off leaving a tail for sewing.

Use DMC cotton perle 12, color white thread to sew a few times in a stitch in the eye to make a large sparkle. Then sew a couple of times in another st to make a second sparkle (a bit smaller than the first one).

HORN

Suggested color – DMC metallic thread (2 or 3 strands)

Round 1: 8 sc in a mr; sl st to join and ch 1 – 8 sts

Round 2: in BLO sc around; sl st to join and ch 1 – 8 sts

Round 3: in BLO (2 sc, dec) x 2; sl st to join and ch 1 – 6 sts

Round 4: in BLO sc around; sl st to join and ch 1 – 6 sts

Round 5: in BLO (sc, dec) x 2; sl st to join – 4 sts

Fasten off leaving a tail for sewing.

TAIL (x 6)

Suggested colors – Curio size 10, Hollyberry and Eggplant

Ch 6

Row 1: in back bump only 1 sc in 2nd ch from hook, 1 sc until the end – 5 sts

Fasten off leaving a tail for sewing.

MANE (5 or 6)

Suggested colors – Curio size 10, Hollyberry and Eggplant

Ch 15

Row 1: in back bump only 1 sc in 2nd ch from hook, 1 sc until the end – 14 sts

Fasten off leaving a tail for sewing.

ASSEMBLY

Sew the eye to the head, right above the muzzle. I sewed the eye on the left part of the face.

Using Curio size 10, black thread and a needle, sew a line going up 4 rounds at an angle on the right side of the head. The bottom of the line should be 7 stitches from the eye and the top – about 4 or 5 stitches from the top of the eye. Once the line is sewn (I sewed twice to make it thicker), sew 3 smaller lines crossing the longer one. Secure the thread.

Sew the horn 4 rounds above the eyes.

Sew the ears about 2 stitches behind the horn, about 3 stitches apart.

Sew the arm one round below the head and the bone – two rounds below the head making sure both align with the legs.

Sew the pieces you made for the tail at the back of the body, one or two rounds above the legs.

Sew the pieces you made for the mane at the back of the head, between the ears.

With black thread, sew a line going down the arm about four rounds. Then sew two smaller lines crossing the longer one.

With the Conch color (also light or salmon pink), cross stitch in 5 stitches below the right ear (about 2 rounds above the eye).

Using a small brush or cotton swab, apply your choice of color of the hard pastel around the scarred eye and arm patch. I also applied some on the broken ear, the bottom of the legs, and a little around the left eye (the round one).

HAPPY CROCHET!!!

Igloo and Christmas Tree

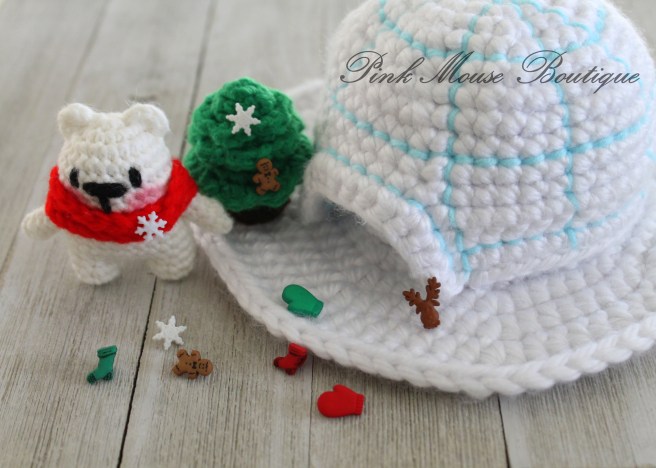
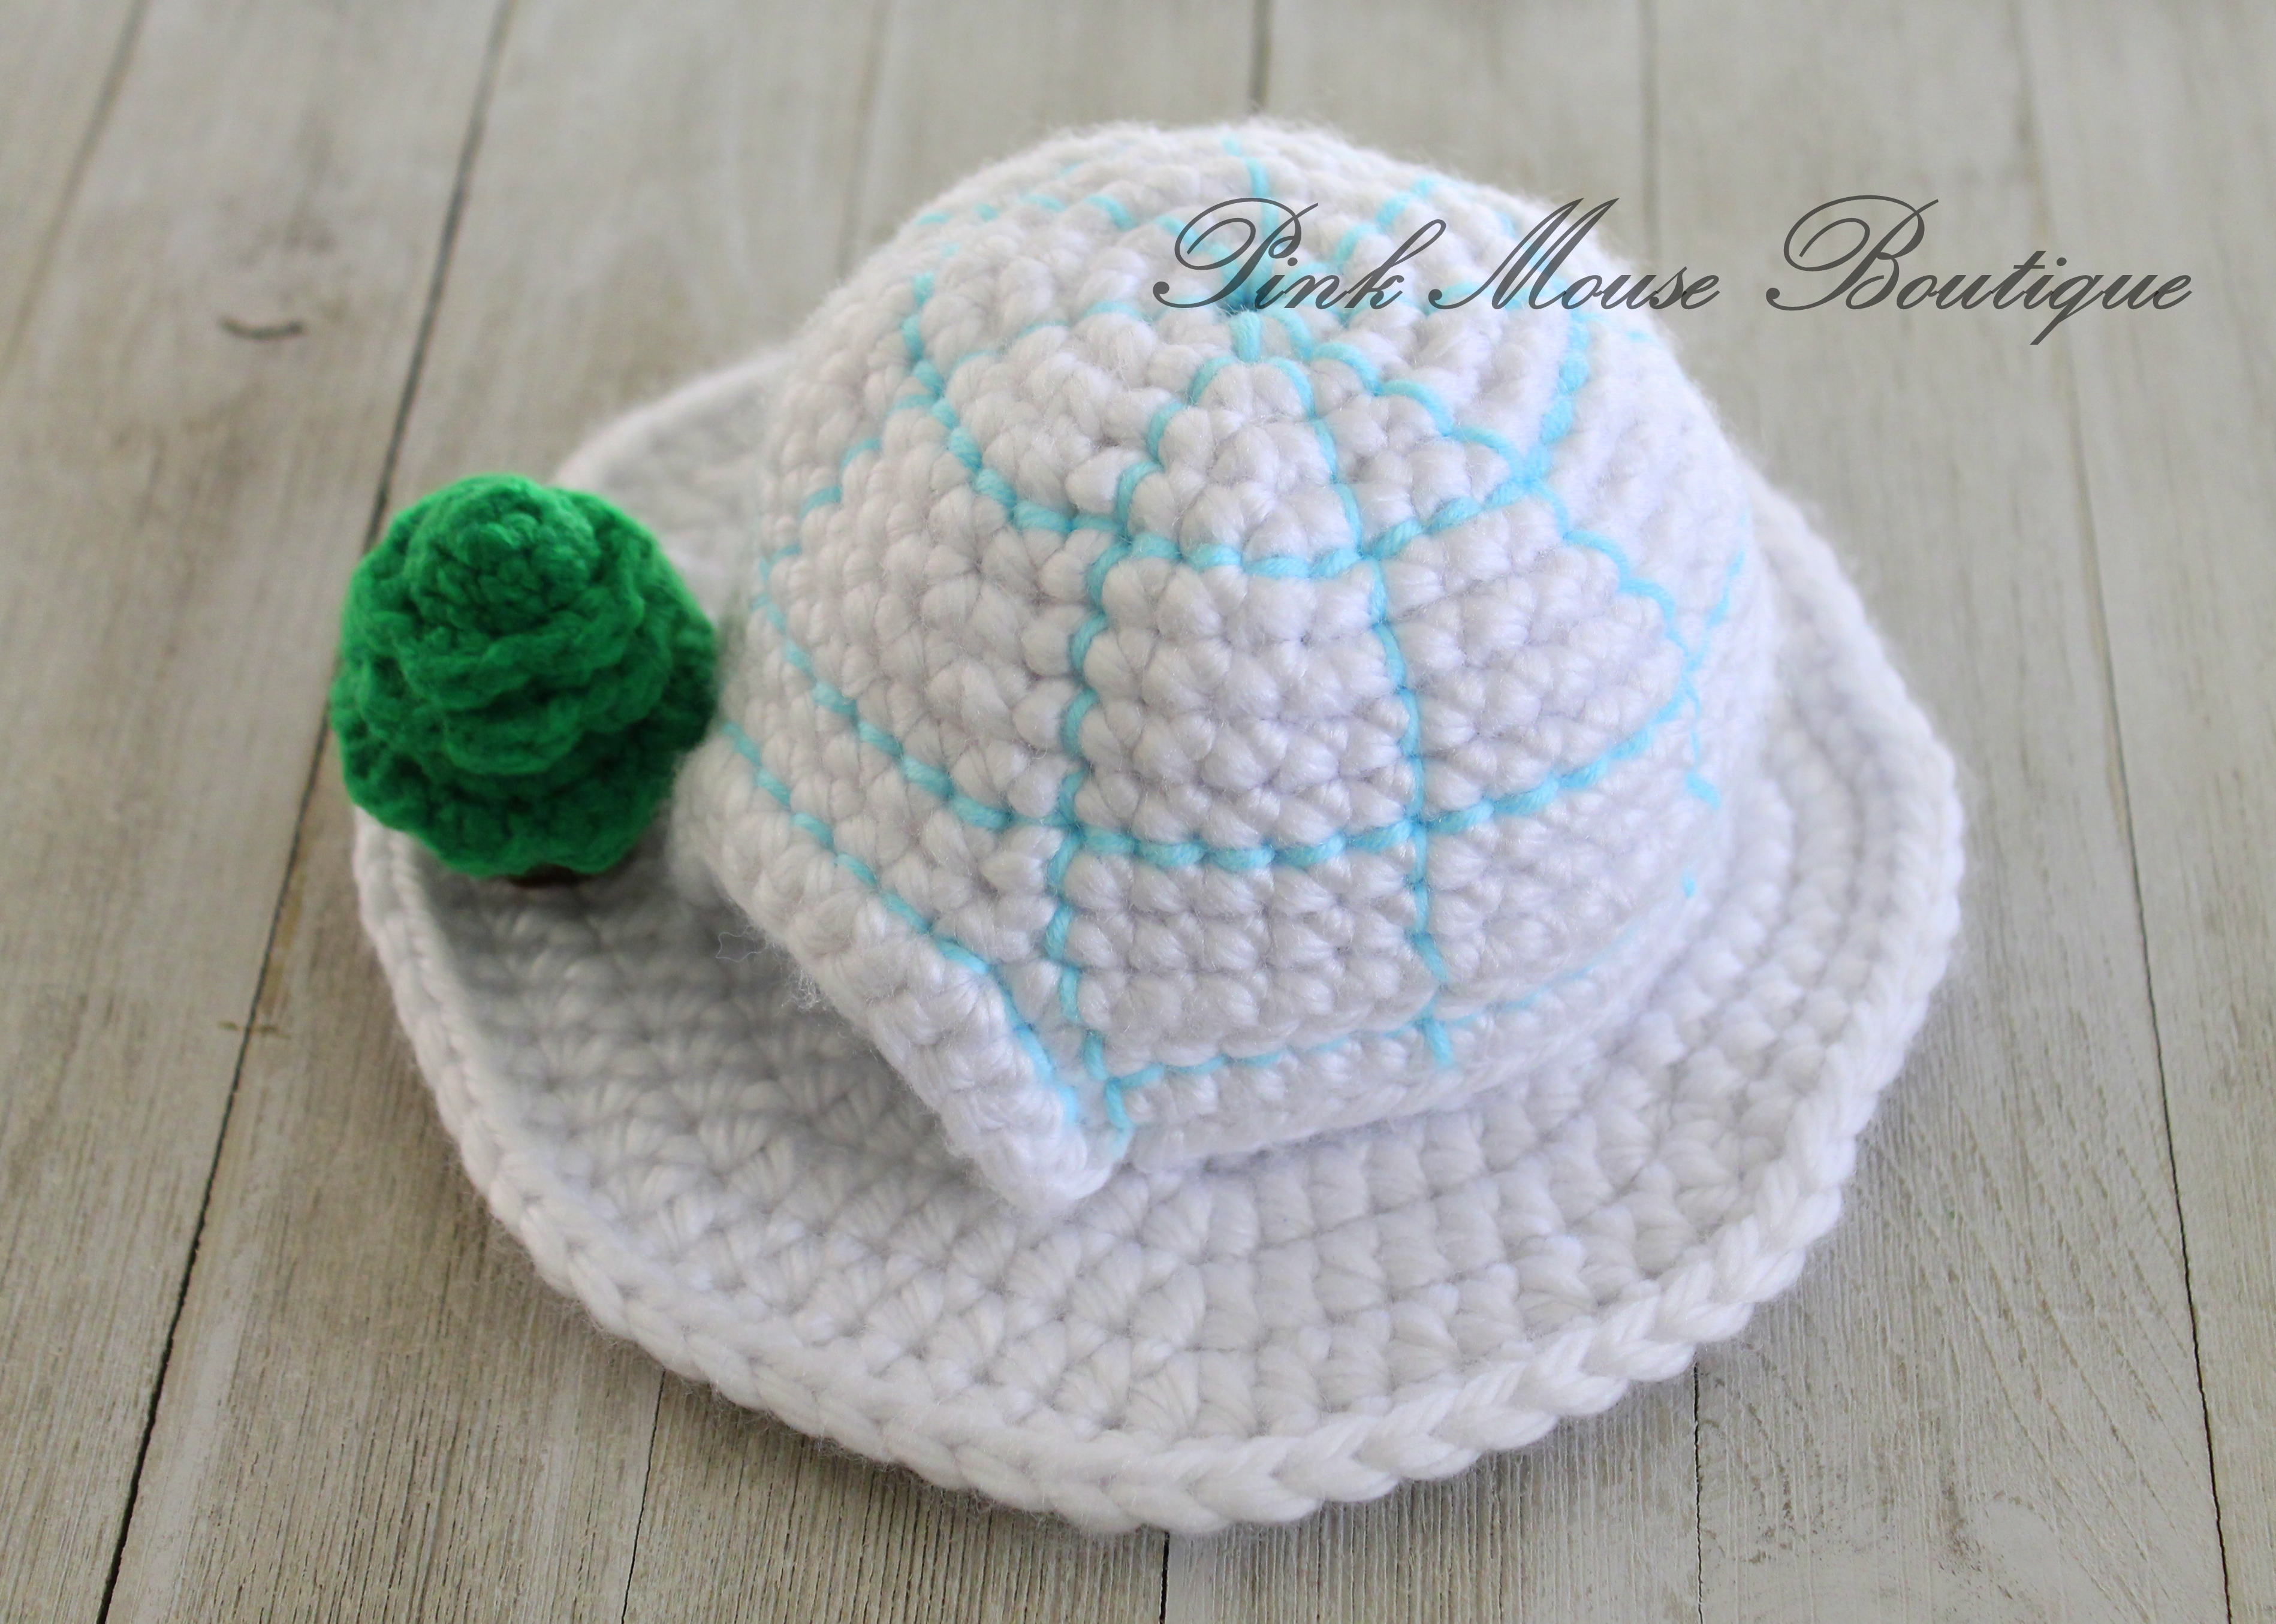
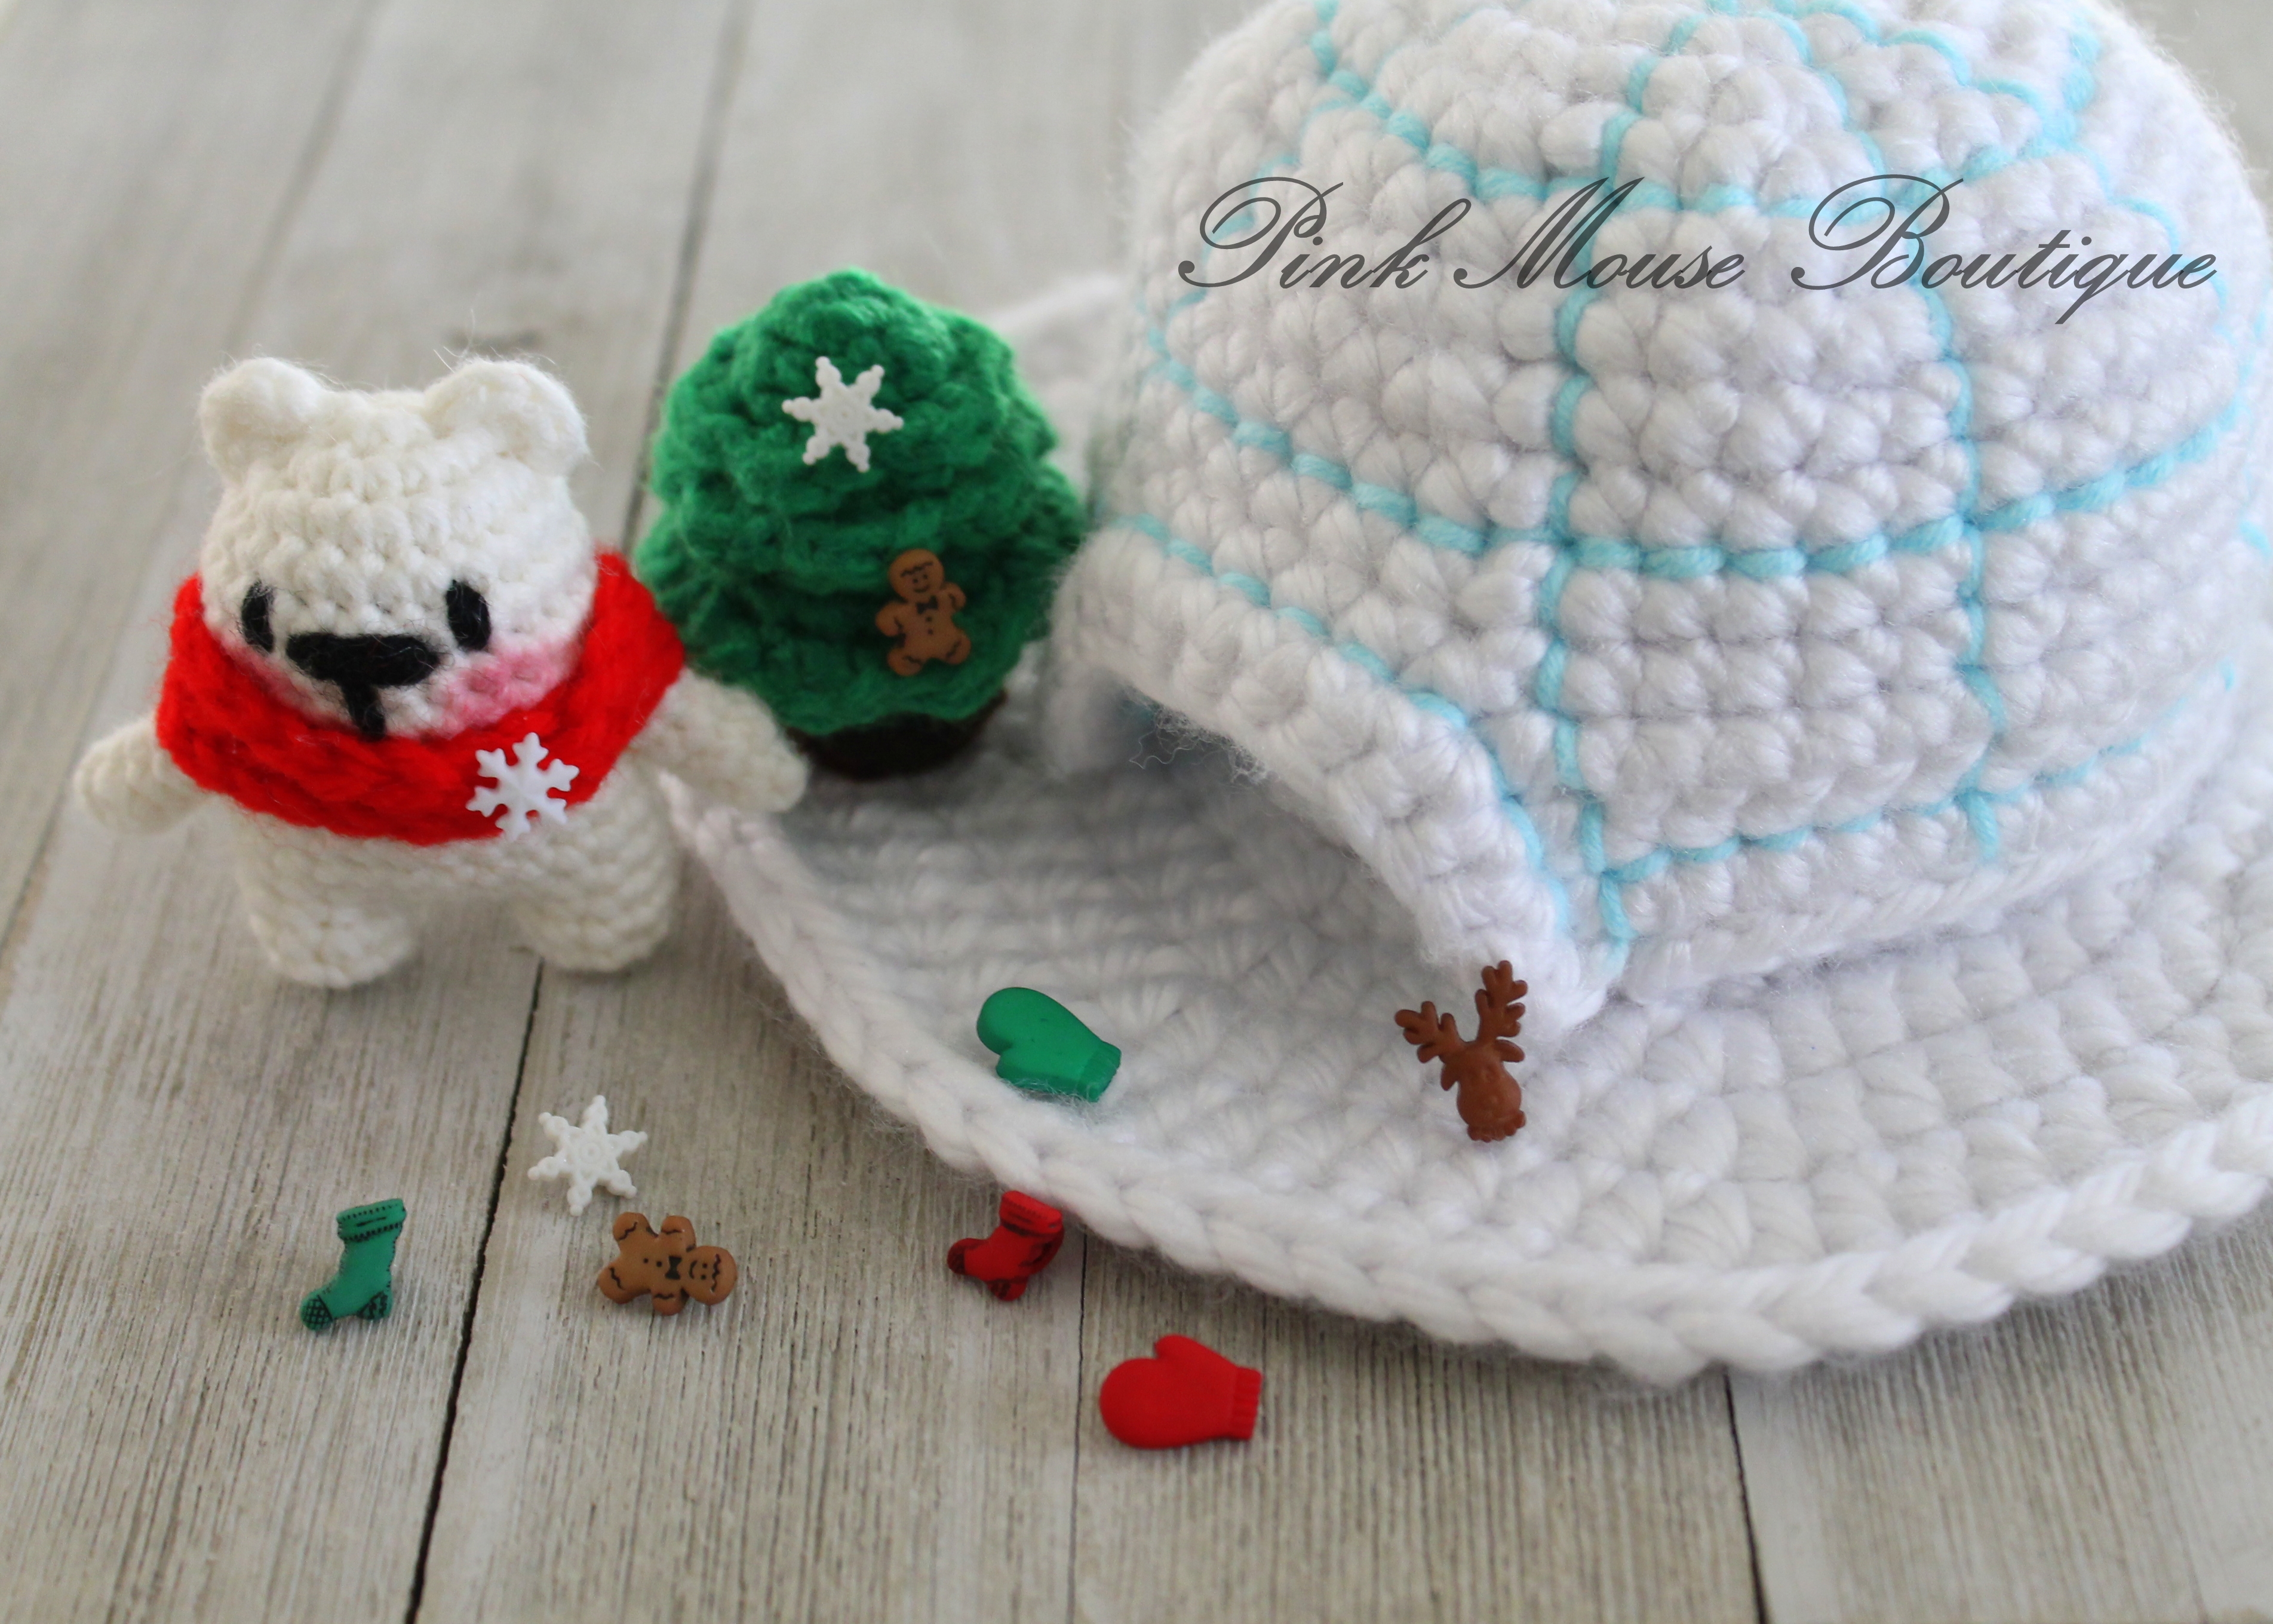
If you have been following me for a while, you know that I love making houses for my dolls. So, even before I made the polar bear (see my last post), I knew I was going to make an igloo for him. And since tomorrow it’s Christmas, I also had to make a Christmas tree. I hope you like this set and enjoy making it!

And if you have missed my last post, click HERE to see the pattern for the polar bear.

Materials:

  1. Super chunky yarn – white
  2. Worsted weigh yarn – light blue, green, brown
  3. Crochet hooks: 6 mm (Clover Amour) for igloo and 4 mm (Clover Amour) for the Christmas tree
  4. Large piece of cardboard (optional)
  5. Sewing needle
  6. Hot glue gun (optional)
  7. Stuffing

Abbreviations:

  1. Mr – magic ring
  2. Ch – chain
  3. Sl st – slip stitch
  4. Sc – single crochet
  5. Hdc – half double crochet
  6. Inc – increase
  7. Dec – decrease
  8. FLO – front loop only
  9. BLO – back look only

Pattern

Base Pattern:

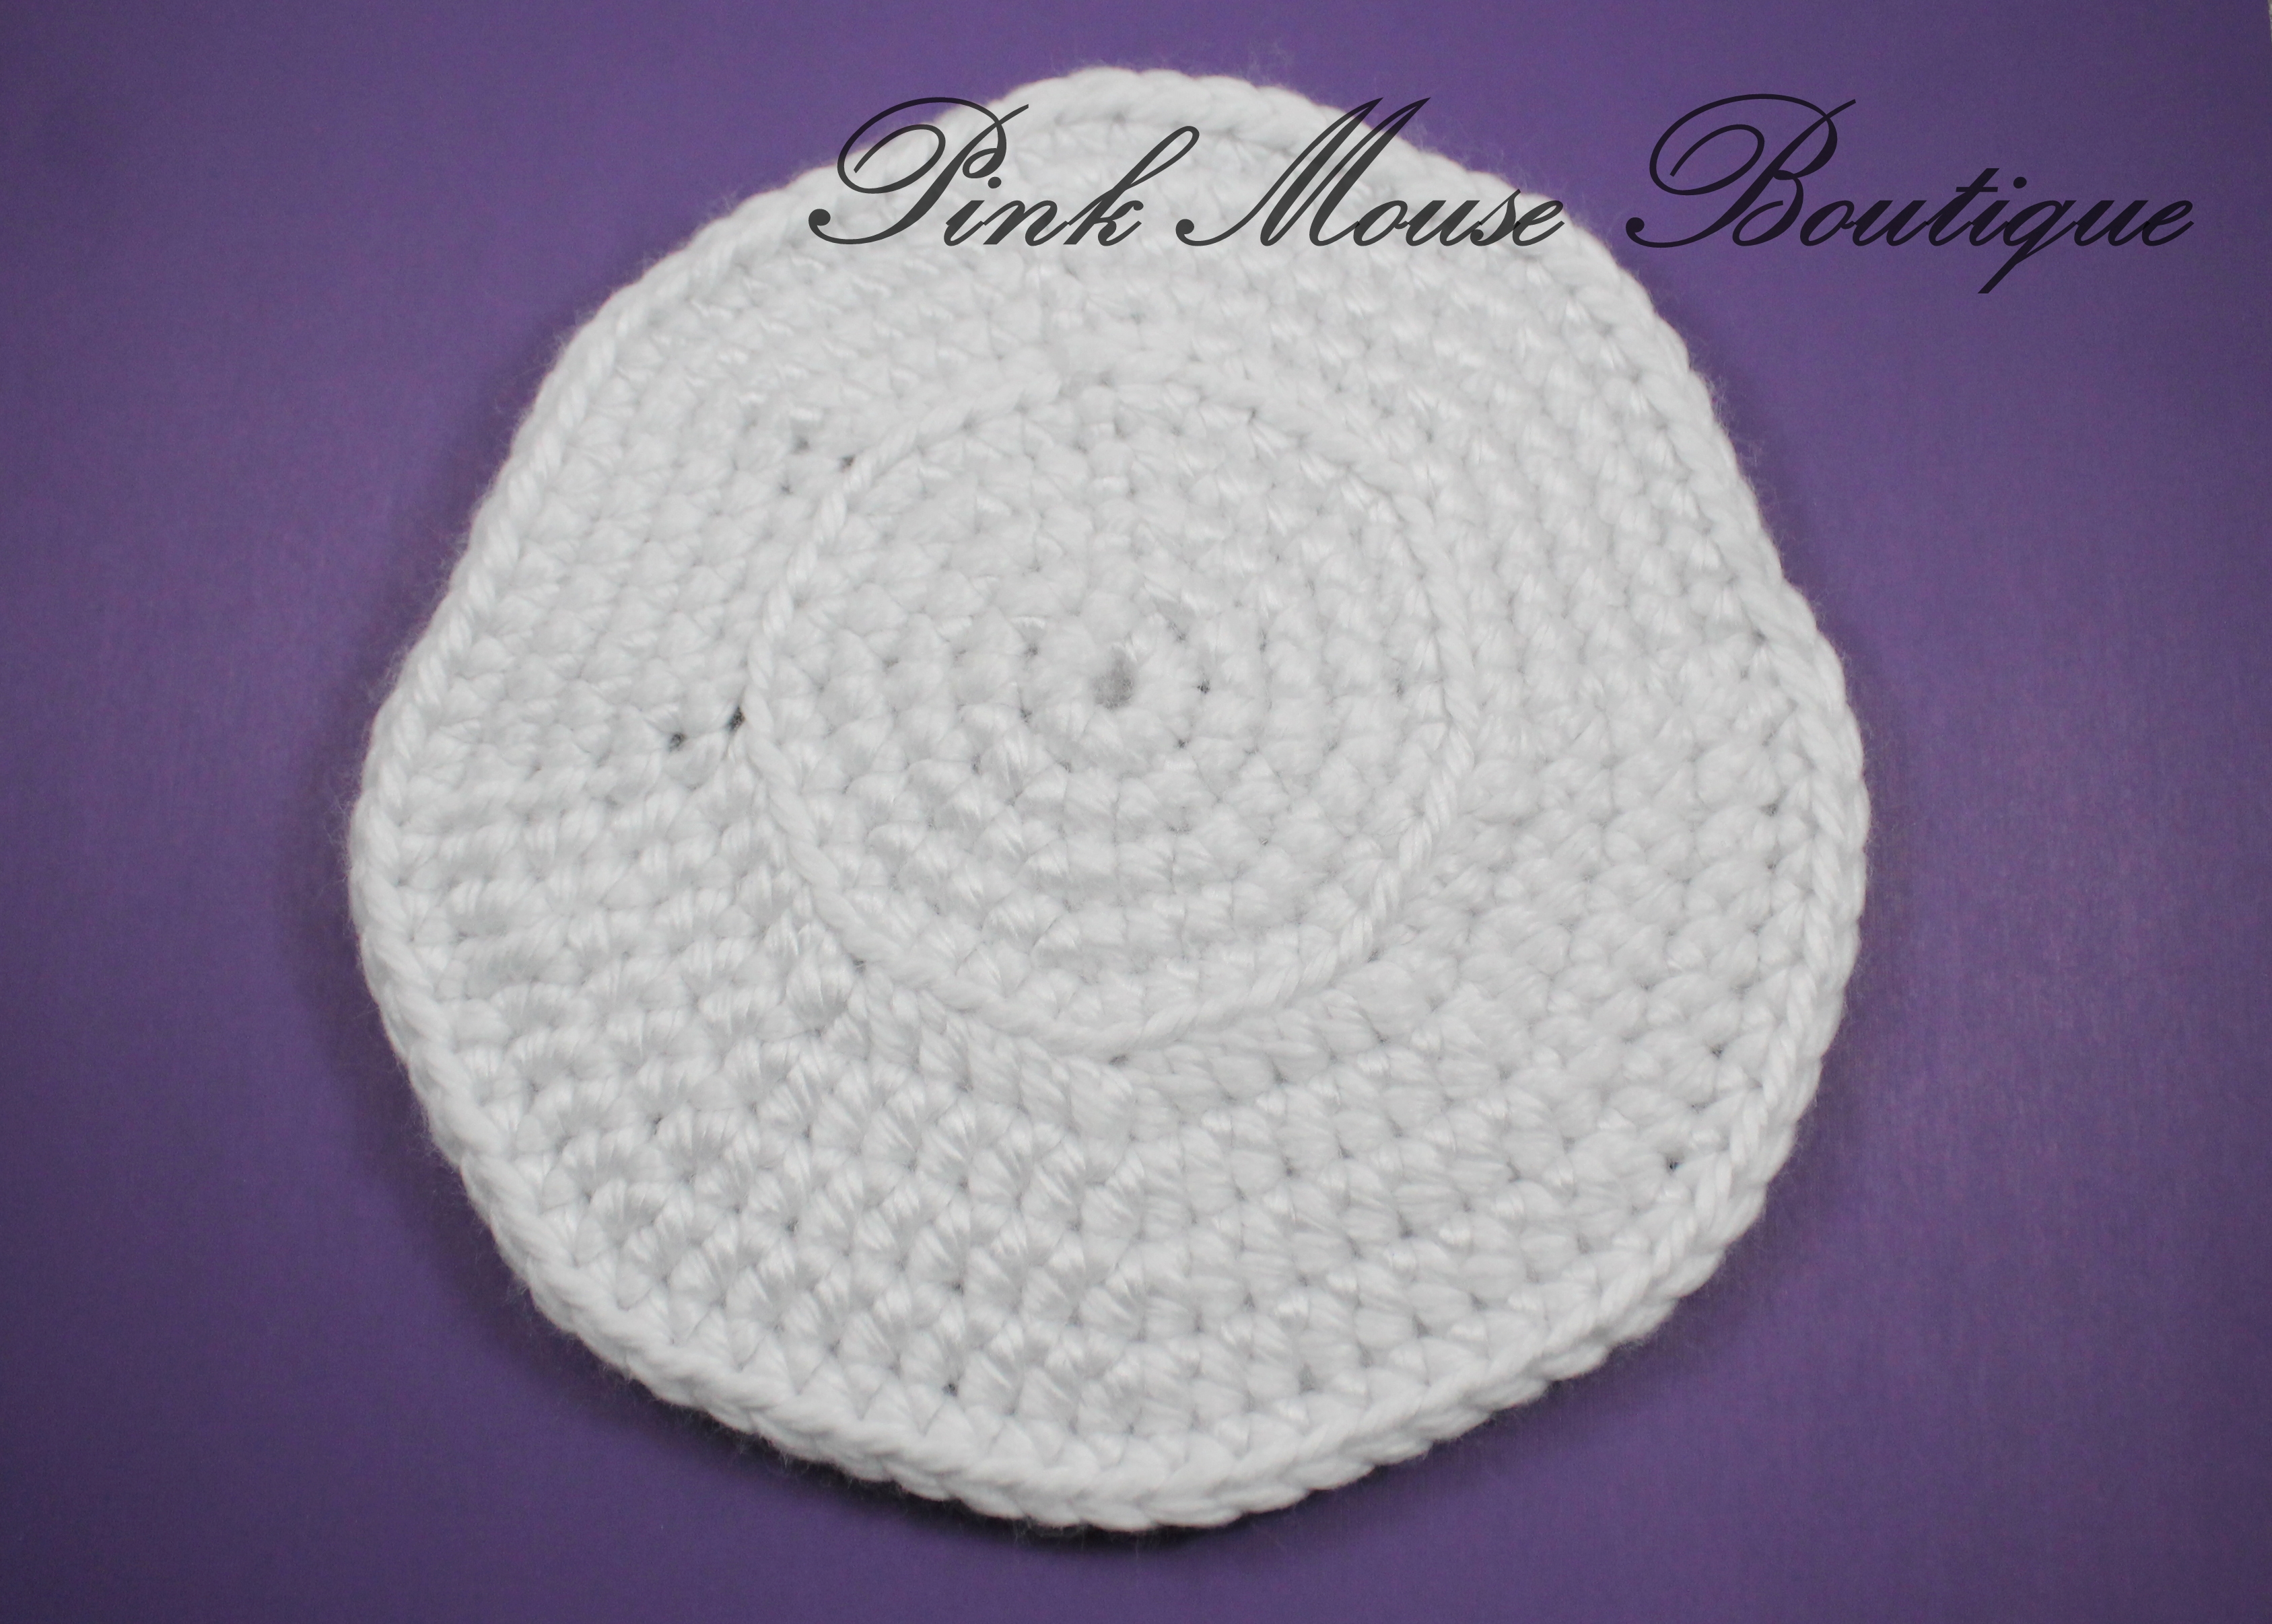
We will start by creating the base. Use white yarn.

Join each round with a slip stitch and chain 1.

Round 1: mr, ch 1, 8 sc in the ring – 8 sts

Round 2: 8 inc – 16 sts

Round 3: (sc, inc) x 8 – 24 sts

Round 4: (2 sc, inc) x 8 – 32 sts

Round 5: (3 sc, inc) x 8 – 40 sts

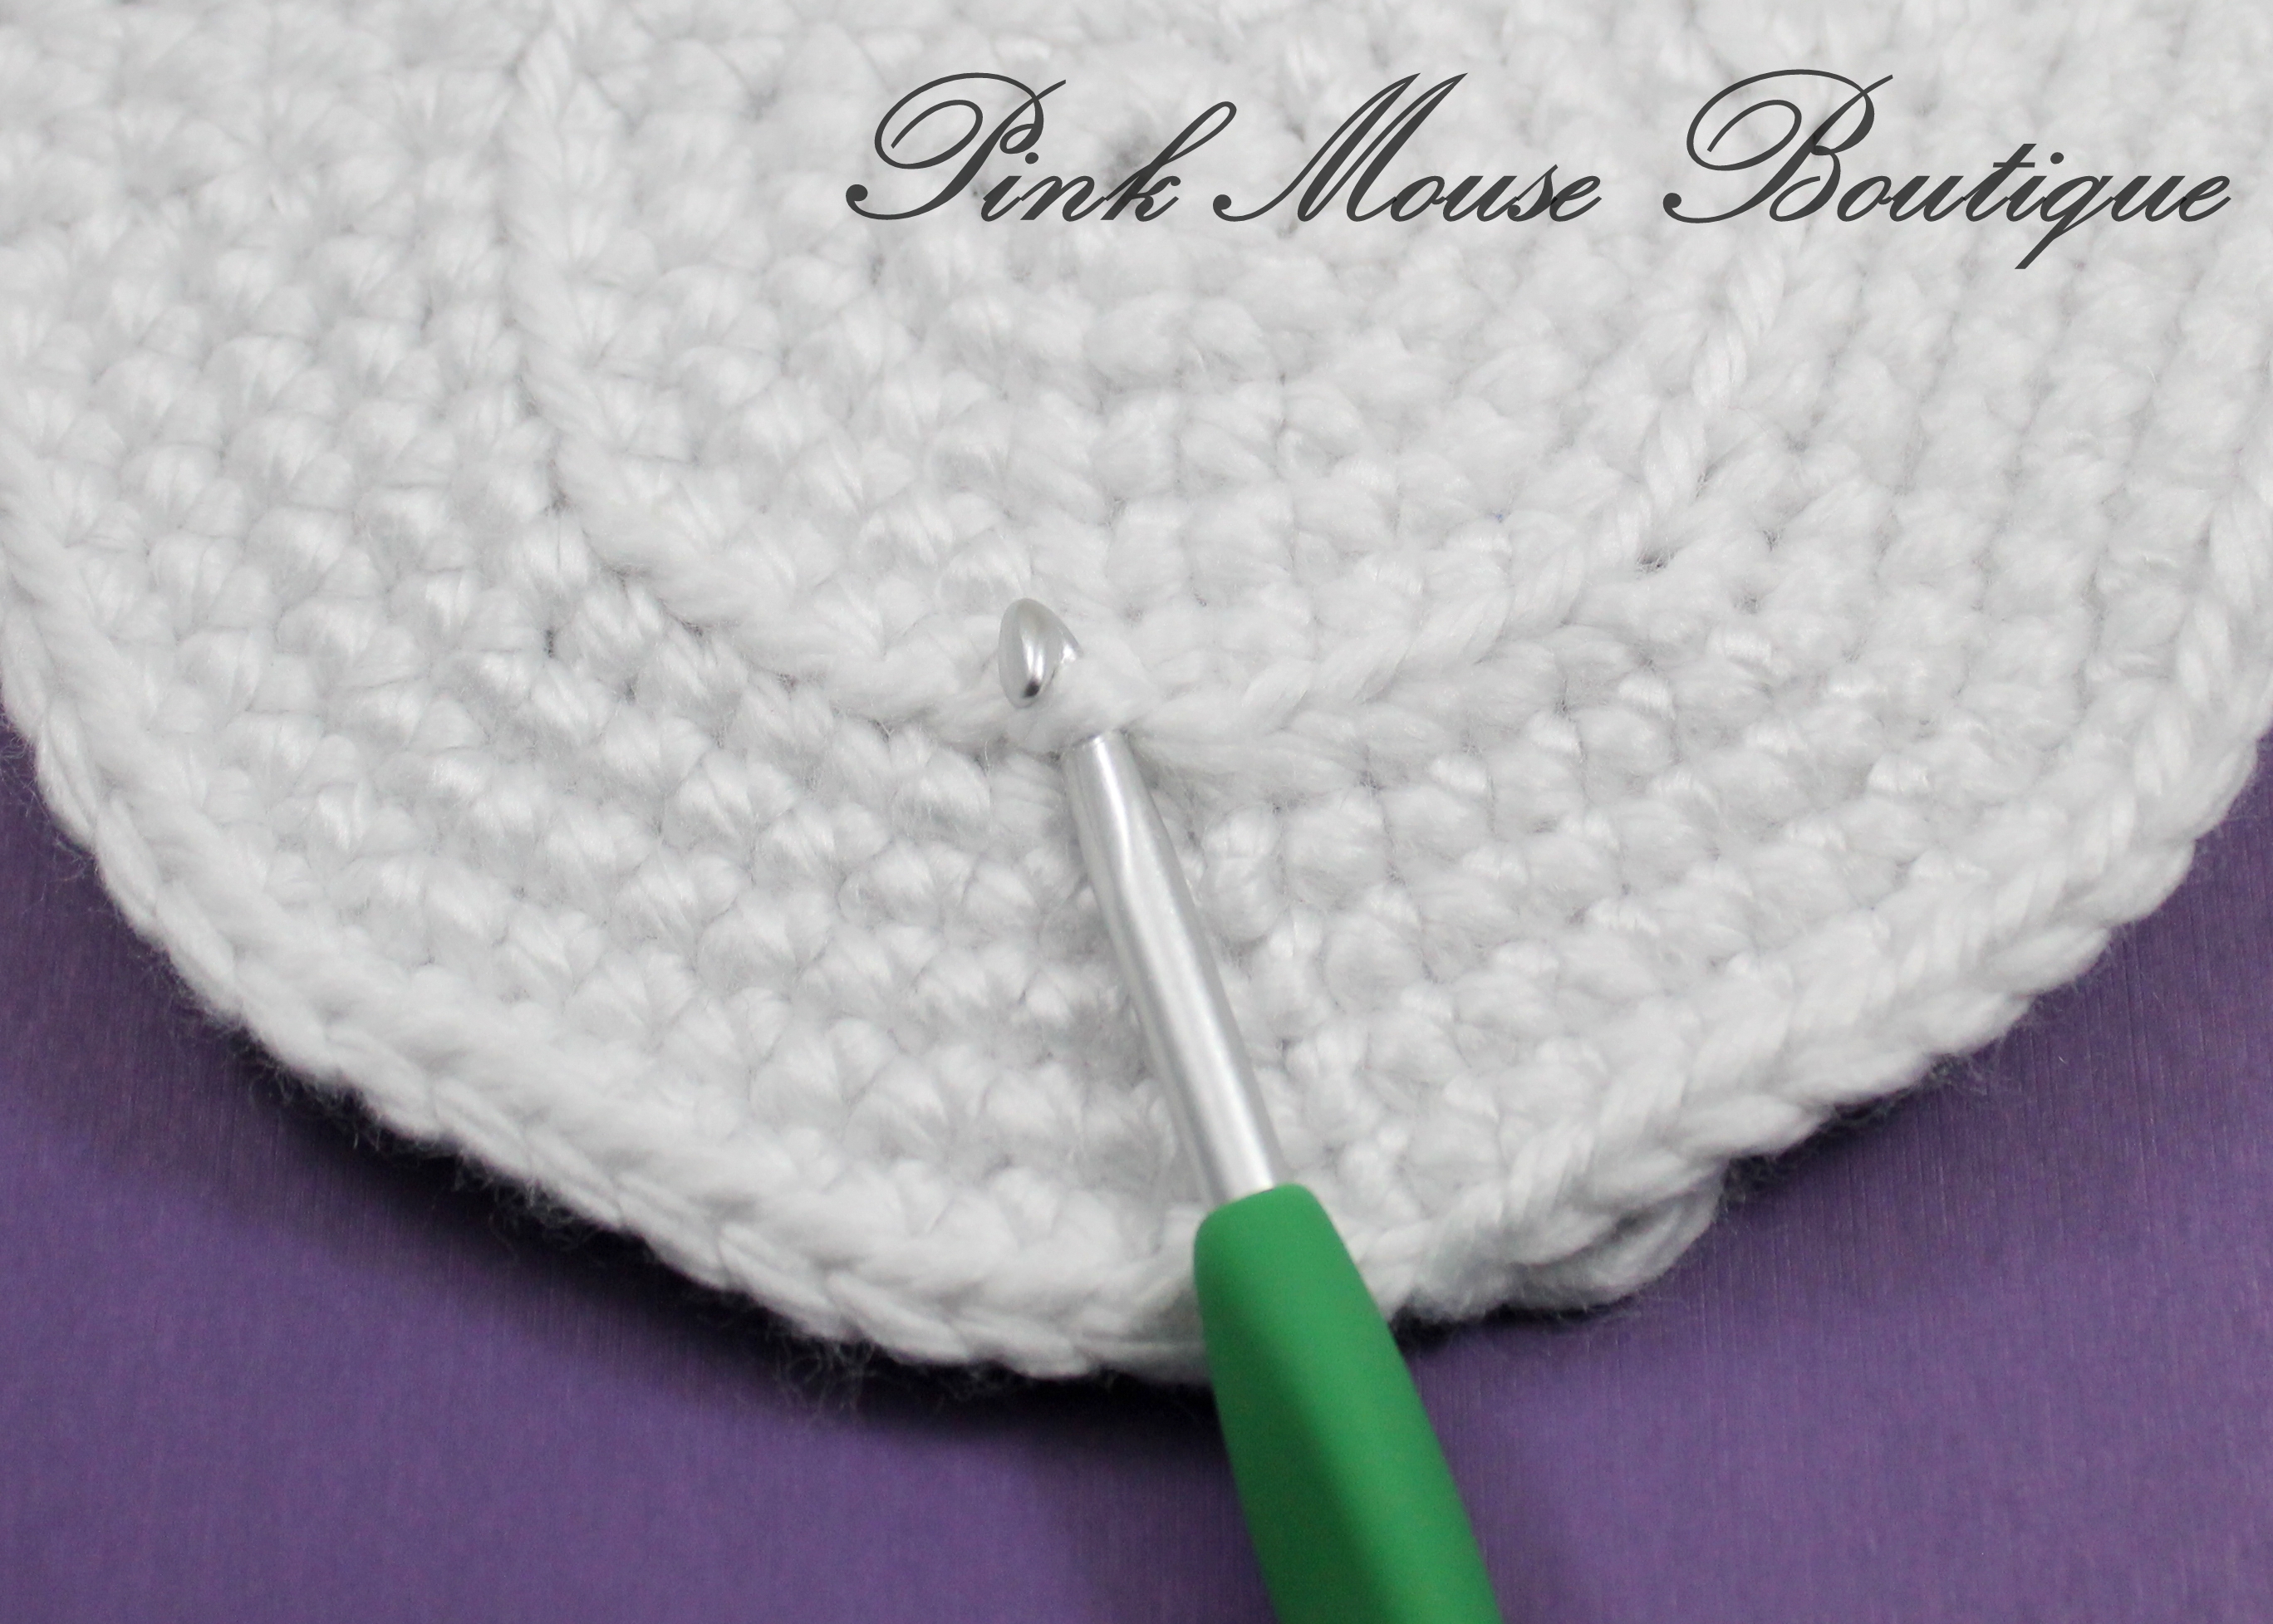
Crochet Round 6 in the BLO.

Round 6: (4 sc, inc) x 2; (4 hdc, hdc inc) x 4; (4 sc, inc) x 2 – 48 sts

Continue crocheting in both loops.

Round 7: (5 sc, inc) x 2; (5 hdc, hdc inc) x 4; (5 sc, inc) x 2 – 56 sts

Round 8: (6 sc, inc) x 2; (6 hdc, hdc inc) x 4; (6 sc, inc) x 2 – 64 sts

Round 9: (7 sc, inc) x 2; (7 hdc, hdc inc) x 4; (7 sc, inc) x 2 – 72 sts

Round 10: 72 sc

Fasten off and weave in the ends.

Optional: You can make a second base, put a cardboard piece between the two, and sew the two together. That way your base will be sturdier. I left mine without a bottom base for now.

Basket Pattern:

After finishing the base, we will create the inside of the igloo.

Continue with white yarn.

For Round 1, crochet in the FLO stitches of Round 5.

Join each round with a slip stitch and chain 1.

Rounds 1 – 3: 40 sc

Round 4: 40 sl st

Fasten off and weave in the ends.

Igloo Pattern:

Join each round with a slip stitch and chain 1.

Round 1: mr, ch 1, 8 sc in the ring – 8 sts

Round 2: 8 inc – 16 sts

Round 3: (sc, inc) x 8 – 24 sts

Round 4: (2 sc, inc) x 8 – 32 sts

Round 5: 32 sc

Round 6: (3 sc, inc) x 8 – 40 sts

Round 7: (9 sc, inc) x 4 – 44 sts

Note: If you want a tighter fit, do not make Round 7 increases but continue with 40 stitches in each round. I wanted a looser fit so my daughter can open and close the container easily.

Rounds 8 – 10: 44 sc

Note: We will now start crocheting in rows to create an opening for the igloo. We will continue the count from where we stopped with the rounds.

Row 11: 39 sc; ch 1 and turn

Row 12: 39 sc; ch 1 and turn

Row 13: 39 sc; turn

Row 14: 39 sl st

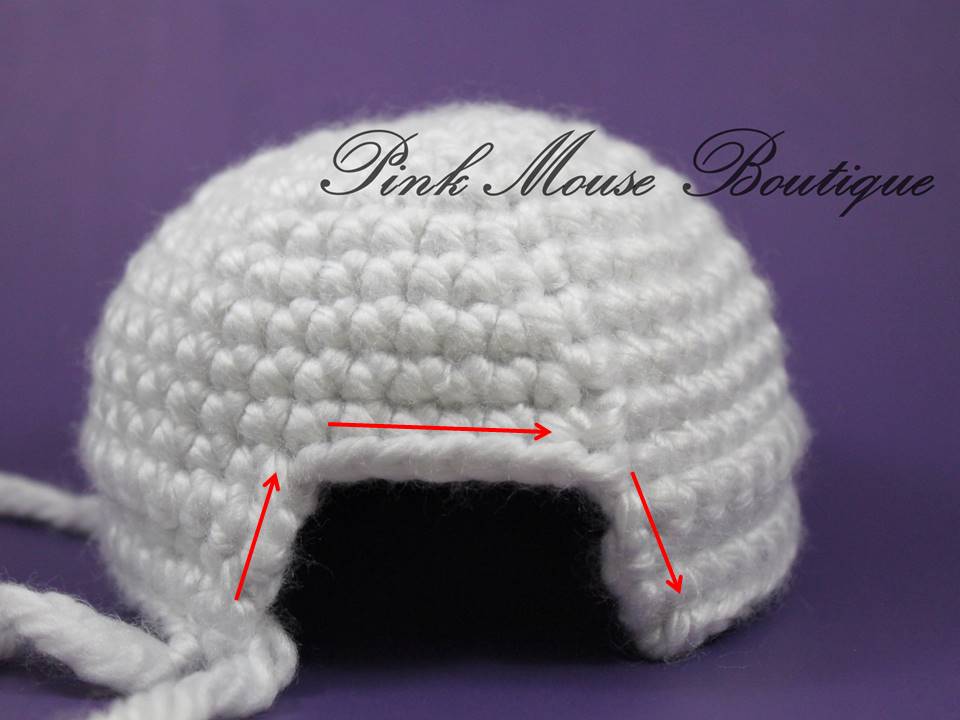
Igloo Opening:

Row 1: When you get to the opening, make 3 sc going up; then 6 sc (in the 5 sts you left empty and 1 extra from where you were joining rounds earlier); and make another 3 sc going down the opening. See pictures below.

Once you make the 3rd sc going down chain 1 and turn. You should have 12 sts for the opening of the igloo.

Row 2: 12 sc

Fasten off and weave in the ends.

Optional: To make the igloo more detailed, you can sew blue lines using the back stitch. I started on Round 4 of the igloo and went all around. Then I did the same for Rounds 8 and 12. I also used the back stitch to sew around the opening of the igloo. Then every few stitches I sewed down starting from the very top. You can make the “ice bricks” of the igloo as big or small as you wish.

Christmas Tree Pattern:

Start with green yarn and 4 mm crochet hook. Join each round with a slip stitch and chain 1.

Round 1: mr, ch 1, 6 sc in the ring – 6 sts

Round 2: (2 sc, inc) x 2 – 8 sts

Round 3: (3 sc, inc) x 2 – 10 sts

Round 4: in FLO (2 hdc in 1st st, sl st in next) x 5

Round 4: same round as above because we will crochet in the BLO of Round 3. (4 sc, inc) x 2 – 12 sts

Round 5: (5 sc, inc) x 2 – 14 sts

Round 6: in FLO (2 hdc in 1st st, sl st in next) x 7

Round 6: same round as above because we will crochet in the BLO of Round 5. (6 sc, inc) x 2 – 14 sts

Round 7: (7 sc, inc) x 2 – 16 sts

Round 8: in FLO (2 hdc, inc) x 8

Round 8: same round as above because we will crochet in the BLO of Round 7. (7 sc, inc) x 2 – 18 sts

Round 9: (4 sc, dec) x 3 – 15 sts

Round 10: (3 sc, dec) x 3 – 12 sts

Stuff the Christmas tree well. Change color to brown.

Rounds 11 – 12: 12 sc

Finish stuffing the tree and the tree trunk.

Round 13: 6 dec – 6 sts

Fasten off and weave in the ends.

You can use festive buttons and beads to decorate your tiny Christmas tree.

Amigurumi Polar Bear

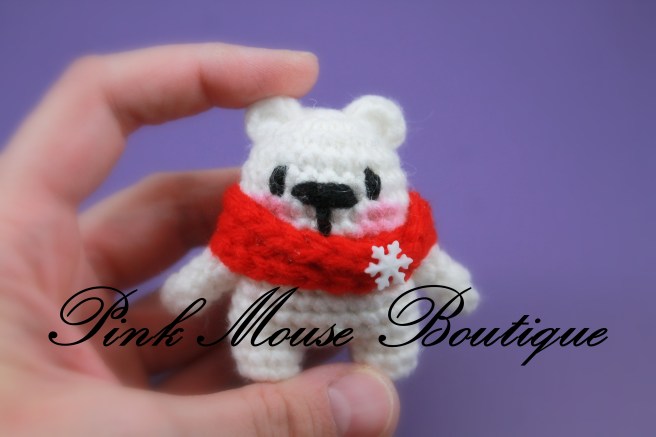
It’s almost Christmas and I wanted to create a tiny design that anyone can make. This little polar bear is super special. He is tiny and adorable and comes with his very own… Hmm… I think I will keep that a secret until next week. 

NOTE: This pattern is designed by Diana Moore from PINK MOUSE BOUTIQUE. This pattern is available for free only on my blog pinkmouseboutique.com. If you see the pattern and pictures posted on another website, please let me know. Thank you!

MATERIALS:

  1. Worsted weight yarn:
    1. white – for the bear 
    2. red – scarf
    3. black – eyes and nose
  2. Clover Amour crochet hook, 3.25 mm
  3. Sewing needle
  4. Stuffing
  5. Glue gun
  6. Snowflake button (optional)

ABBREVIATIONS:

mr – magic ring                                              dec – decrease

ch – chain                                                         inc – increase

sc – single crochet

hdc – half double crochet

NOTES:

  1. Crochet in continuous rounds unless otherwise specified.
  2. Use the invisible decrease technique when decreasing. 

PATTERN:

We will begin by making the head, body, and legs (in one piece).

Start with white yarn.

Round 1: mr, ch 1, 8 sc in the ring – 8 sts

Round 2: 8 inc – 16 sts

Round 3: (sc, inc) x 8 – 24 sts

Rounds 4 – 7: 24 sc

Round 8: (sc, dec) x 8 – 16 sts

Round 9: (sc inc) x 8 – 24 sts

Rounds 10 – 13: 24 sts

Stuff the head and body well.

The legs will be made with 9 sts on each side of the body. The 6 sts (3 in the front and 3 in the back will be sewn later).

Leg 1:

Continue from where you stopped with the body.

Round 1: 8 sc, sk 15 sts, 1 sc – 9 sts

Rounds 2 – 3: 9 sc

Leave a long tail and fasten off.

Leg 2:

Leave 6 sts in the middle for sewing (3 in the back and 3 in the front of the body). Join yarn to one of the 9 sts you left for the 2nd leg. Continue following the instructions for the first leg. 

Once you finish both legs, stuff them well, finish them off and secure the stitches.

Face:

Sew the eyes on Round 5, 5 stitches apart.

Sew the nose in the middle 3 stitches between the eyes. Then sew one long line starting from the middle of the nose and going down 2 rounds.

Arms (x 2):

Round 1: mr, ch 1, 5 sc in the ring – 5 sts

Rounds 2 – 5: 5 sc around

Leave a long tail for sewing and fasten off.

Ears (x 2):

mr, ch 1, 5 hdc in the ring

Leave a long tail for sewing and fasten off.

Tail:

Round 1: mr, ch 1, 6 sc in the ring – 6 sts

Round 2: 6 sc

Leave a long tail for sewing and fasten off.

Scarf:

Use red yarn or any color of your choice.

Ch 66

Fasten off.

Assembly:

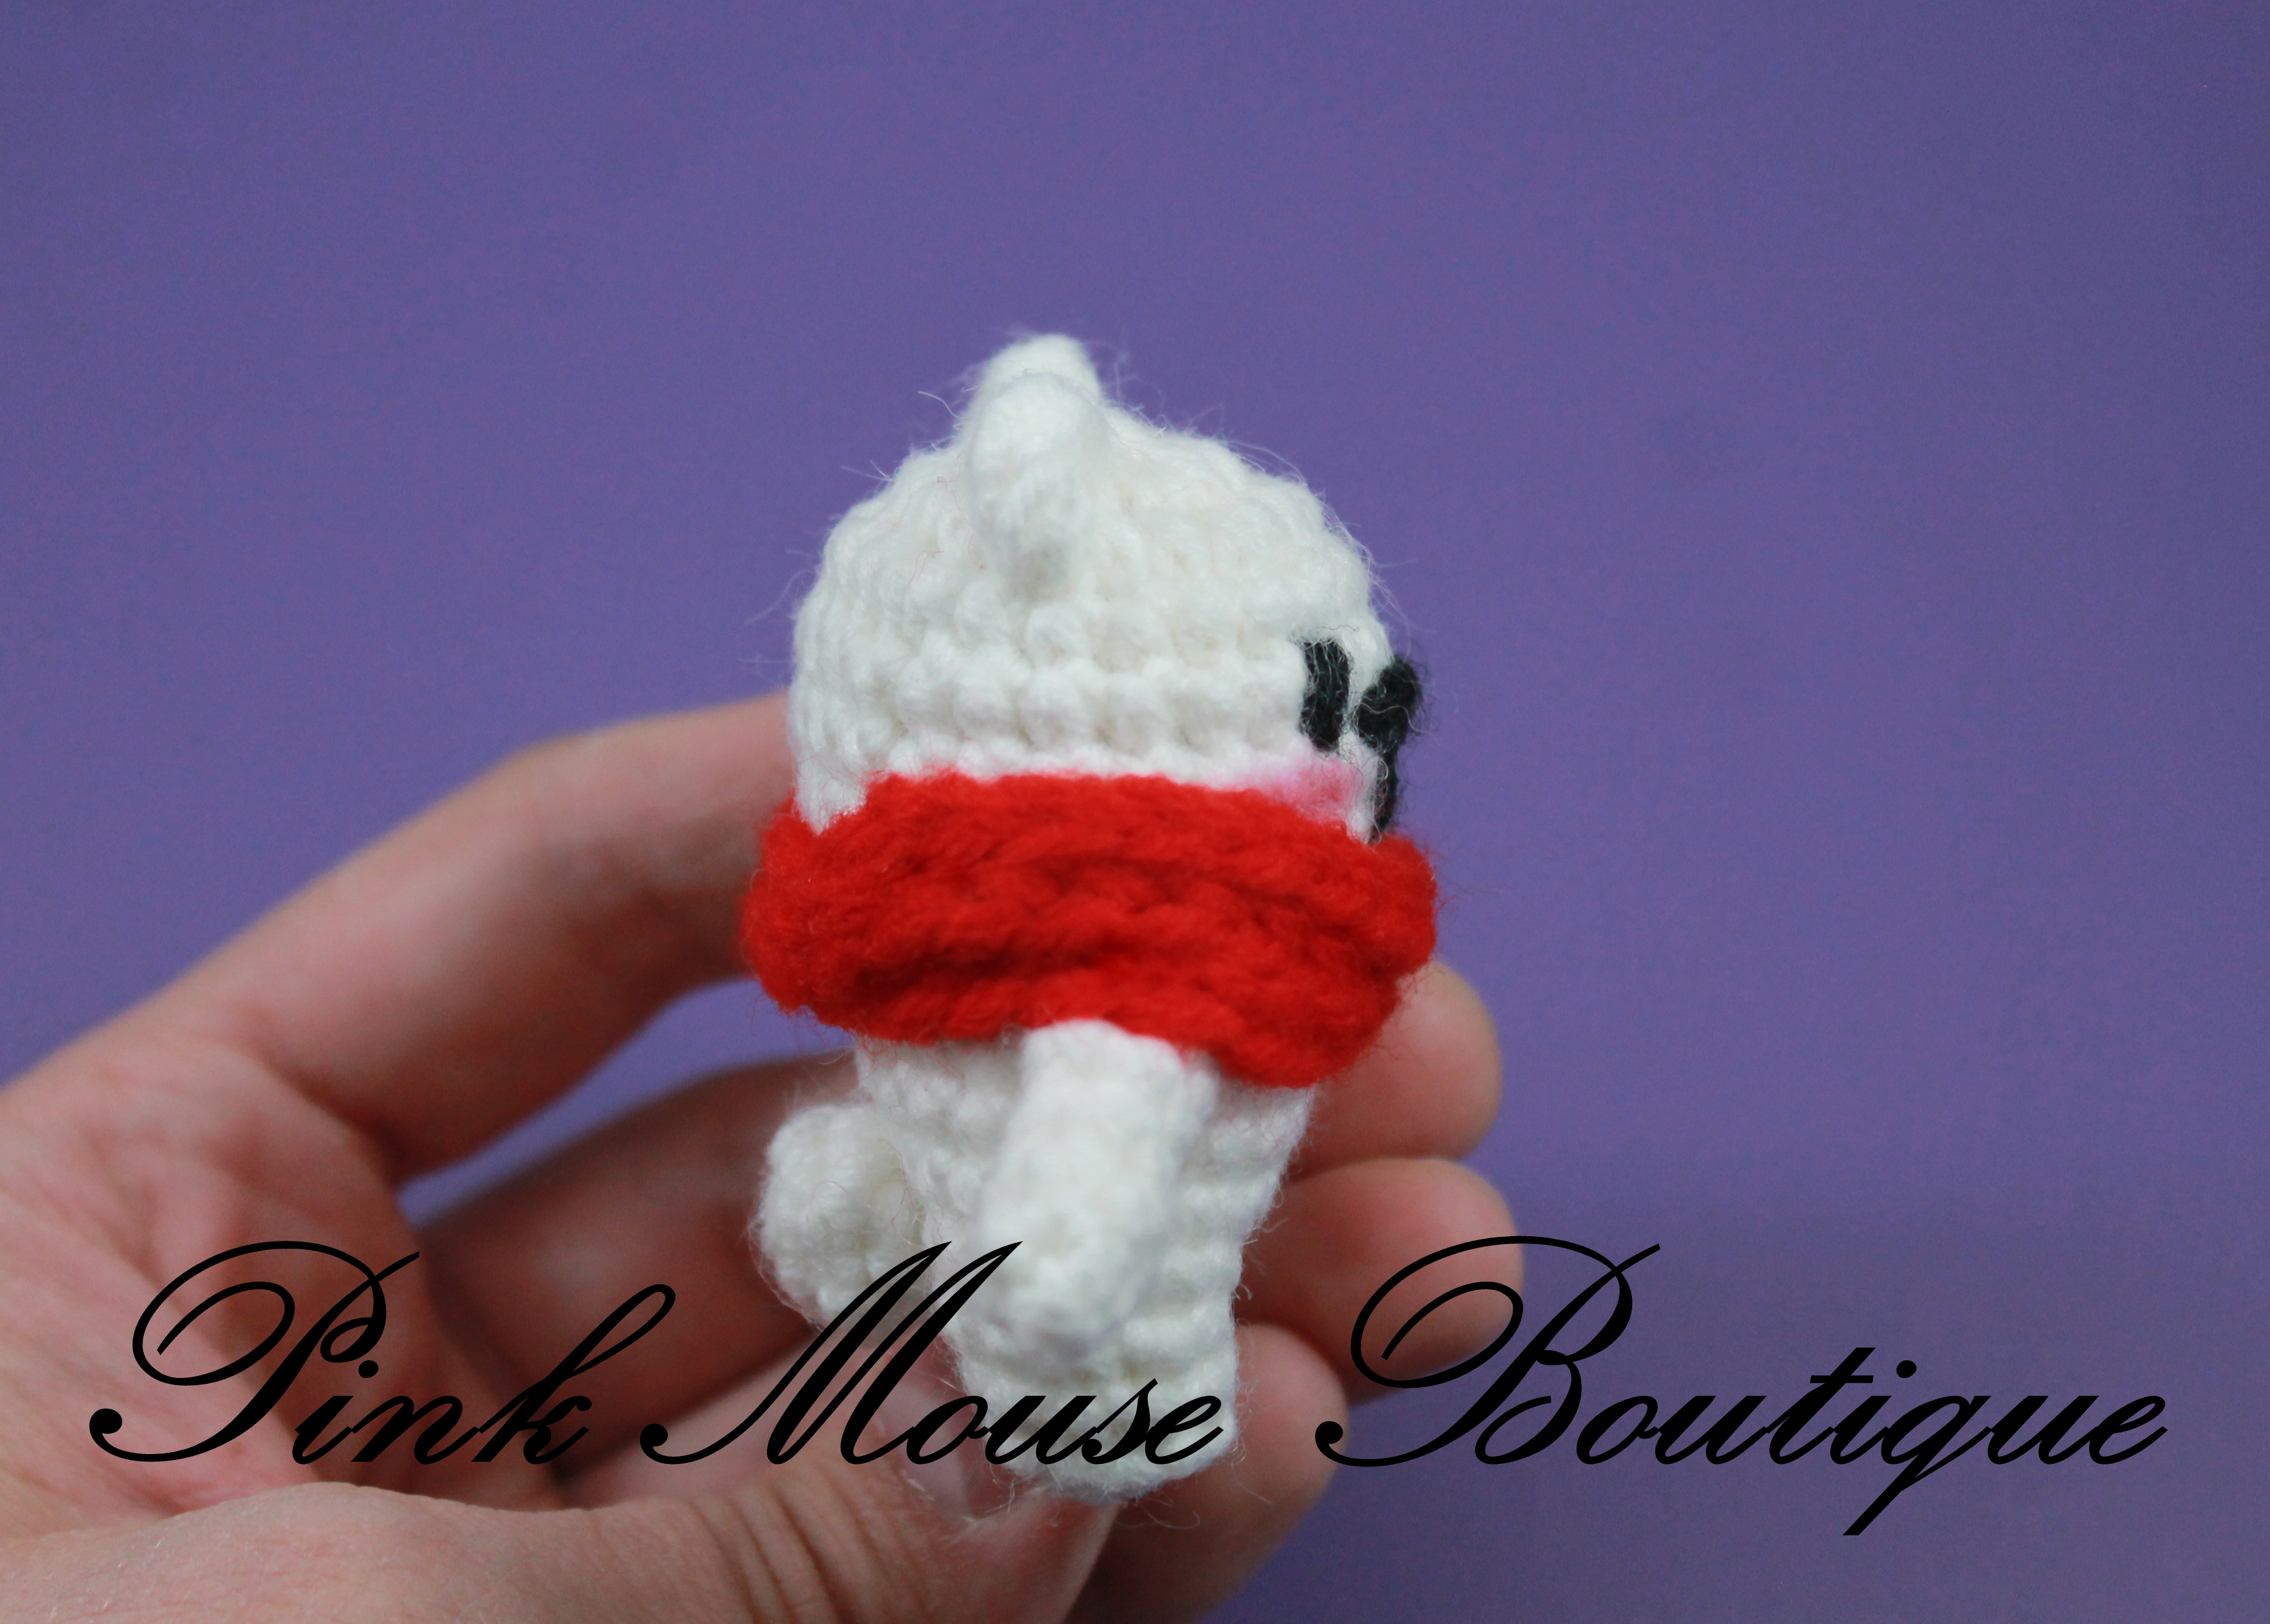
Sew the arms on Round 8 (or 9) of the body. Sew the tail in the back a round above the legs. Sew the ears on top of the head (a round below the magic ring). Using a cotton swab and blush, make pink cheeks. NOTE: Cover the body with a piece of fabric so the blush doesn’t stain it.

Fold the scarf in half and find the middle. With the glue gun, glue the middle of the scarf to the front of the bear (Round 9).

You will wrap it around a few times while gluing in a few places to make sure the scarf will stay in place. Note: Add only a little bit of glue at a time so it doesn’t look messy. Tuck both ends under the scarf and glue to secure.

Optional: Sew a small snowflake to the scarf (a little to one side).

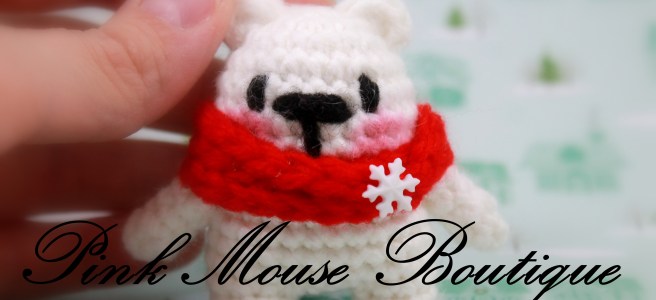
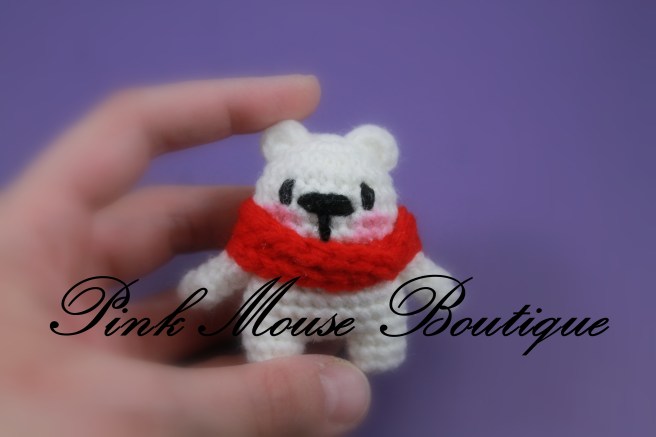
And voila! You have made an adorable little polar bear! Now you can also add a ribbon to its head and make it an ornament. 🙂

Stay tuned! In a few days, this little guy will show you something special!

HAPPY CROCHET!

Amigurumi Mouse

IMG_6341

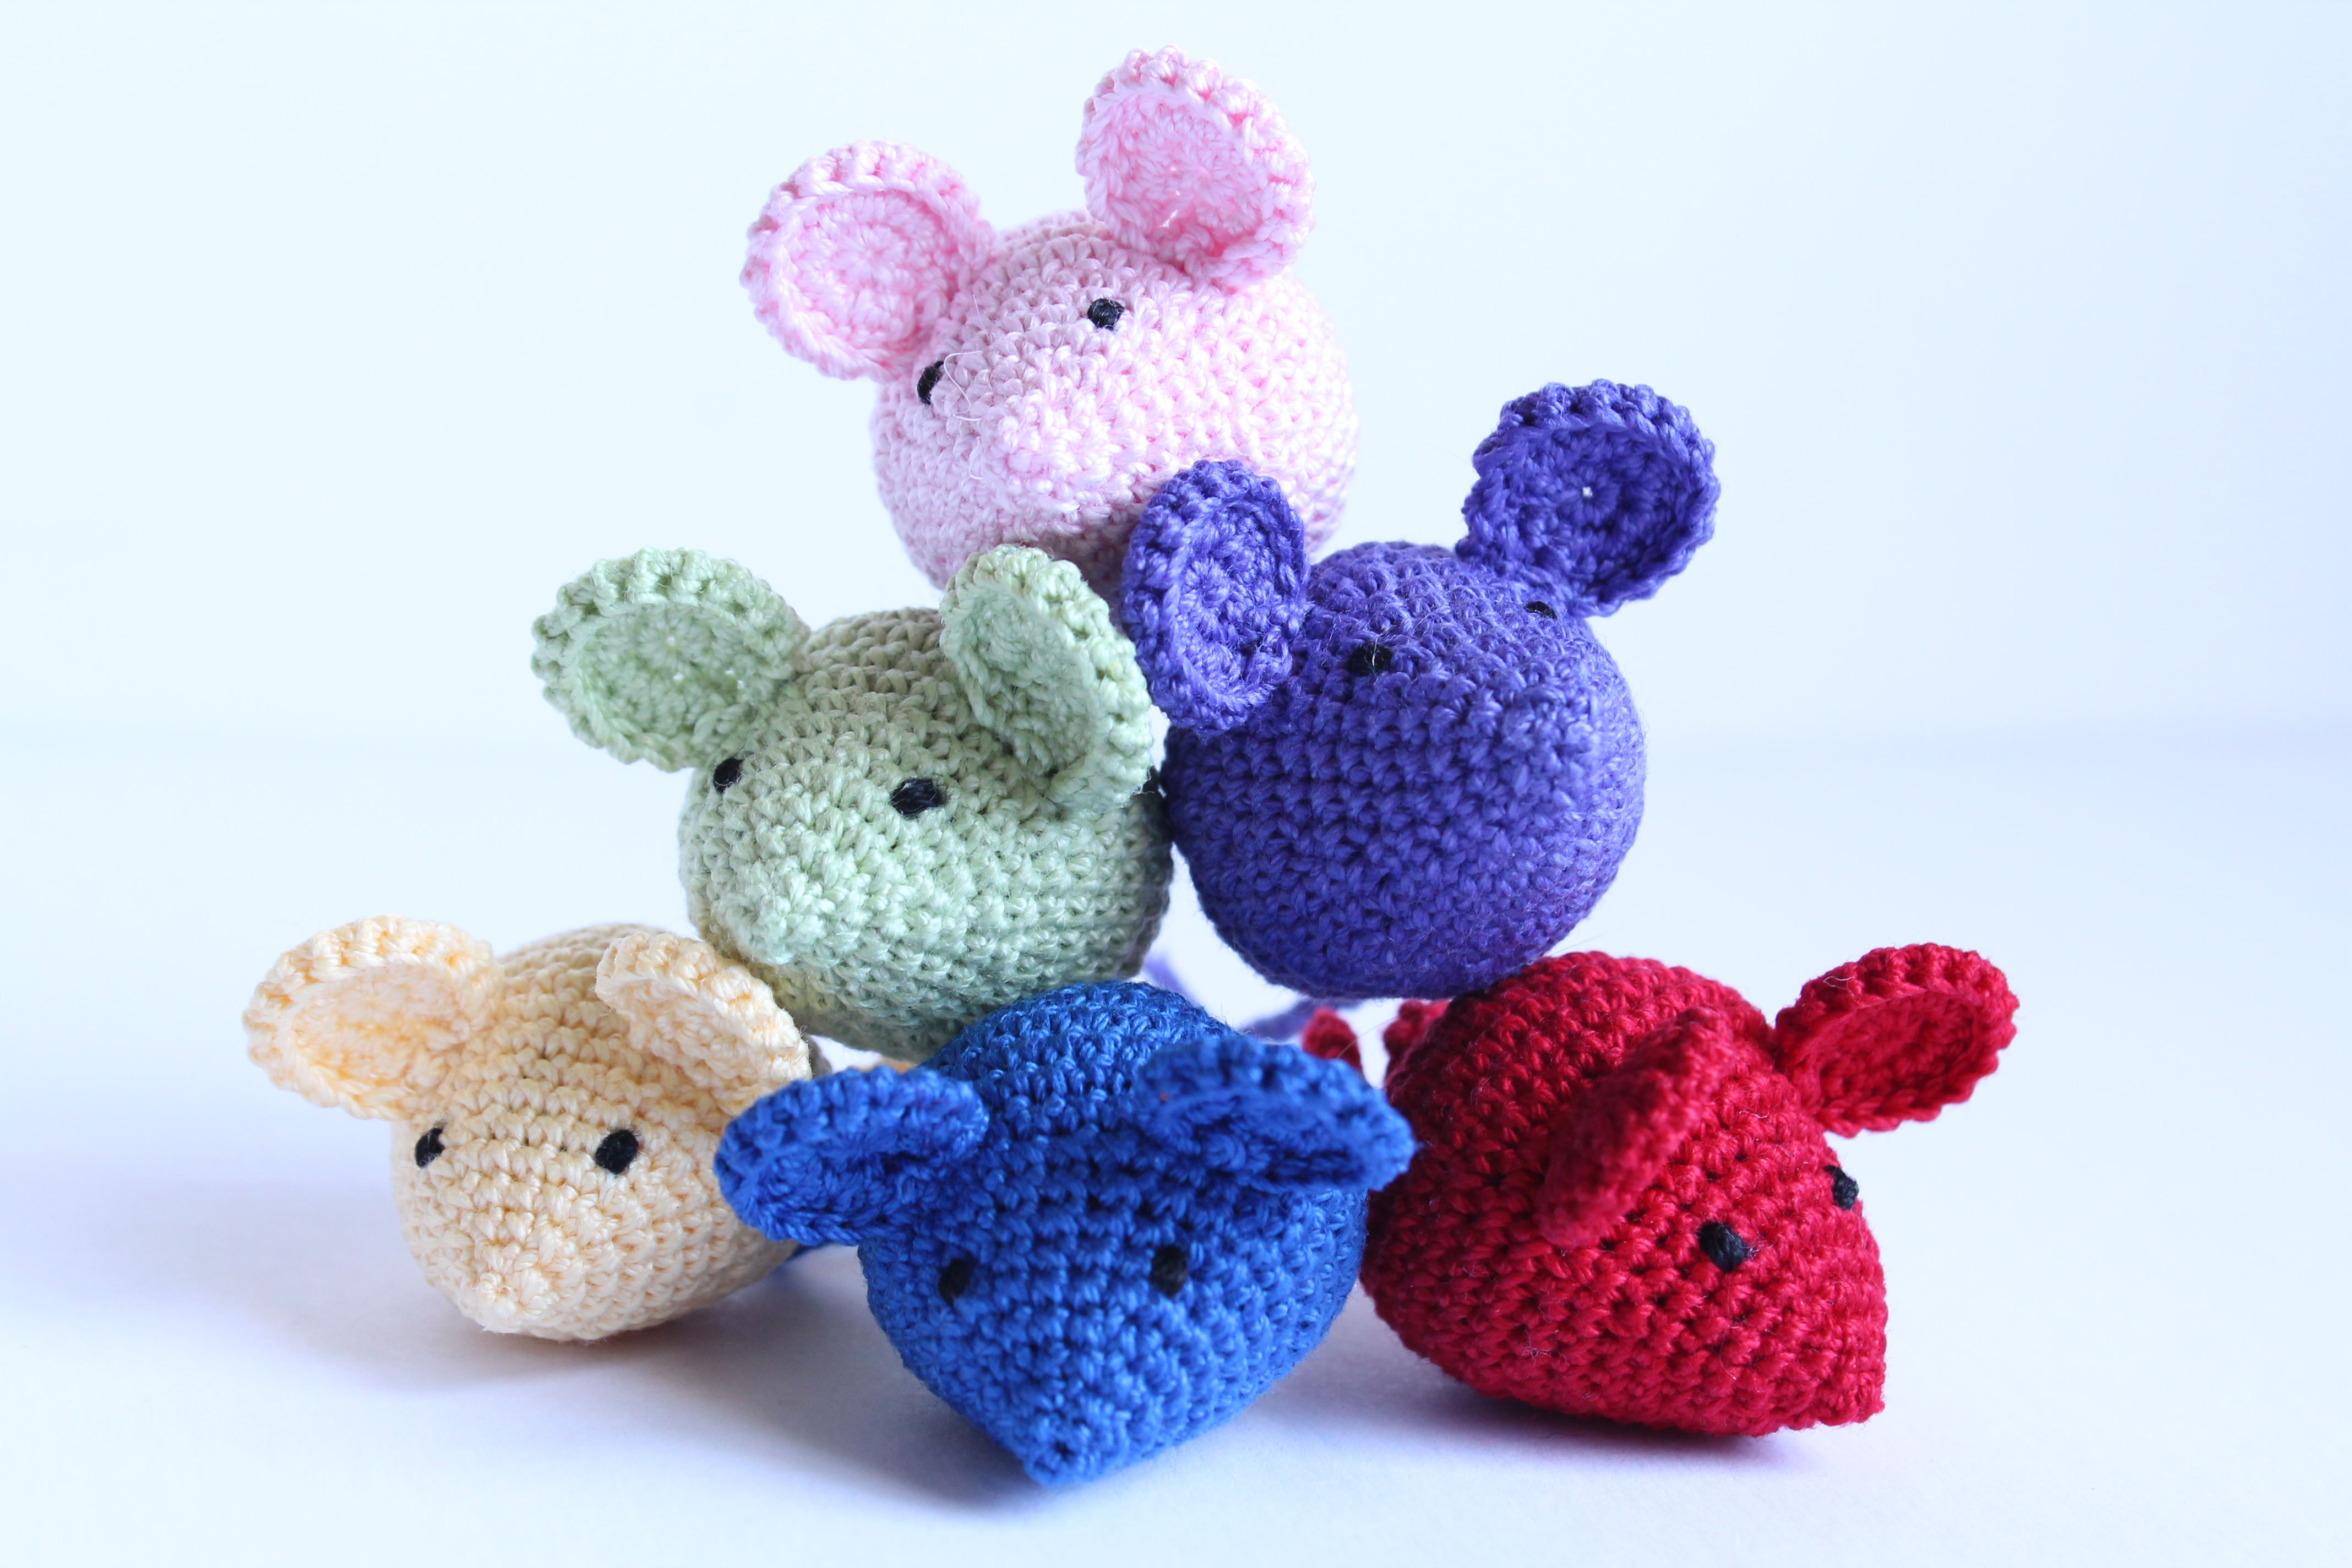
Since my blog is called Pink Mouse Boutique, I had to create a mouse pattern. And this one is super adorable and very easy and quick to make. You can use any color thread or yarn. These mice are perfect to teach the children in your life about numbers, colors, sorting, counting, etc. The fun is endless! And I am so addicted to them!

  1. Aunt Lydia’s size 10 thread (color of your choice) + black for the eyes
  2. Clover Amour, 1.5 mm crochet hook
  3. Scissors
  4. Sewing needle
  5. Polyester stuffing

Abbreviations:

mr – magic ring

sl st – slip stitch

st(s) – stitch(es)

ch – chain

sc – single crochet

hdc – half double crochet

dec – decrease

inc – increase

Notes:

  1. Leave long beginning and end tails. We will need them later to braid the tail of the mouse.
  2. Do not join rounds.
  3. VIDEO TUTORIAL: https://www.youtube.com/watch?v=kp5GkKPhwCk&t=1213s

Pattern:

BODY

Leave a long beginning tail.

Round 1: 8 sc in a mr – 8 sts

Round 2: 8 inc – 16 sts

Round 3: (sc, inc) x 8 – 24 sts

Round 4: (2 sc, inc) x 8 – 32 sts

Round 5: (3 sc, inc) x 8 – 40 sts

Rounds 6 – 10: sc around – 40 sts (5 rounds)

Round 11: (3 sc, dec) x 8 – 32 sts

Round 12: sc around – 32 sts

Round 13: (2 sc, dec) x 8 – 24 sts

Rounds 14 – 15: sc around – 24 sts (2 rounds)

Round 16: (4 sc, dec) x 4 – 20 sts

Sew the eyes on round 15, 5 sts apart from each other.

Round 17: sc around – 20 sts

Stuff the body well.

Round 18: (3 sc, dec) x 4 – 16 sts

Round 19: (2 sc, dec) x 4 – 12 sts

Stuff more if needed before finishing Round 20.

Round 20: 6 dec – 6 sts

Leave a long tail and fasten off. Finish off and bring the tail all the way through the body of the mouse and through the magic ring.

Ears (x 2):

Leave long a long beginning tail.

Round 1: 8 sc in a mr; sl st to join and ch 2 – 8 sts

Round 2: 8 hdc inc; sl st to join and ch 1 – 16 sts

Round 3: sc around; sl st to join – 16 sts

Pull the mr tight and sew in place (about 3 rounds above the eyes). Bring the tails through the mr of the body.

Tail:

You should have 6 pieces of long thread coming out of the magic ring. Braid those until you reach a desired length for the tail. Make a knot and cut the excess thread.

IMG_6426

And voila! You made a cute little mouse!

IMG_6422

I hope you enjoyed this pattern. Let me know what you think in the comments.

Happy Crochet!